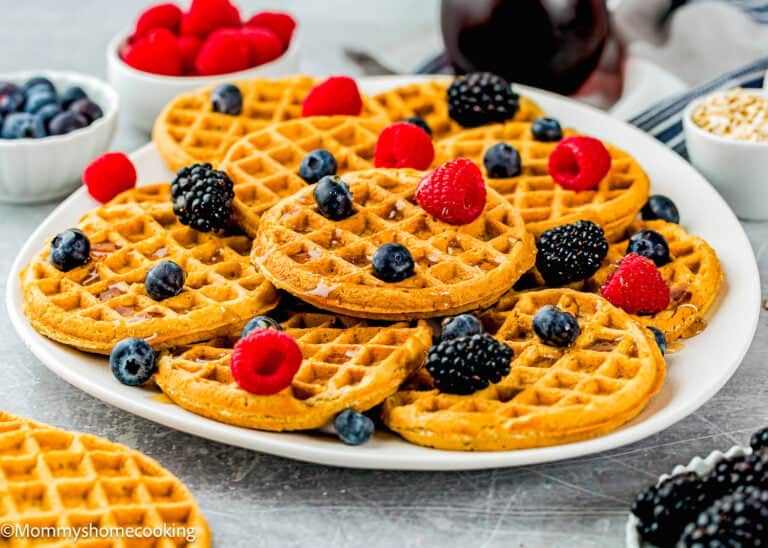

These eggless pumpkin sheet pan pancakes give the whole family cozy, lightly spiced pumpkin pancakes — baked in one pan, no flipping, and no eggs. Pour, spread, bake, and cut into squares: it’s the easiest way to get everyone a warm fall breakfast at once, with no one at the table left out.
Prefer griddle pancakes? Try my classic Eggless Pumpkin Pancakes instead — same cozy flavor, made the traditional way.

Oriana’s Thoughts On The Recipe
Pumpkin and cinnamon baking into one pan is one of my favorite smells of fall, and that’s really what sold me on this recipe — it’s every bit as pumpkin-forward as a stack of griddled pumpkin pancakes, just baked into soft, tender squares instead. And because it’s completely egg-free, my daughter with an egg allergy gets the same cozy pumpkin breakfast as everyone else at the table.
After more than a dozen years of egg-free baking, real pumpkin flavor — not just a hint of spice — is what I chase in every fall recipe, and this one delivers it: pure pumpkin puree and a full teaspoon of pumpkin pie spice, no shortcuts. It’s become one of our go-to fall mornings — the kids help cut the squares, the kitchen smells incredible, and nobody’s plate looks any different from anyone else’s.
Why You’ll Want to Try My Recipe
- Egg-free by design: No eggs, no egg replacer to hunt down — safe for allergy families and never a workaround.
- Simple pantry ingredients: Nothing fancy or hard to find — just everyday staples and a can of pumpkin.
- One pan, zero babysitting: Pour it, bake it, cut it into squares — no standing at the stove flipping batch after batch while everyone else eats first.
- Cozy fall flavor kids love: Real pumpkin and warm spice, lightly sweet — the kind of breakfast that gets everyone to the table.
- Make-ahead and freezer-friendly: Bake, cut, and freeze the squares for fast weekday breakfasts all season.
- Dairy-free as written: Made with non-dairy milk and butter, so even more families can share the same pan (regular dairy works too).

Why This Recipe Works
The lift and tenderness here come from the same egg-free technique I use in my classic sheet pan pancakes — buttermilk and a generous dose of baking soda and powder do the job eggs normally would. What’s different in this version is the pumpkin: the puree adds real moisture and that unmistakable fall flavor, on top of keeping the crumb soft as it bakes into one even layer.
Ingredients You’ll Need, Substitutions & Notes

Scroll down to the recipe card for all the details, including measurements and instructions
- Pure pumpkin puree: Use plain canned pumpkin, not pumpkin pie filling (which is pre-sweetened and spiced). It adds moisture and that cozy fall flavor.
- Dairy-free milk + apple cider vinegar: Stirred together, these make a quick buttermilk. That little bit of acid is important here — it’s part of how the pancakes rise without eggs.
- Baking powder AND baking soda: You need both. With no eggs helping them lift, the generous leavening is what keeps these light instead of dense and flat.
- Pumpkin pie spice: One teaspoon gives them their signature warmth. No blend on hand? See the Notes in the recipe card for an easy homemade version.
- Dairy-free unsalted butter, melted: Adds richness and tenderness. Melt it first so it blends smoothly into the batter.
- Packed light brown sugar: Just enough for a gentle sweetness, plus a little moisture that keeps the crumb soft.
Food Allergy Notes & Swaps
This recipe does not contain eggs, tree nuts, peanuts, soy, sesame, fish, or shellfish as ingredients. Manufacturing lines change — read every label every single time, even brands you have used before. That habit has never steered me wrong.
Need Dairy-Free or Gluten-Free?
If you are navigating additional dietary needs alongside the egg-free requirement, I have detailed guides for both: How I Replace Dairy in My Egg-Free Recipes – Baking Without Eggs and Gluten
Ingredient Swap Suggestions
- Dairy-Free: To make this recipe dairy-free, you can easily swap out the dairy ingredients for non-dairy alternatives.
- Butter: Substitute butter with dairy-free butter substitutes. Miyoko’s Creamery Organic Vegan Butter, Trader Joe’s brand vegan butter, and Earth Balance Vegan Buttery Sticks are my favorite butter substitutes for baking. For the best flavor, use a vegan butter that tastes good. Use sticks or blocks, not tub (spreadable) butter.
- Milk: You can use your favorite non-dairy milk, like soy or oat milk.
- Gluten-Free: Use a gluten-free, all-purpose flour blend. Look for a gluten-free flour blend specifically formulated for baking, as it will have the right combination of flours and starches to mimic the texture of wheat flour. My favorite is Better Batter Original Blend. I also like Doves Farm Freee Gluten-Free All-Purpose Flour, but this blend does not contain xanthan gum, so you need to add 1/4 teaspoon of xanthan gum per cup (140 g) of gluten-free flour blend.
Process Overview: Step-by-Step Photos
Please check the recipe card at the bottom of the post for exact quantities and detailed instructions (scroll down).
- Whisk the dry ingredients
- Mix the wet ingredients
- Combine and rest the batter
- Spread and top
- Bake
- Cut and serve

What I Learned Testing This Recipe
This recipe is a dream — easy and so flavorful, honestly one of the easiest fall breakfasts I’ve developed. The biggest thing I learned:
Grease your pan well before you pour the batter in. It’s a soft, slightly sticky batter once baked, and a good spray saves you from losing squares to the pan.
The other two things that matter most are ones I mention a lot around here for a reason — don’t overmix the batter, and let it rest 5 to 10 minutes before it goes in the oven so the flour has time to hydrate. Skip that rest, and you’ll notice it in the texture.
Tips & Troubleshooting
A few things that make these come out great every time:
- Grease the pan well. This batter is soft and a little sticky once baked — a light spray (or a spray plus a quick pass of butter) keeps every square releasing cleanly instead of sticking to the pan.
- Don’t overmix. Stir just until the flour disappears. Overmixed batter turns tight and a little tough instead of soft and tender.
- Don’t skip the rest. Those 5 to 10 minutes let the flour hydrate and the leavening wake up — it’s the difference between light, fluffy squares and flat, gummy ones.
- Spread it evenly, corner to corner. Thin spots bake faster and dry out while thick spots stay underdone. An even layer is the key to a pan that bakes uniformly.
- Set your expectations honestly. Baked sheet pan pancakes are a touch more tender and cake-like than griddled ones — that’s the tradeoff for feeding everyone at once, and it’s exactly how they’re meant to be.
And if something goes sideways:
- The center is gummy or underdone. Usually the layer was uneven, or it needed another minute or two. Pro Tip: Spread the batter evenly and check with a toothpick in the center — it should come out clean before you pull the pan.
- The edges came out dry. The layer baked a touch too long. Pro Tip: Start checking a couple of minutes before the timer goes off so the edges don’t overbake.
- They stuck to the pan. The pan wasn’t greased well enough — this batter needs it. Pro Tip: Give the pan a generous spray (or spray plus a swipe of butter) before you pour, all the way into the corners.
- They didn’t rise much. With no eggs, the leavening does all the lifting. Pro Tip: Make sure your baking powder and soda are fresh, don’t skip the buttermilk step, and get the pan into a fully preheated oven right away.

Try Them Topped with Candied Pepitas
For a little crunch on top, I made a quick batch of candied pumpkin seeds (pepitas) for these photos, and it’s worth the five extra minutes. Microwave 2 tablespoons maple syrup, 2 tablespoons brown sugar, and ¼ teaspoon salt together for 30 to 45 seconds, just until the sugar dissolves and it turns a little foamy. Stir in 1 cup pepitas and toss until every seed is coated, then spread them on a lined baking sheet and bake at 375°F for 10 minutes. Let them cool completely before scattering over the pancakes — they crisp up as they cool.


Frequently Asked Questions

More Cozy Egg-Free Fall Breakfasts to Try!


Recipe Card

Easy Eggless Pumpkin Sheet Pan Pancakes


Video
Important
• For best results, I highly recommend using a kitchen scale to measure the ingredients.
Ingredients
- 1 cup (140 g) all-purpose flour
- 3 teaspoons (12 g) baking powder
- ½ teaspoon (3 g) baking soda
- ¼ teaspoon (1 g) salt
- 1 teaspoon pumpkin pie spice
- ¼ cup (50 g) packed light brown sugar
- ¾ cup (180 ml) milk (dairy or non-dairy will work)
- 1 tablespoon (15 ml) apple cider vinegar
- ½ cup (120 g) pure pumpkin puree
- 2 tablespoons (30 g) unsalted butter, melted (dairy or non-dairy will work)
- 1 teaspoon (5 ml) pure vanilla extract
- Optional add-ons (sprinkle over the batter before baking): chocolate chips, chopped pecans, dried cranberries, or a dusting of cinnamon sugar
Instructions
- Prep your pan and oven. Preheat your oven to 425°F (218°C) and lightly grease a 13×18-inch rimmed baking sheet. Notes: You could also use a 10×15 pan, which gives thicker, fluffier squares; a 13×18 spreads the batter thinner for lighter, crispier edges — use whichever you like.
- Whisk the dry ingredients. In a medium bowl, whisk together the flour, baking powder, baking soda, salt, pumpkin pie spice, and brown sugar until evenly combined, with no streaks of spice or sugar left.

- Make the buttermilk and mix the wet ingredients. In a measuring cup, stir the milk, apple cider vinegar, pumpkin puree, melted butter, and vanilla until smooth.
- Combine and rest the batter. Pour the wet into the dry and stir just until you no longer see dry flour — the batter will be thick but spreadable, a little like a soft cake batter. Let it rest for 5 to 10 minutes so the flour hydrates and the leavening gets a head start, which helps the pancakes bake up light instead of dense.
- Spread and top. Scrape the batter onto your prepared pan and spread it into an even layer all the way to the corners (an offset spatula makes this easy). If you're using any add-ons, scatter them over the top now.
- Bake. Bake for 10 to 12 minutes, until the top is golden, springs back lightly when you press it, and a toothpick inserted in the center comes out clean. If you added chocolate chips, aim for a chip-free spot to test — a melted chip can leave a streak that looks like raw batter.Note: Every oven runs a little differently, so start checking at 10 minutes so the edges don't overbake.
- Cut and serve. Let it cool for a couple of minutes so it firms up and holds together, then cut into squares. Serve warm with butter and pure maple syrup.


Candied pepitas topping (optional, pictured):
- Microwave 2 tablespoons maple syrup, 2 tablespoons brown sugar, and ¼ teaspoon salt for 30 to 45 seconds, until dissolved and foamy. Stir in 1 cup pepitas, toss to coat, spread on a lined baking sheet, and bake at 375°F for 10 minutes. Cool completely before topping the pancakes — they crisp as they cool.
- Gluten-Free: Use a gluten-free, all-purpose flour blend. Look for a gluten-free flour blend specifically formulated for baking, as it will have the right combination of flours and starches to mimic the texture of wheat flour. My favorite is Better Batter Original Blend. I also like Doves Farm Freee Gluten-Free All-Purpose Flour, but this blend does not contain xanthan gum, so you need to add 1/4 teaspoon of xanthan gum per cup (140 g) of gluten-free flour blend.
- Dairy Brands I Trust: For the non-dairy milk and butter in the ingredient list, my favorite dairy-free butter substitutes for baking are Miyoko’s Creamery Organic Vegan Butter, Trader Joe’s brand vegan butter, and Earth Balance Vegan Buttery Sticks — use sticks or blocks, not tub (spreadable) butter, for the best flavor and bake. For milk, soy or oat milk work great.
- Nut-Free: This recipe has no nuts, but skip any nut add-ons and check chocolate chips for shared-equipment warnings.
- Don’t skip the rest — those 5 to 10 minutes let the batter thicken, and the leavening wake up, and that’s the difference between light, fluffy squares and flat, gummy ones.
- Spread the batter evenly, corner to corner, because thin spots dry out while thick spots stay underdone.
- And trust a toothpick in the center over the clock — sheet pans can bake unevenly, so pull the pan when the center comes out clean, not just when the timer goes off.
Nutrition
Nutrition information provided is an estimate and will vary based on cooking methods and brands of ingredients used.
Variations & Additions To Try
- Add-ins before baking: Scatter chocolate chips, chopped pecans, or dried cranberries over the batter before it goes in the oven.
- Cinnamon-sugar top: Sprinkle a little cinnamon sugar over the top for a lightly crisp, sweet finish.
- Spice it your way: Swap the pumpkin pie spice for plain cinnamon if you prefer a milder flavor, or bump it up for a bolder fall taste.
- Make it a treat: Finish cooled squares with a simple powdered-sugar glaze to turn breakfast into a cozy dessert.
Serving Suggestions
Cut into squares and serve warm with butter and pure maple syrup. They’re perfect for a busy weekday breakfast, a relaxed weekend brunch, or a holiday morning when you’re feeding a crowd (Thanksgiving morning is a great one). Because they’re egg-free, they’re an easy dish to bring when you’re not sure who at the table has an allergy — set the whole pan out and let everyone dig in. A dollop of yogurt or whipped topping and some fresh fruit round it out nicely.