
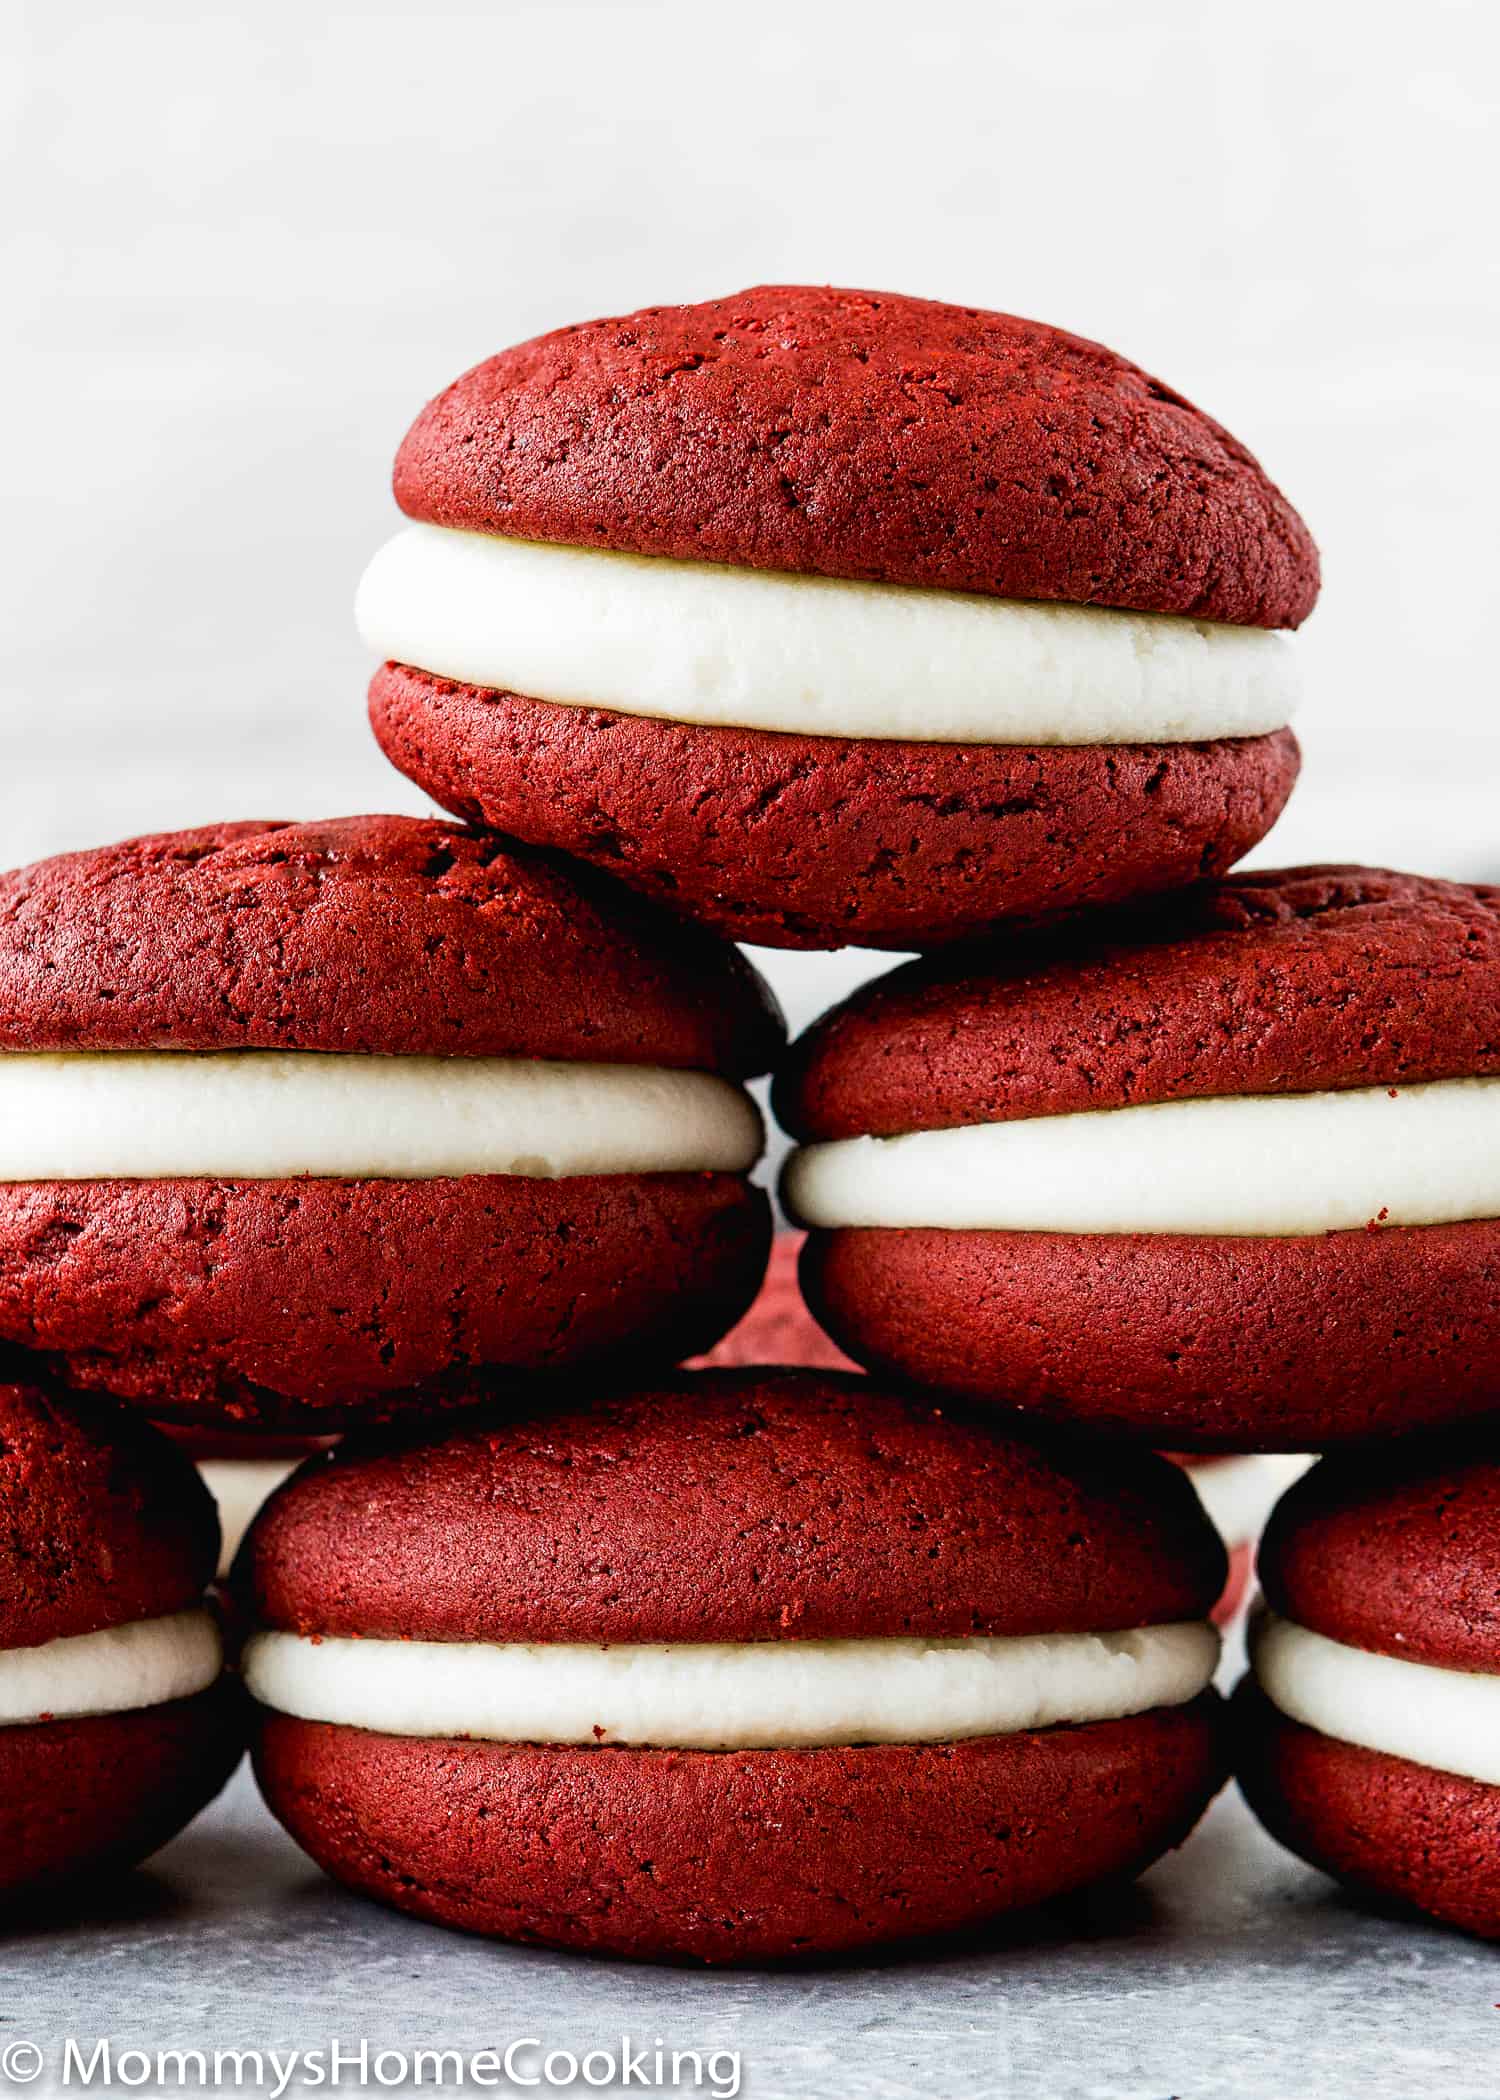
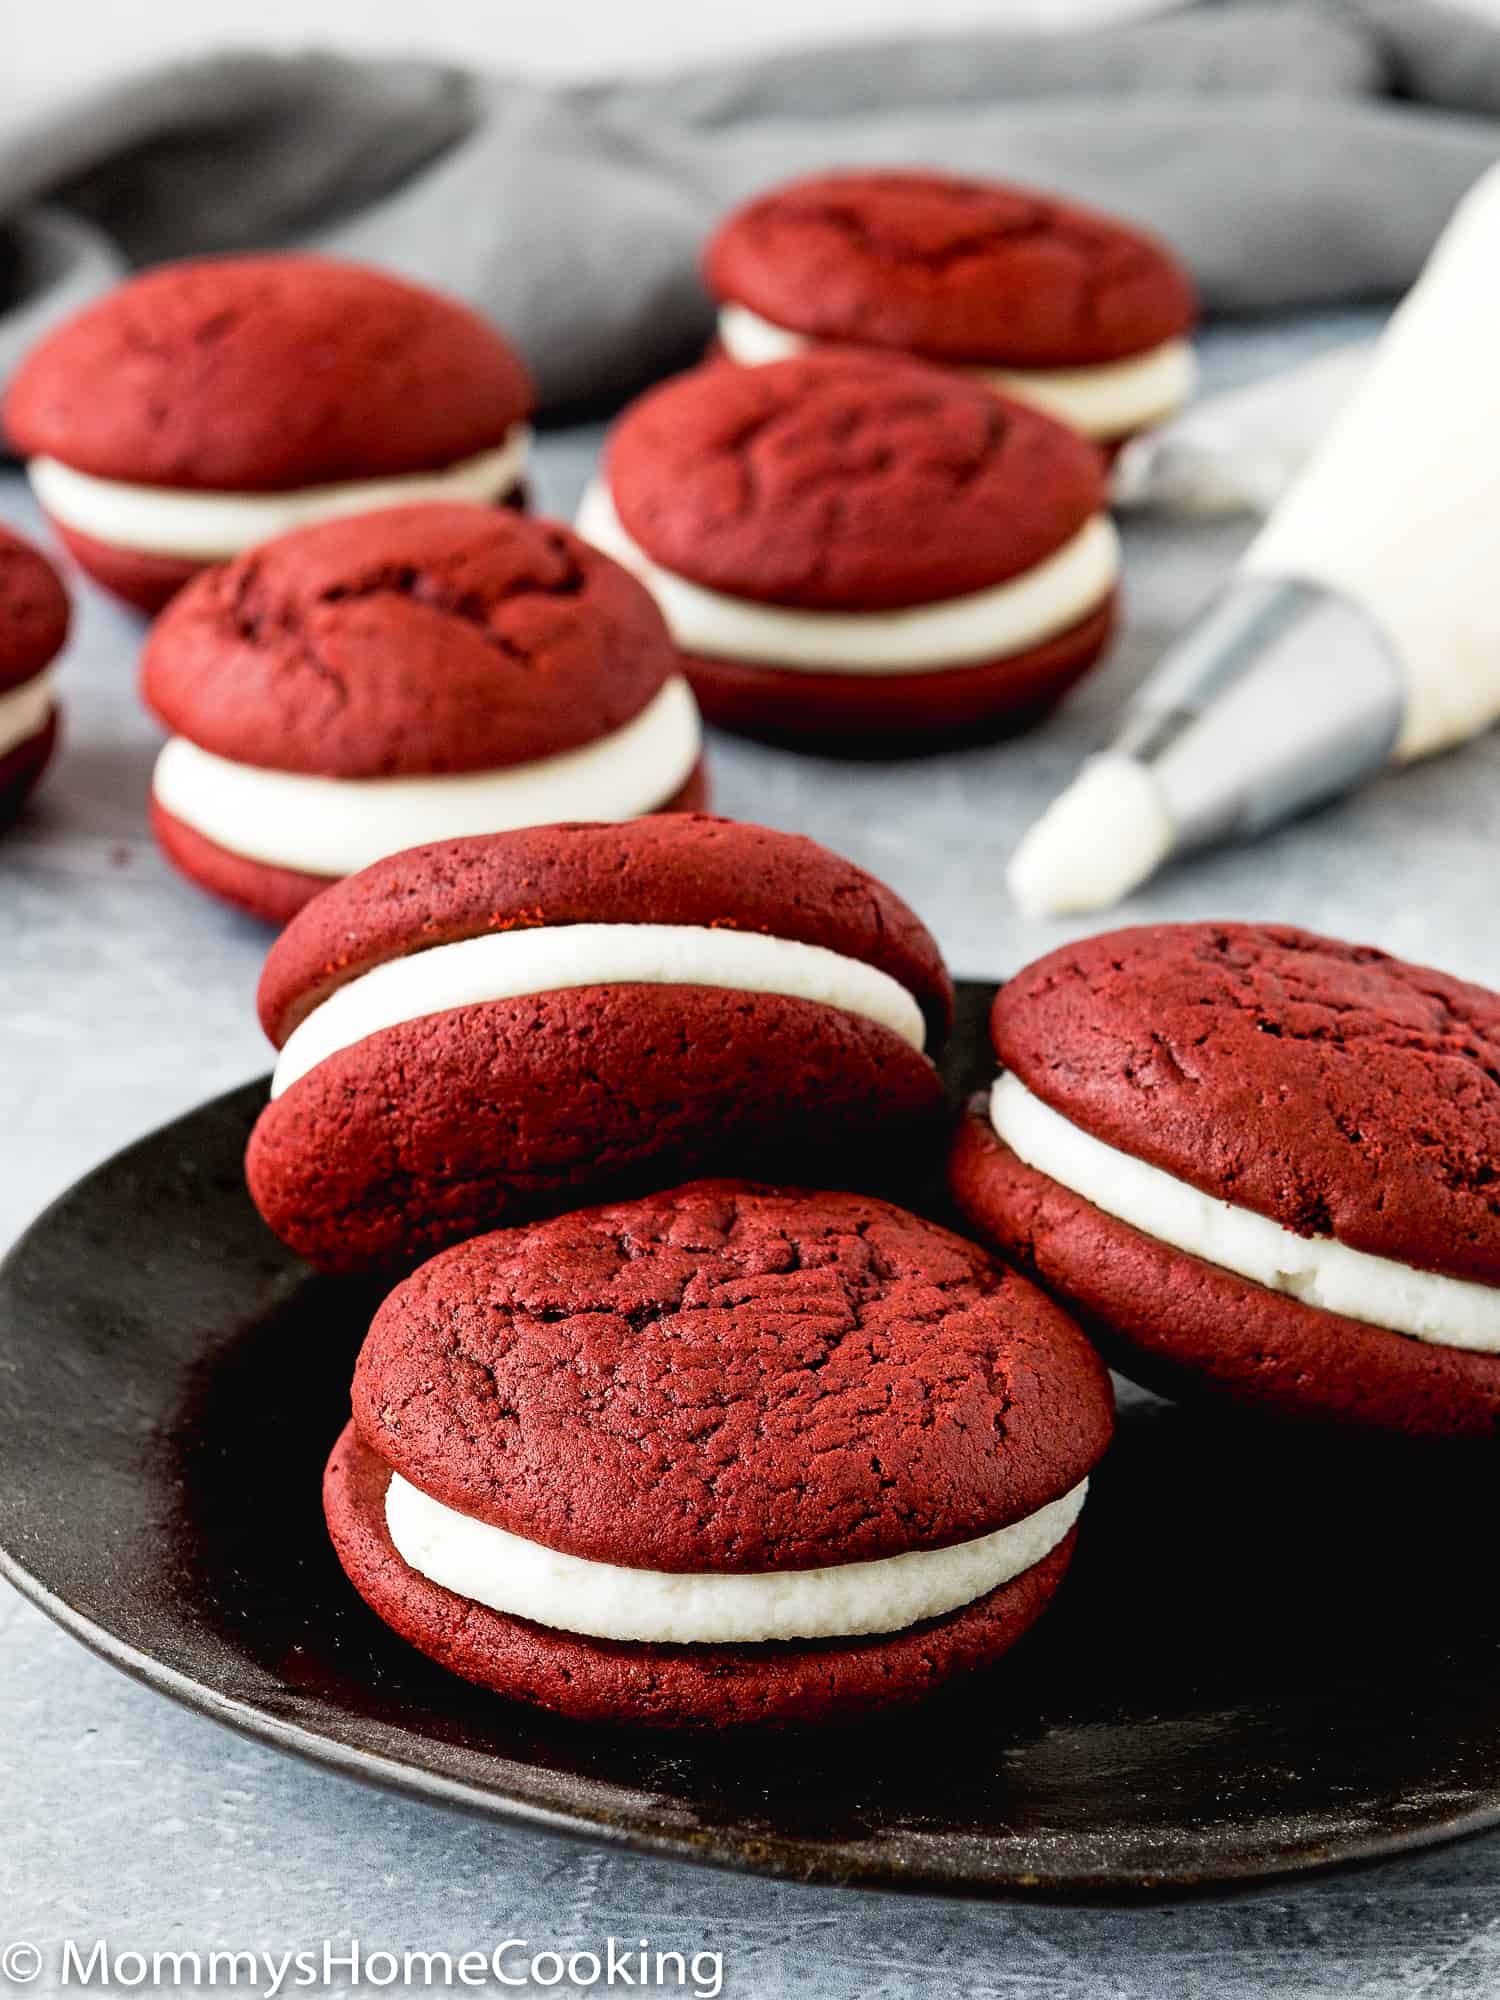
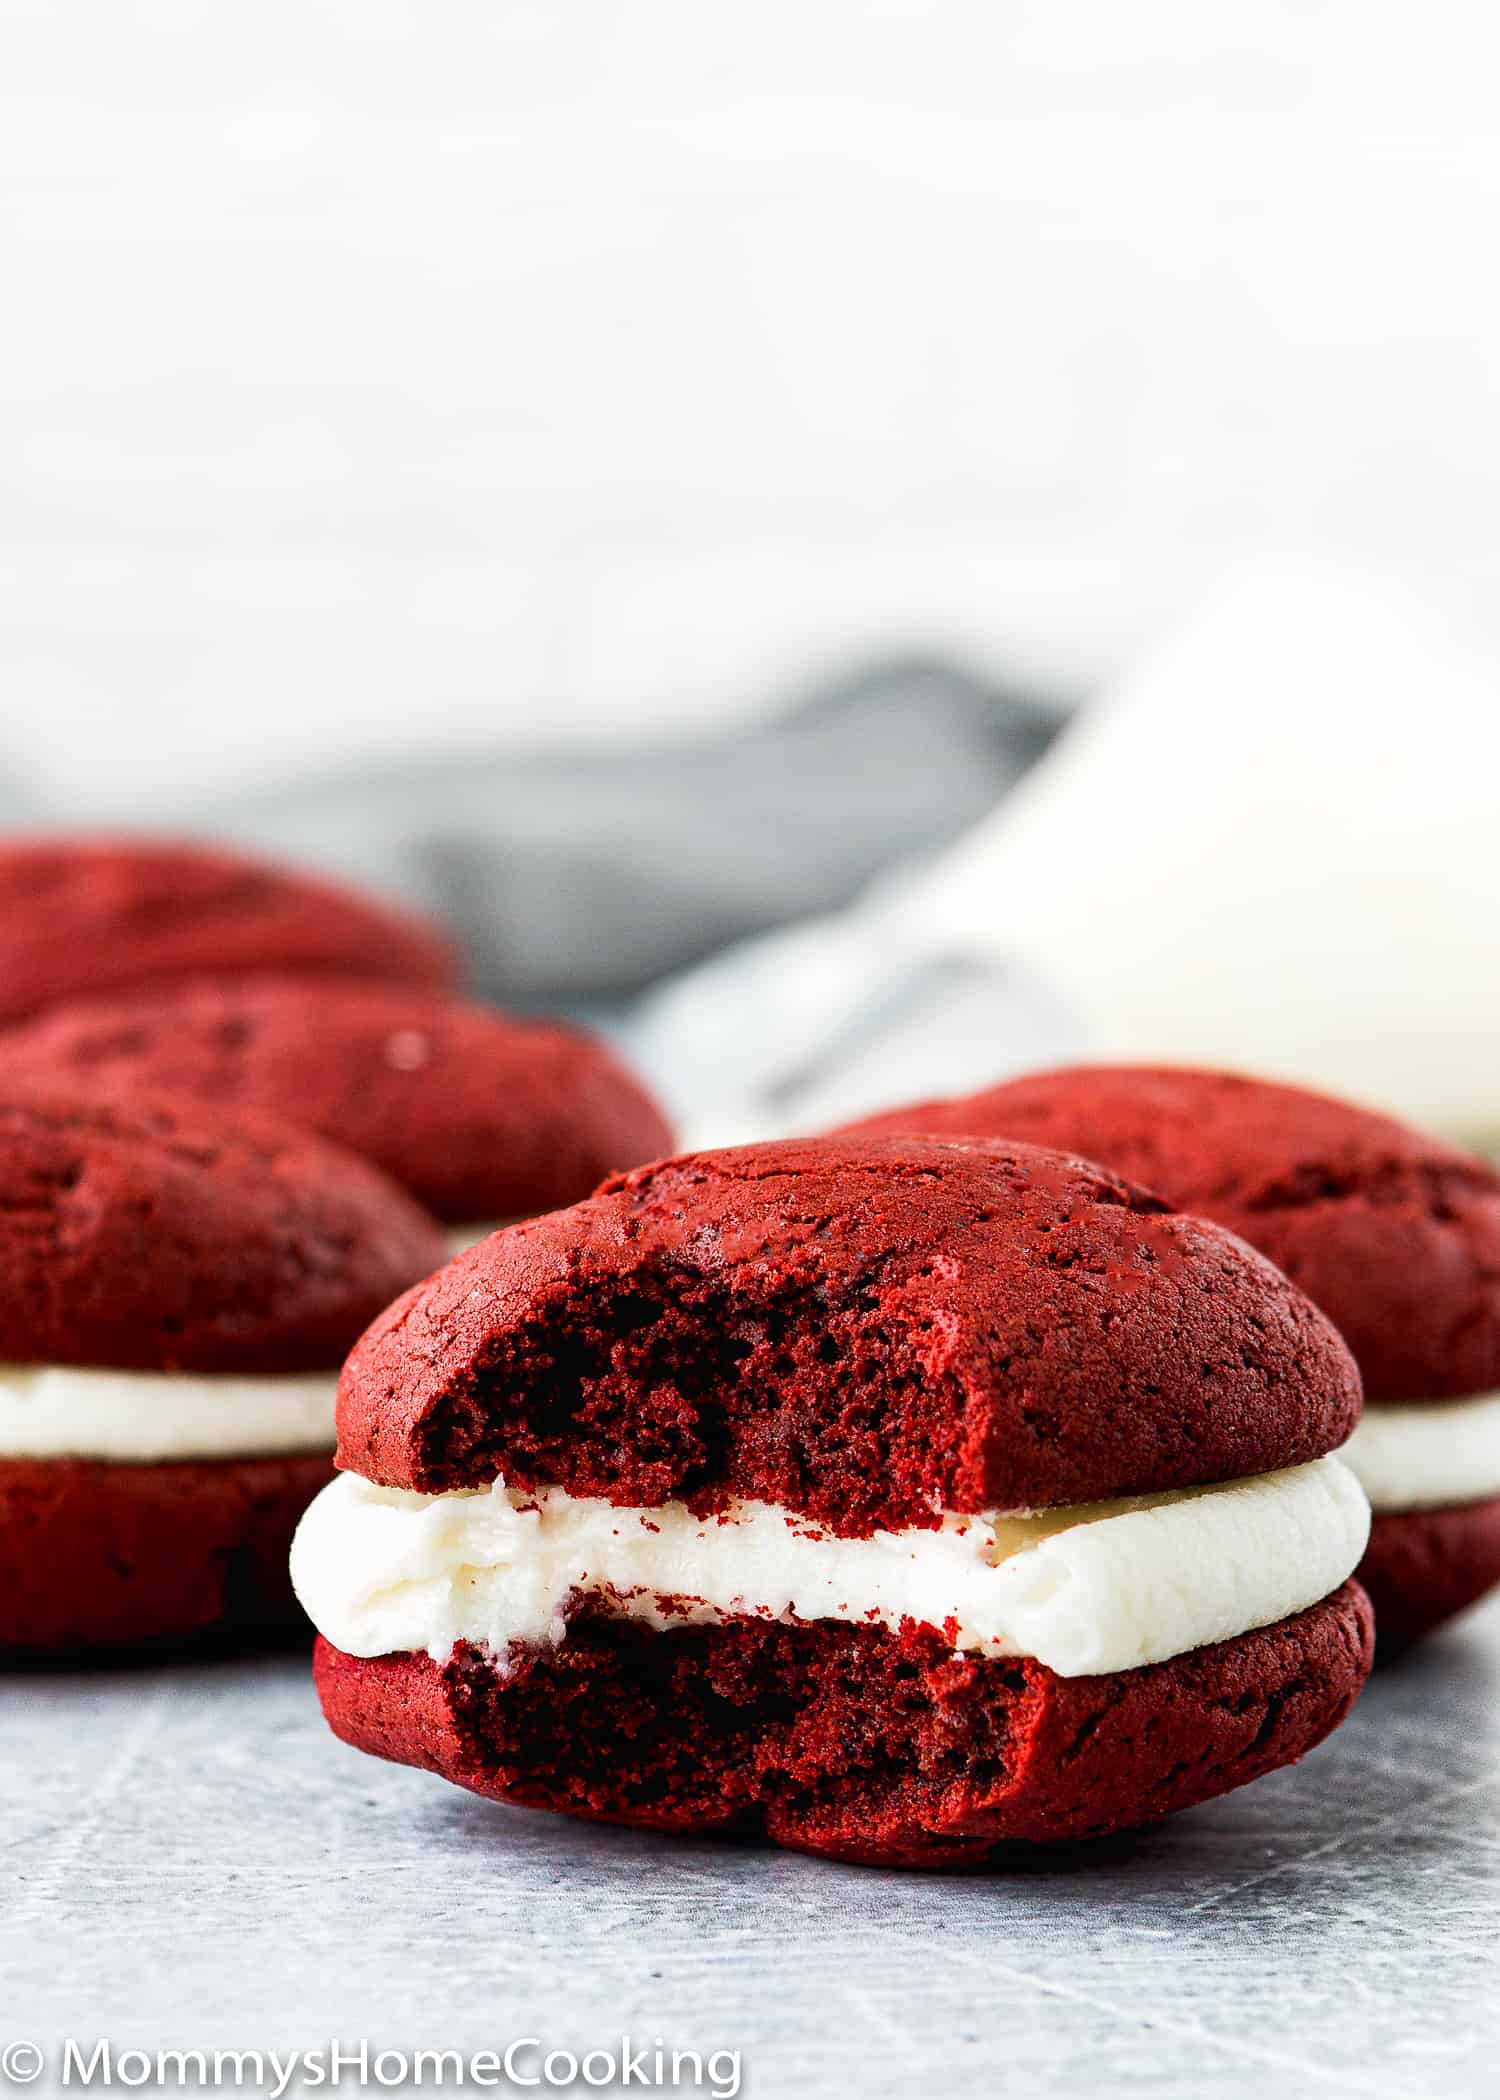
These Eggless Red Velvet Whoopie Pies are soft, light, and cakey. Each bite of these delightful cake-like eggless cookies truly melts away in your mouth! The recipe includes step-by-step photos and lots of tips.

Egg-Free Red Velvet Whoopie Pies Recipe Highlights
Oh my, do I have a yummy recipe for you today.
My son LOVES everything red velvet, so I decided to create these Eggless Red Velvet Whoopie Pies as an ultimate Valentine’s treat from him.
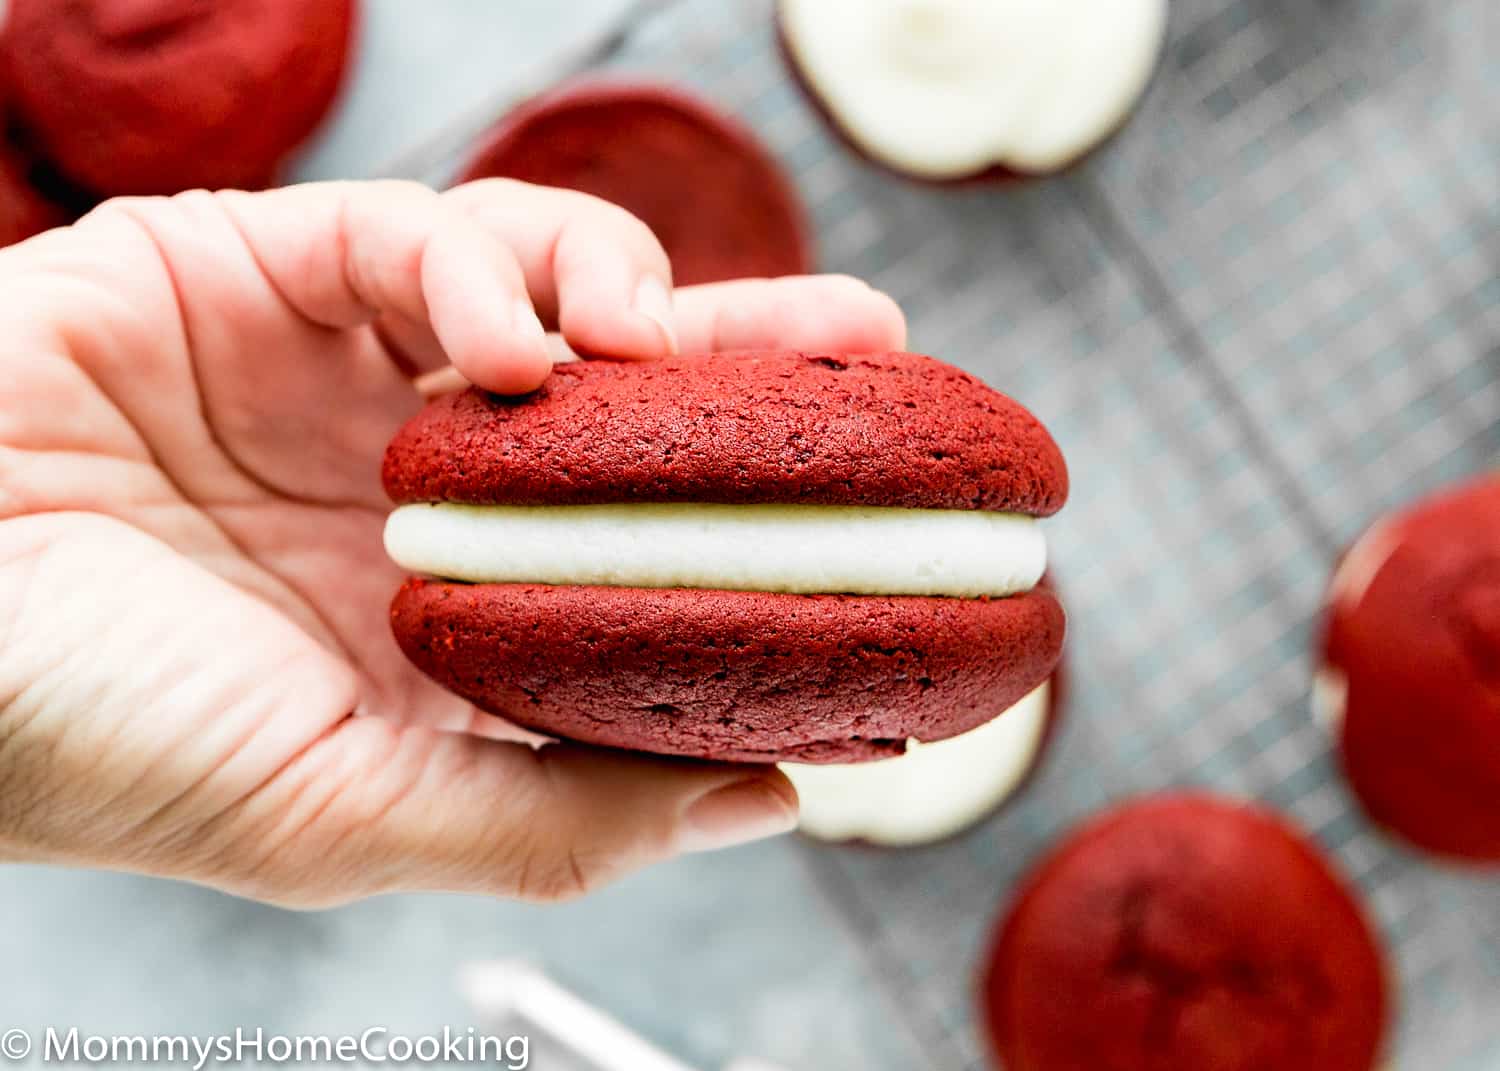
Two super-soft red velvet cookies sandwiched between a delicious and creamy cream cheese frosting. You’ll be making these amazing Eggless Red Velvet Whoopie Pies all year long!
What Are Whoopie Pies?
Whoopie pies are little mounds of cake sandwiched together with a sweet filling. They are also known as Gobs – what a funny name!
These Eggless Red Velvet Whoopie Pies are soft, light, and fluffy! And bursting with the red velvet flavor. They’re super easy to make. You don’t even need to chill the cookie batter – YAY!
These are such dreamy, easy-to-make sandwich cookies you’ll get requests time and time again!
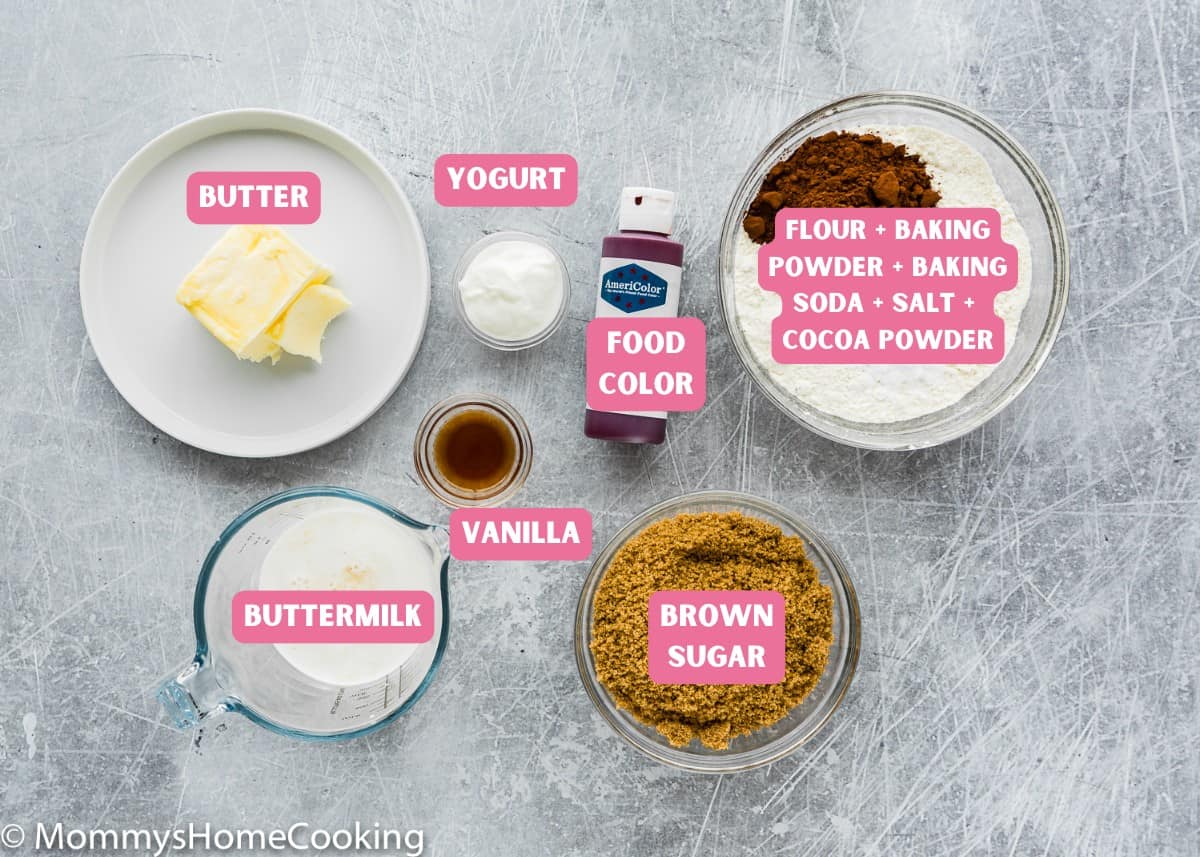
Eggless Red Velvet Whoopie Ingredients
Please check the recipe card at the bottom of the post for exact quantities and detailed instructions (scroll down).
Amounts are included in the printable recipe below (scroll down). You’ll need:
Ingredients Notes & Substitutions
- Flour: Standard all-purpose flour works best here; skip the cake flour, bread flour, and wheat flour. Make sure to measure accurately. A kitchen scale is the best way to measure your ingredients, in my opinion.
- Cocoa Powder: I like to use unsweetened natural cocoa powder instead of Dutch-processed, because it’s more acidic and reacts with baking soda, allowing your baked goods to rise. This is especially important in egg-free baking.
- Baking soda & Baking powder: Make sure they’re not expired or too old. To avoid a chemical aftertaste, use baking powder that is labeled aluminum free. I usually use the Clabber Girl brand, and though the ingredients state aluminum, I’ve never noticed an aluminum aftertaste.
- Salt: I prefer kosher or sea salt. If you only have table salt handy, I recommend reducing the amount to half.
- Butter: I prefer to use unsalted butter, but if you only have salted butter handy, you can use it. In this case, skip the salt called in the recipe.
- Brown sugar: I use and recommend light brown sugar.
- Yogurt: You can substitute plain regular yogurt for sour cream. I recommend using the full-fat versions.
- Buttermilk: You don’t have buttermilk? No problem!! Check out my recipe for Easy Homemade Buttermilk Substitute [Video].
- Vanilla extract: For optimal flavor, reach for pure vanilla instead of imitation. Even better, try homemade vanilla extract! If you are looking for non-alcoholic vanilla flavoring, I recommend Simply Organic Vanilla Flavoring.
- Gel red food coloring: The amount of food coloring will depend on the concentration of the food coloring you are using. I recommend using gel or paste food colors since they are highly concentrated, and you’ll end up using less.
For Cream Cheese Filling:
- Cream cheese: Use the full-fat version that comes in blocks.
- Unsalted butter
- Confectioners’ sugar
- Pure vanilla extract
How To Make Eggless Red Velvet Whoopie Step by Step
Step 1 – Make The Batter
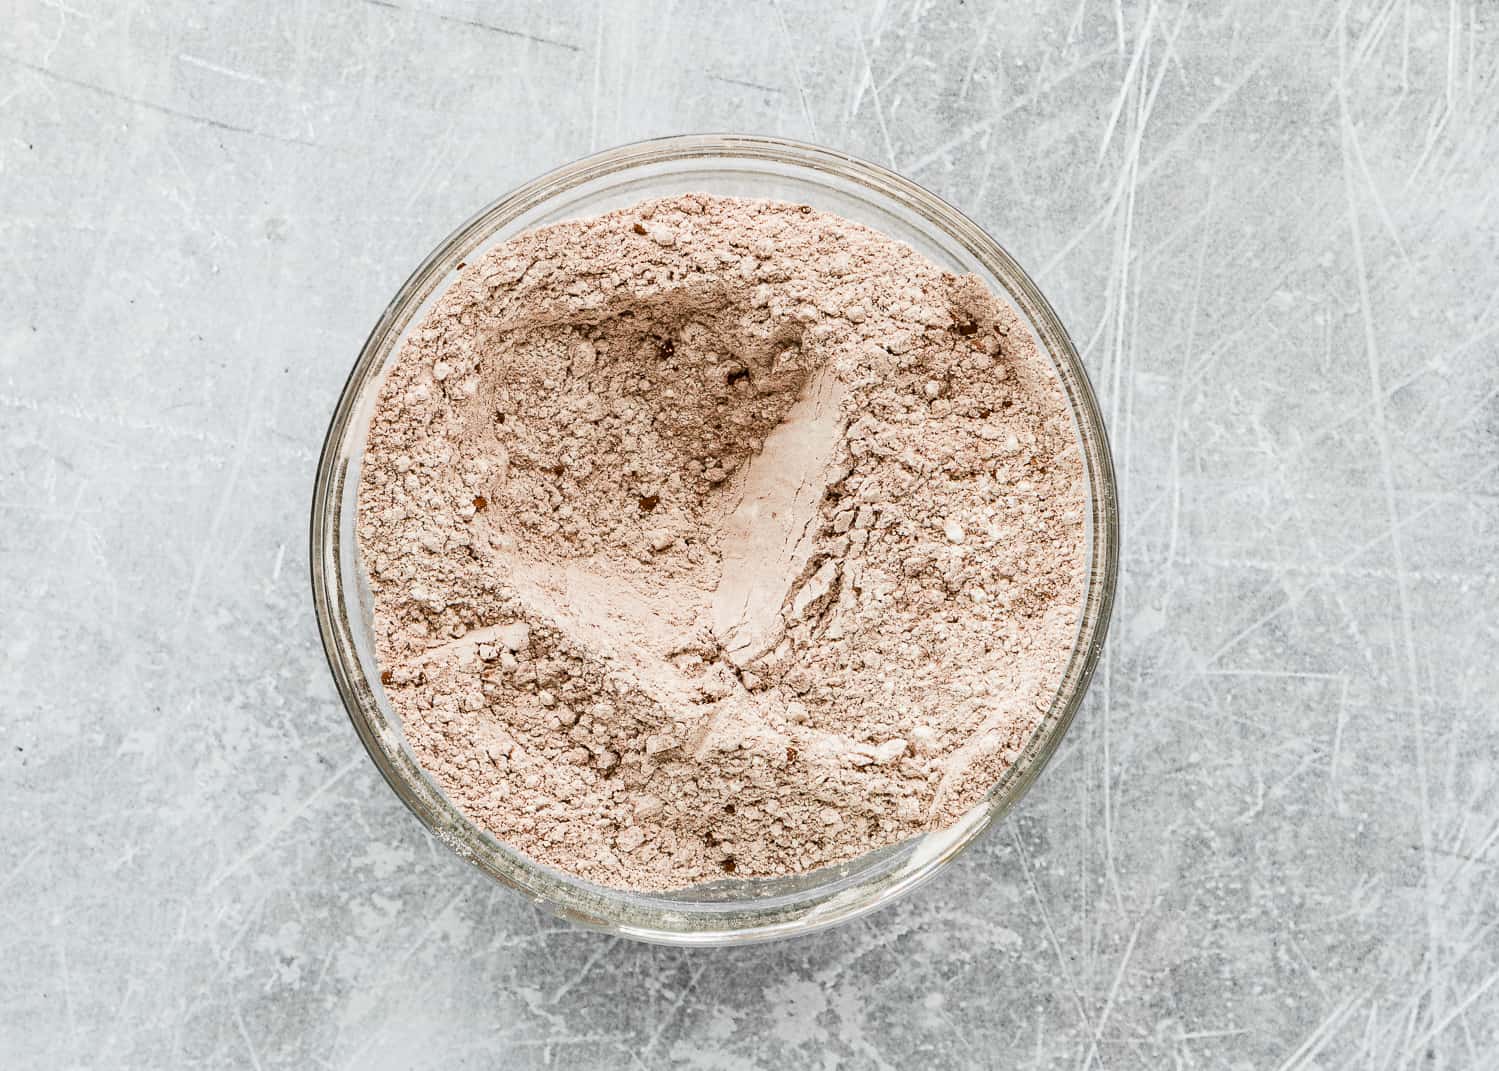
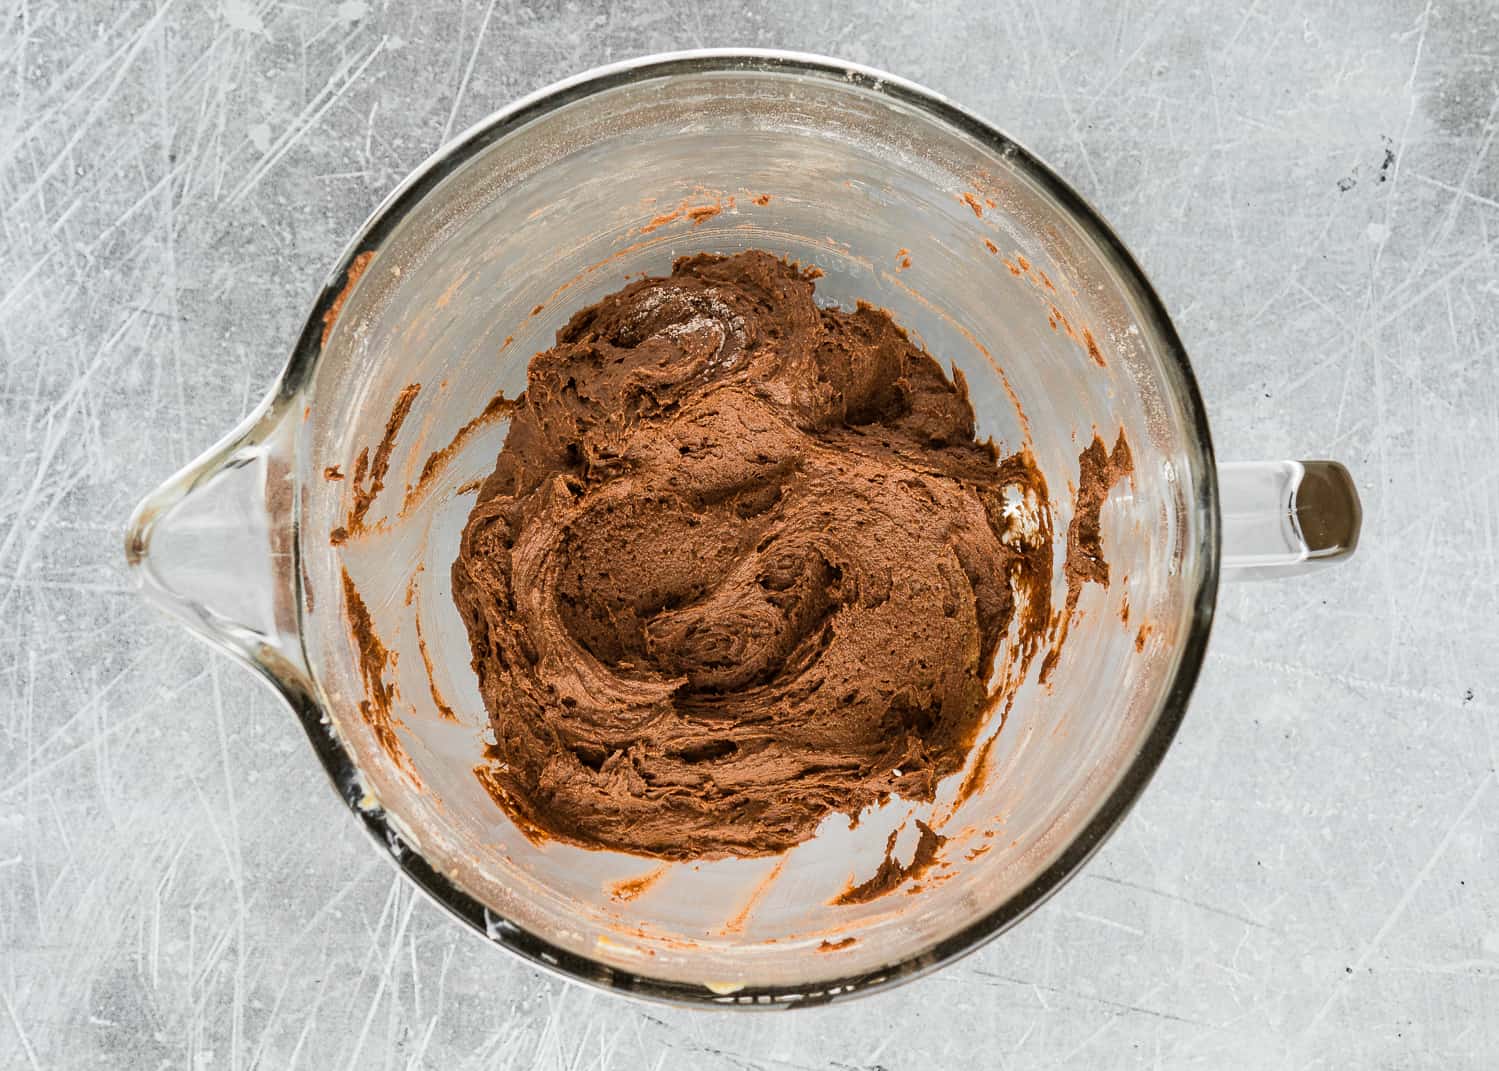
Mix Dry Ingredients. In a medium bowl, whisk flour, cocoa powder, baking soda, baking powder, and salt together. Set aside.
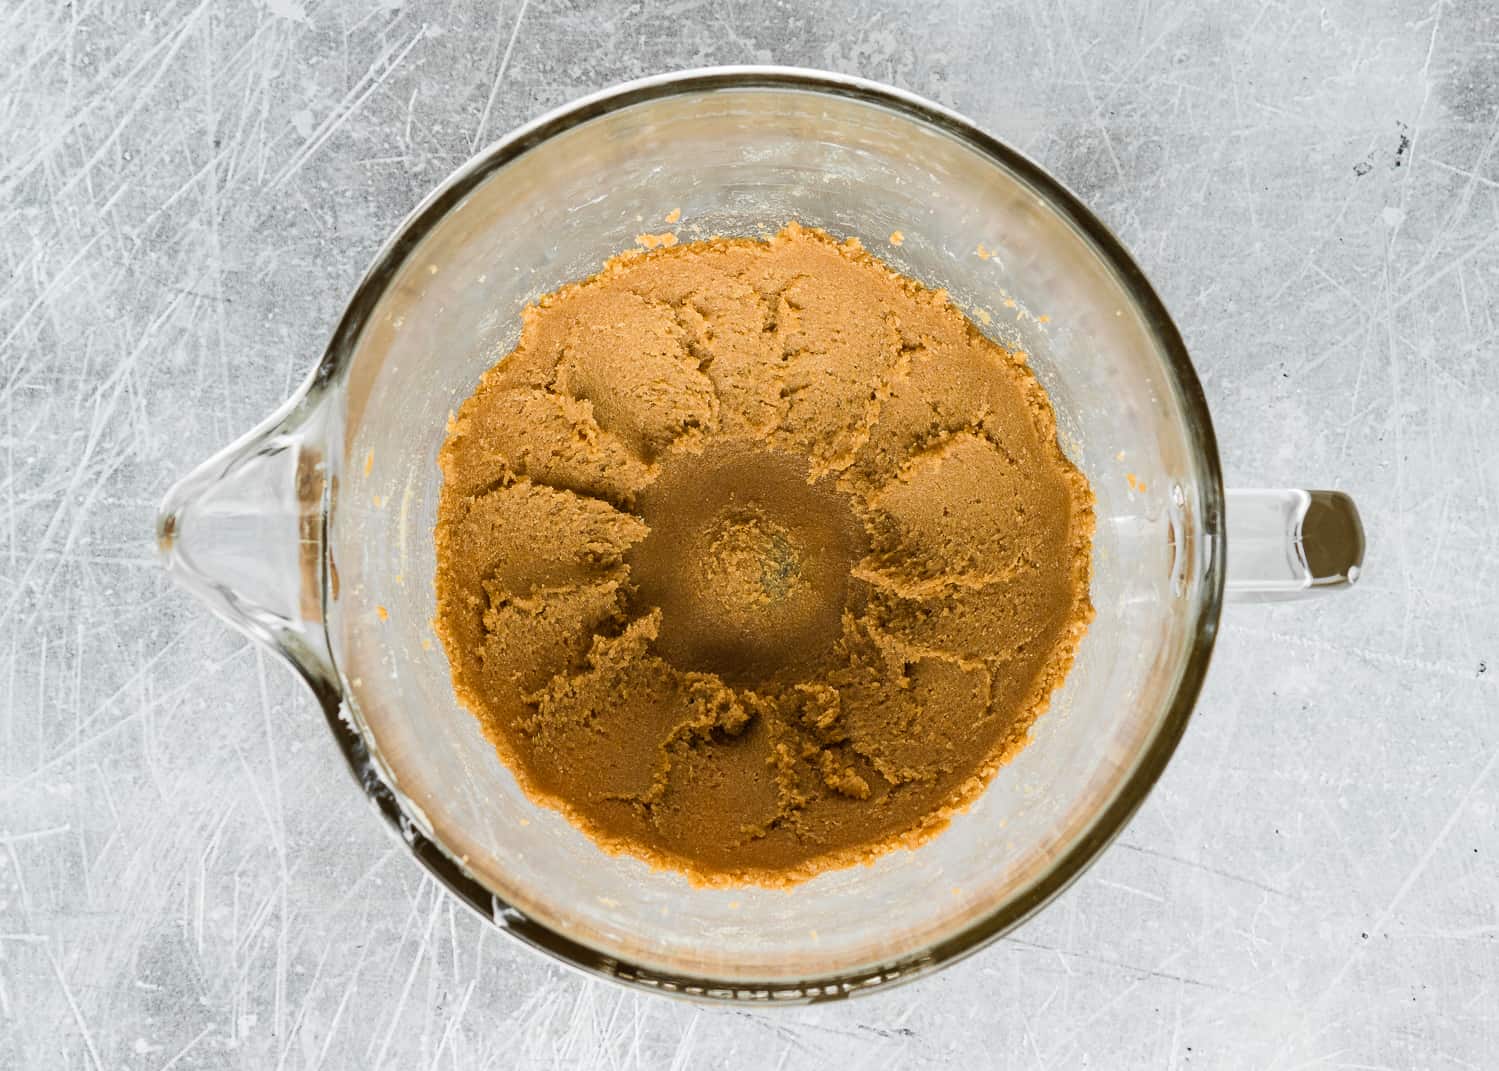
Beat. Cream the butter and brown sugar until light and fluffy. Beat in yogurt, buttermilk, and vanilla.
Combine. Add the dry ingredients to the wet ingredients. Add enough food coloring to achieve a deep red hue.


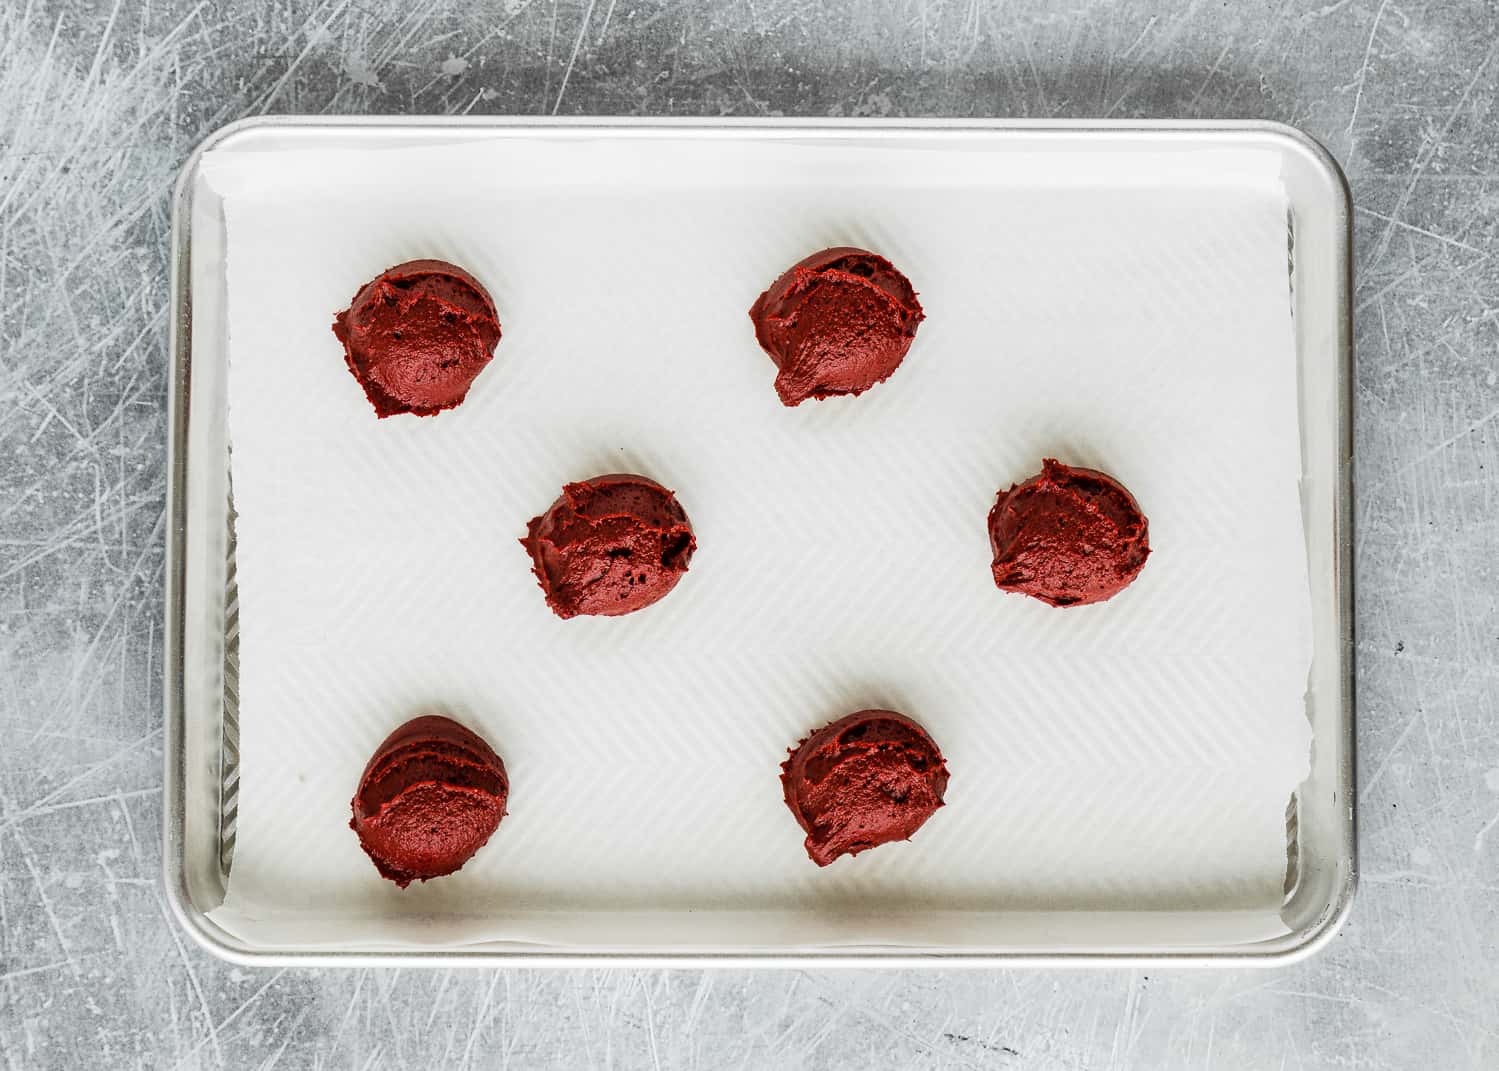
Step 2 – Portion The Batter
Spoon or scoop mounds of batter, about 1 1/2 tablespoons each.
PRO TIP: Use damp fingers to shape the batter into a ball and smooth the tops after you scoop it onto the baking sheet.
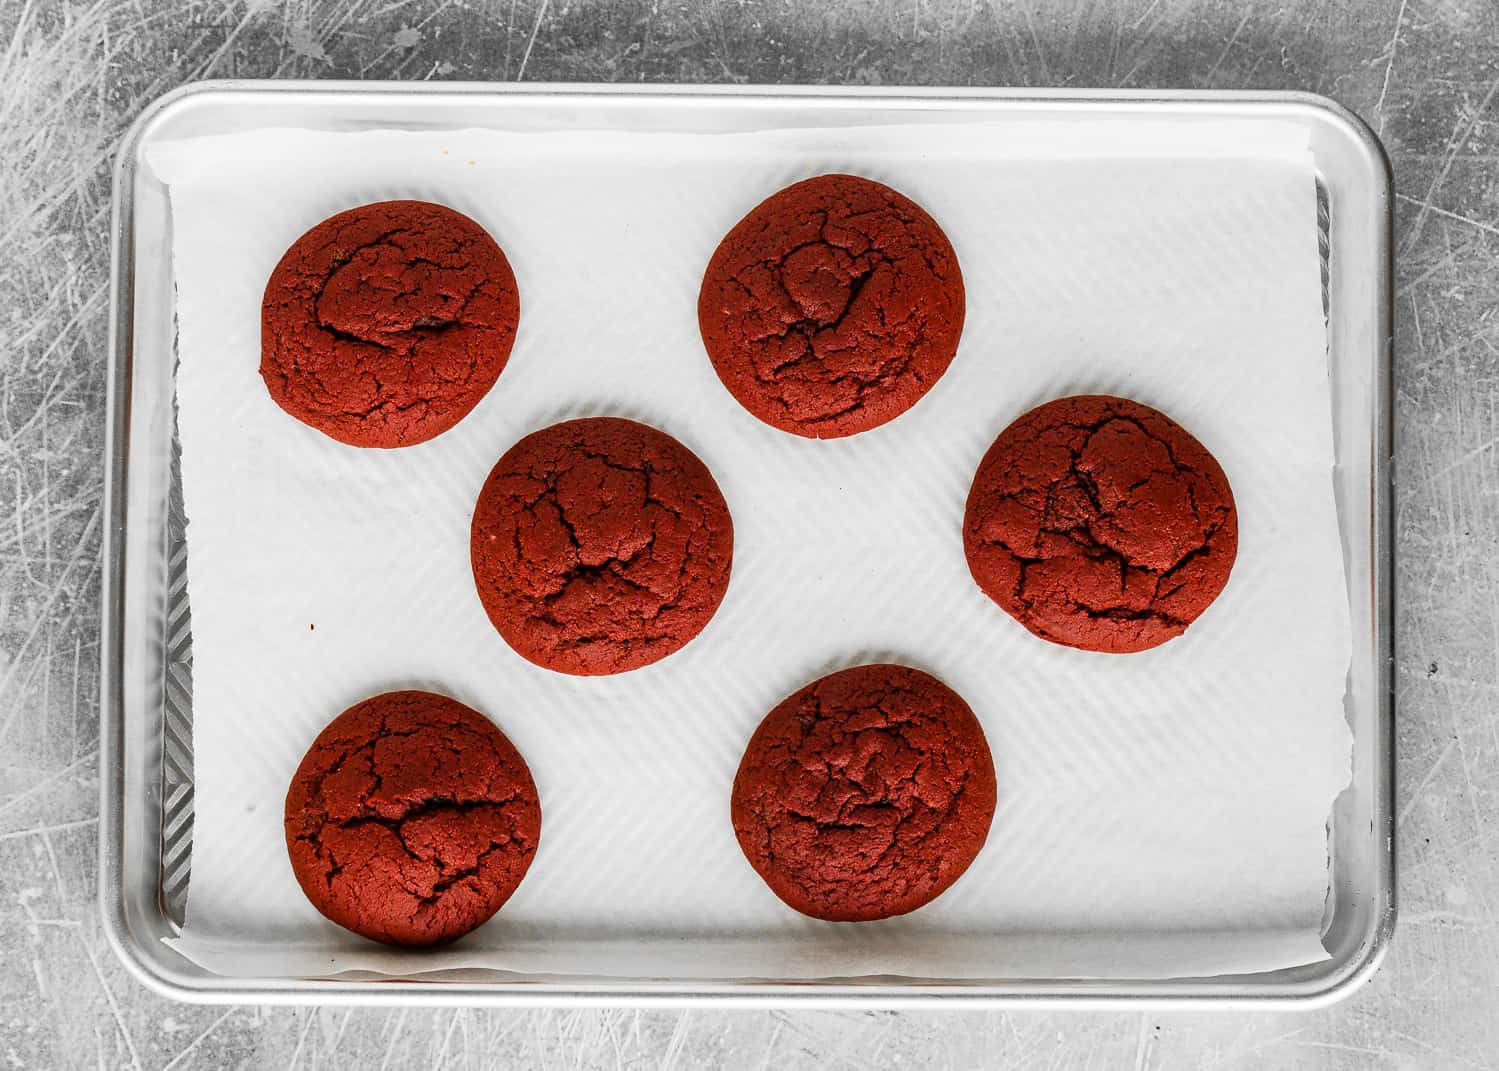
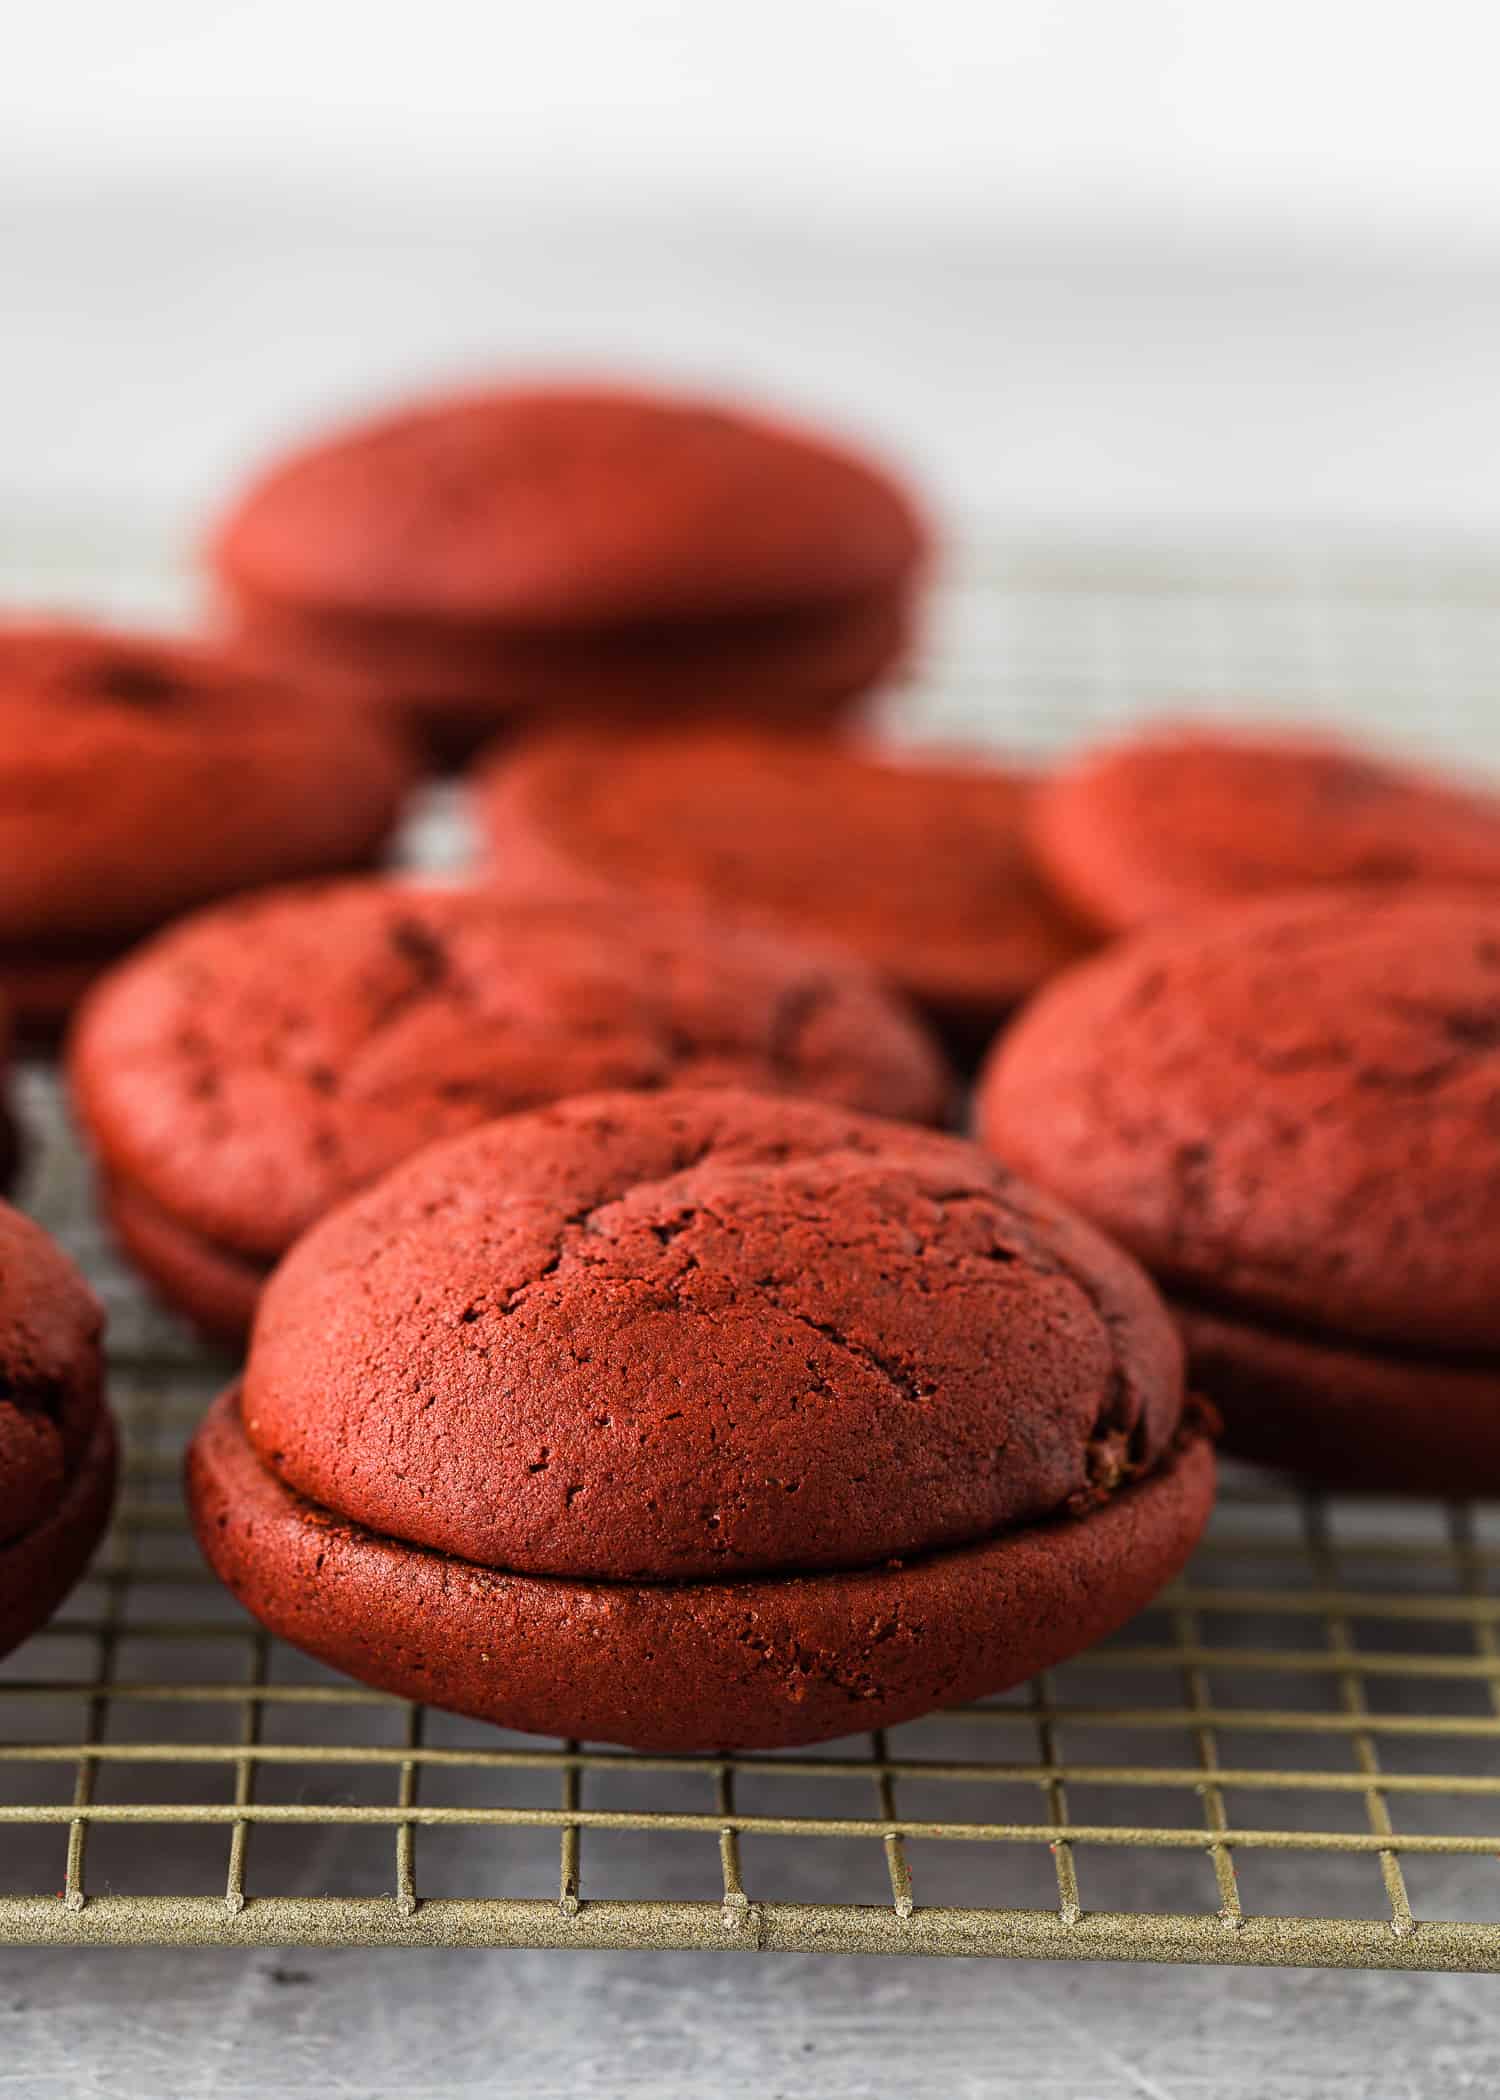
Step 3 – Bake
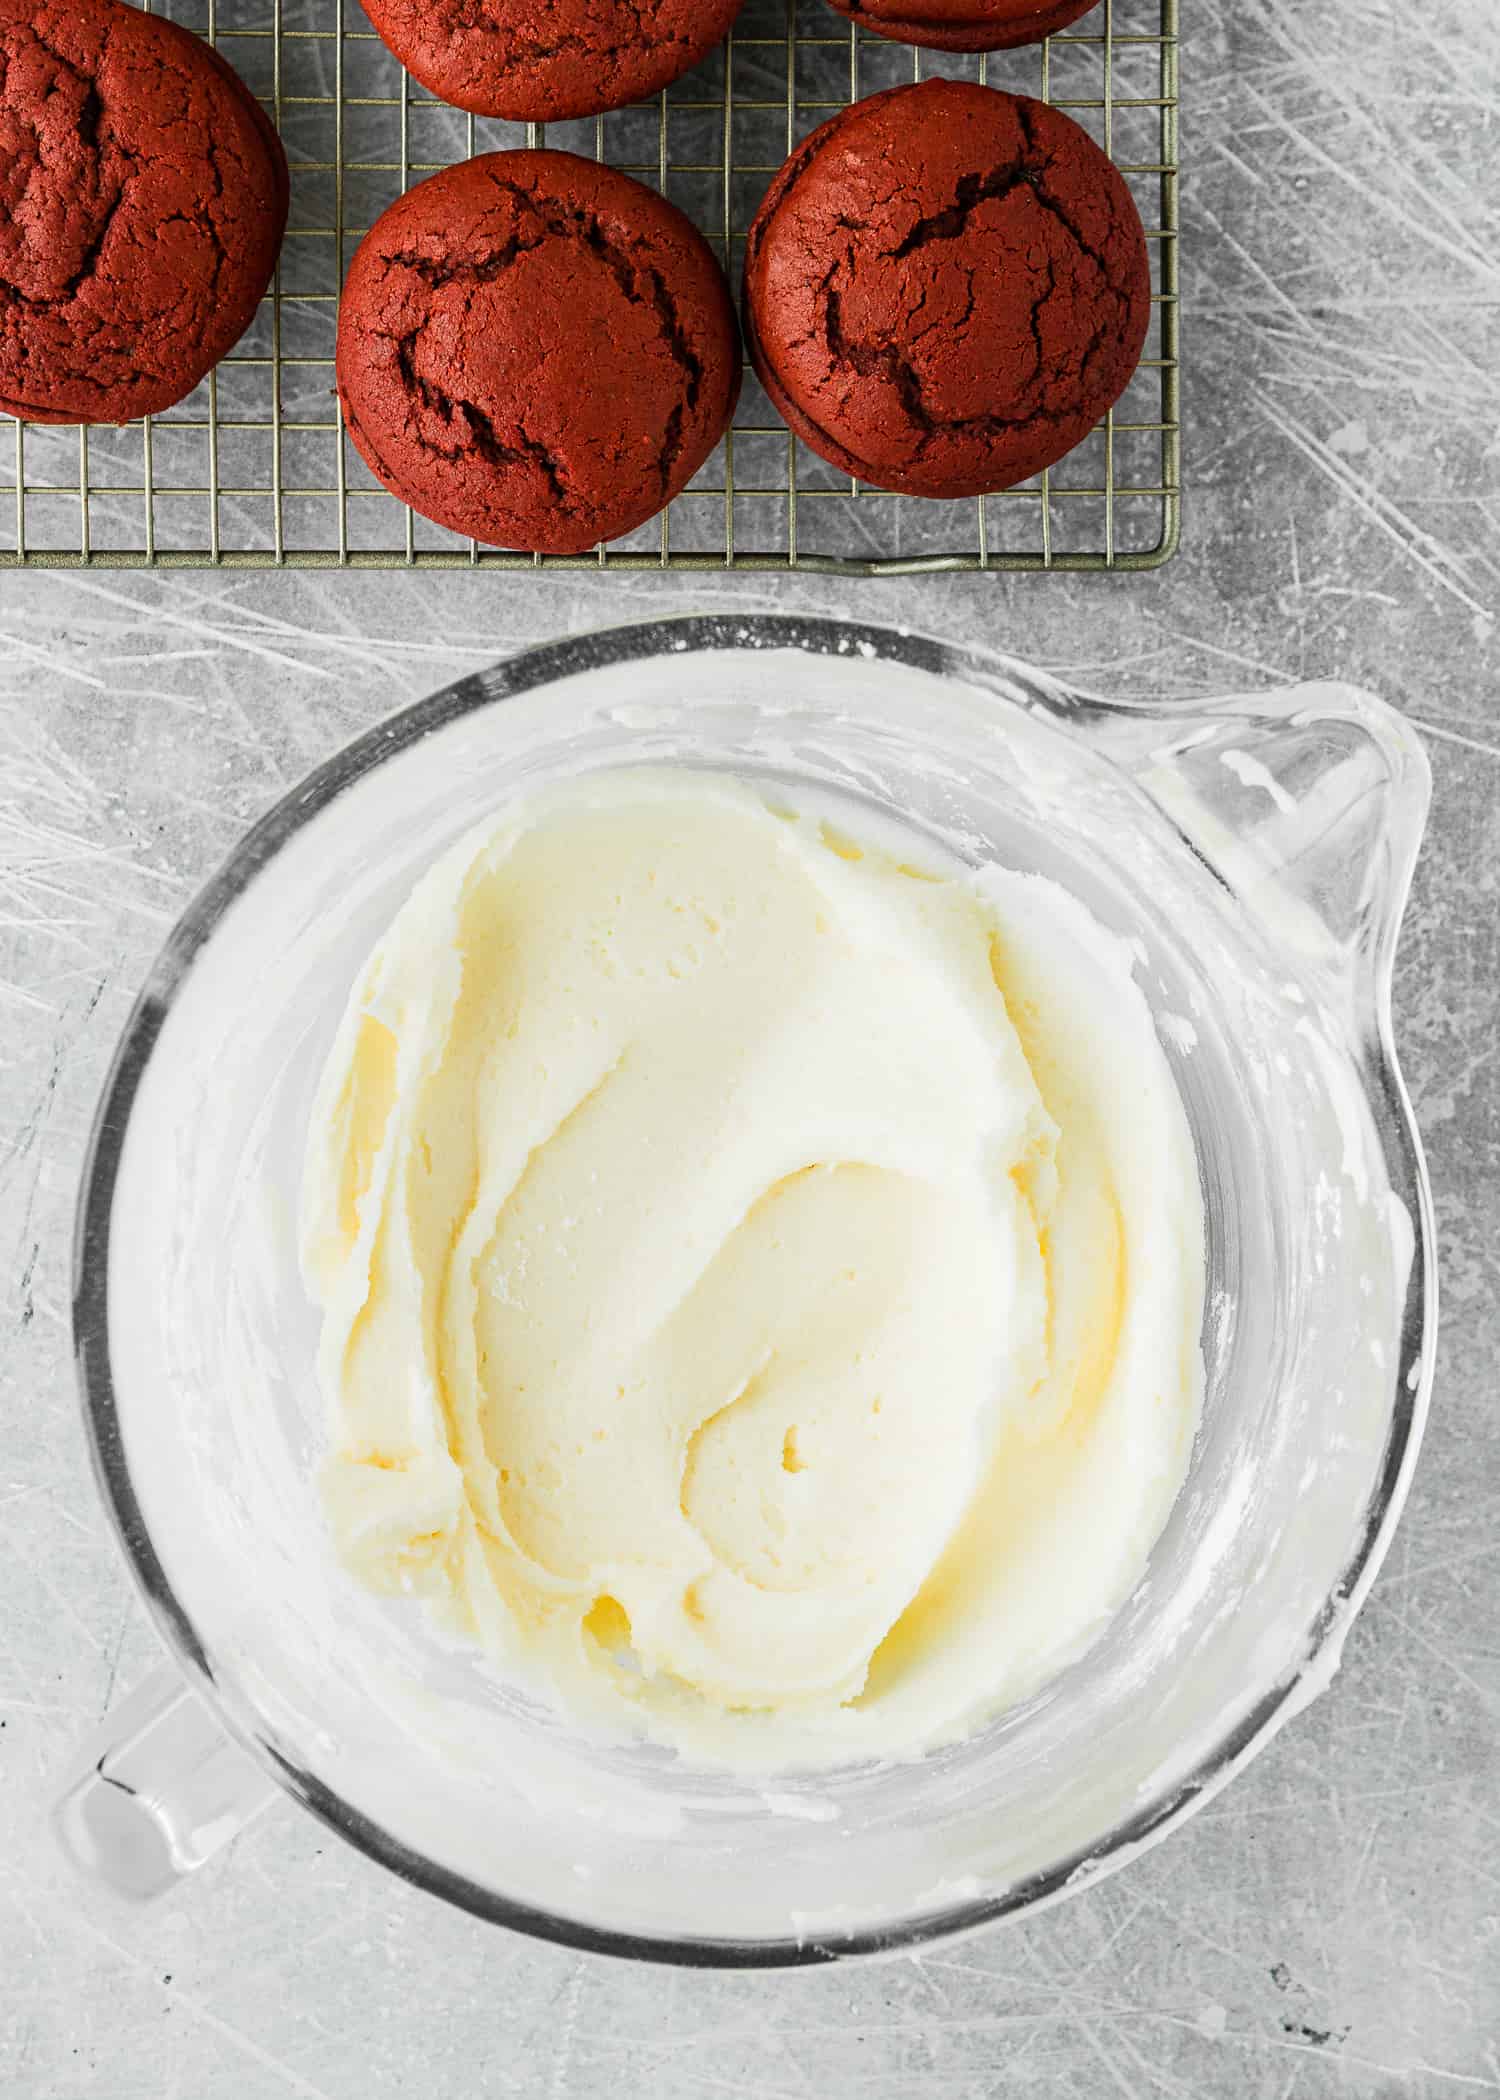
Bake the cookies until the centers appear set and the tops spring back when lightly touched. Allow to cool completely before sandwiching.
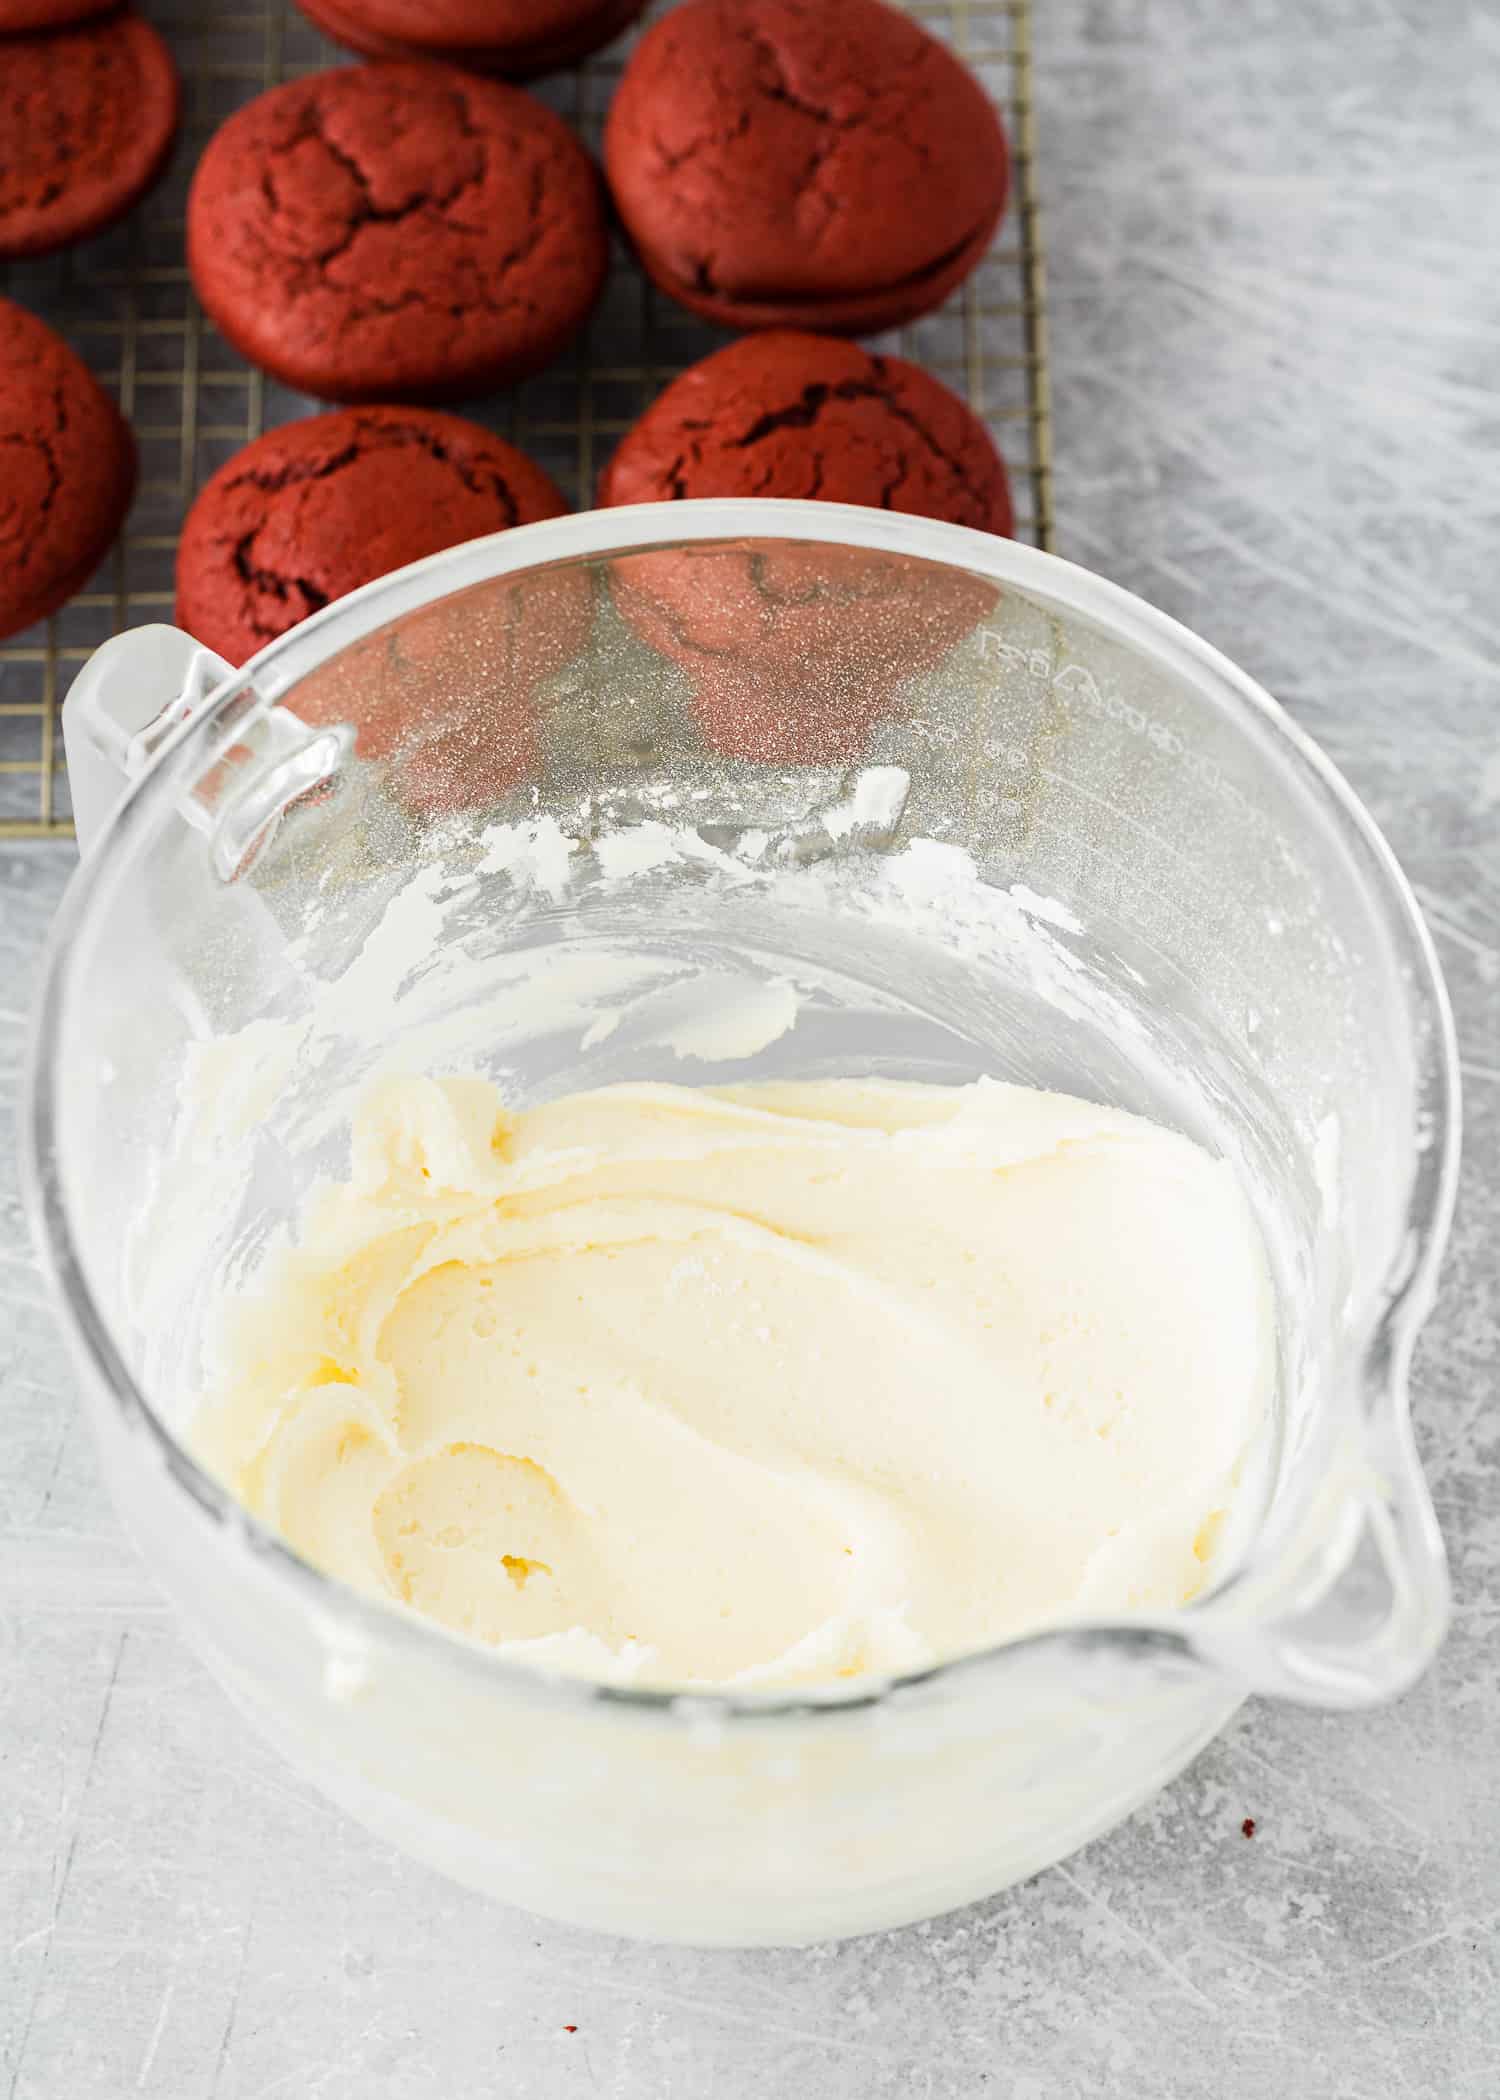
Step 4 – Make The Filling
While the cookies cool, beat together the butter and cream cheese in a large bowl for one to two minutes, or until smooth. Add a little powdered sugar at a time, then add the vanilla extract and beat until nice and creamy. Transfer the frosting into a piping bag or a gallon-size zip lock bag and then place it in the refrigerator for 30 minutes.
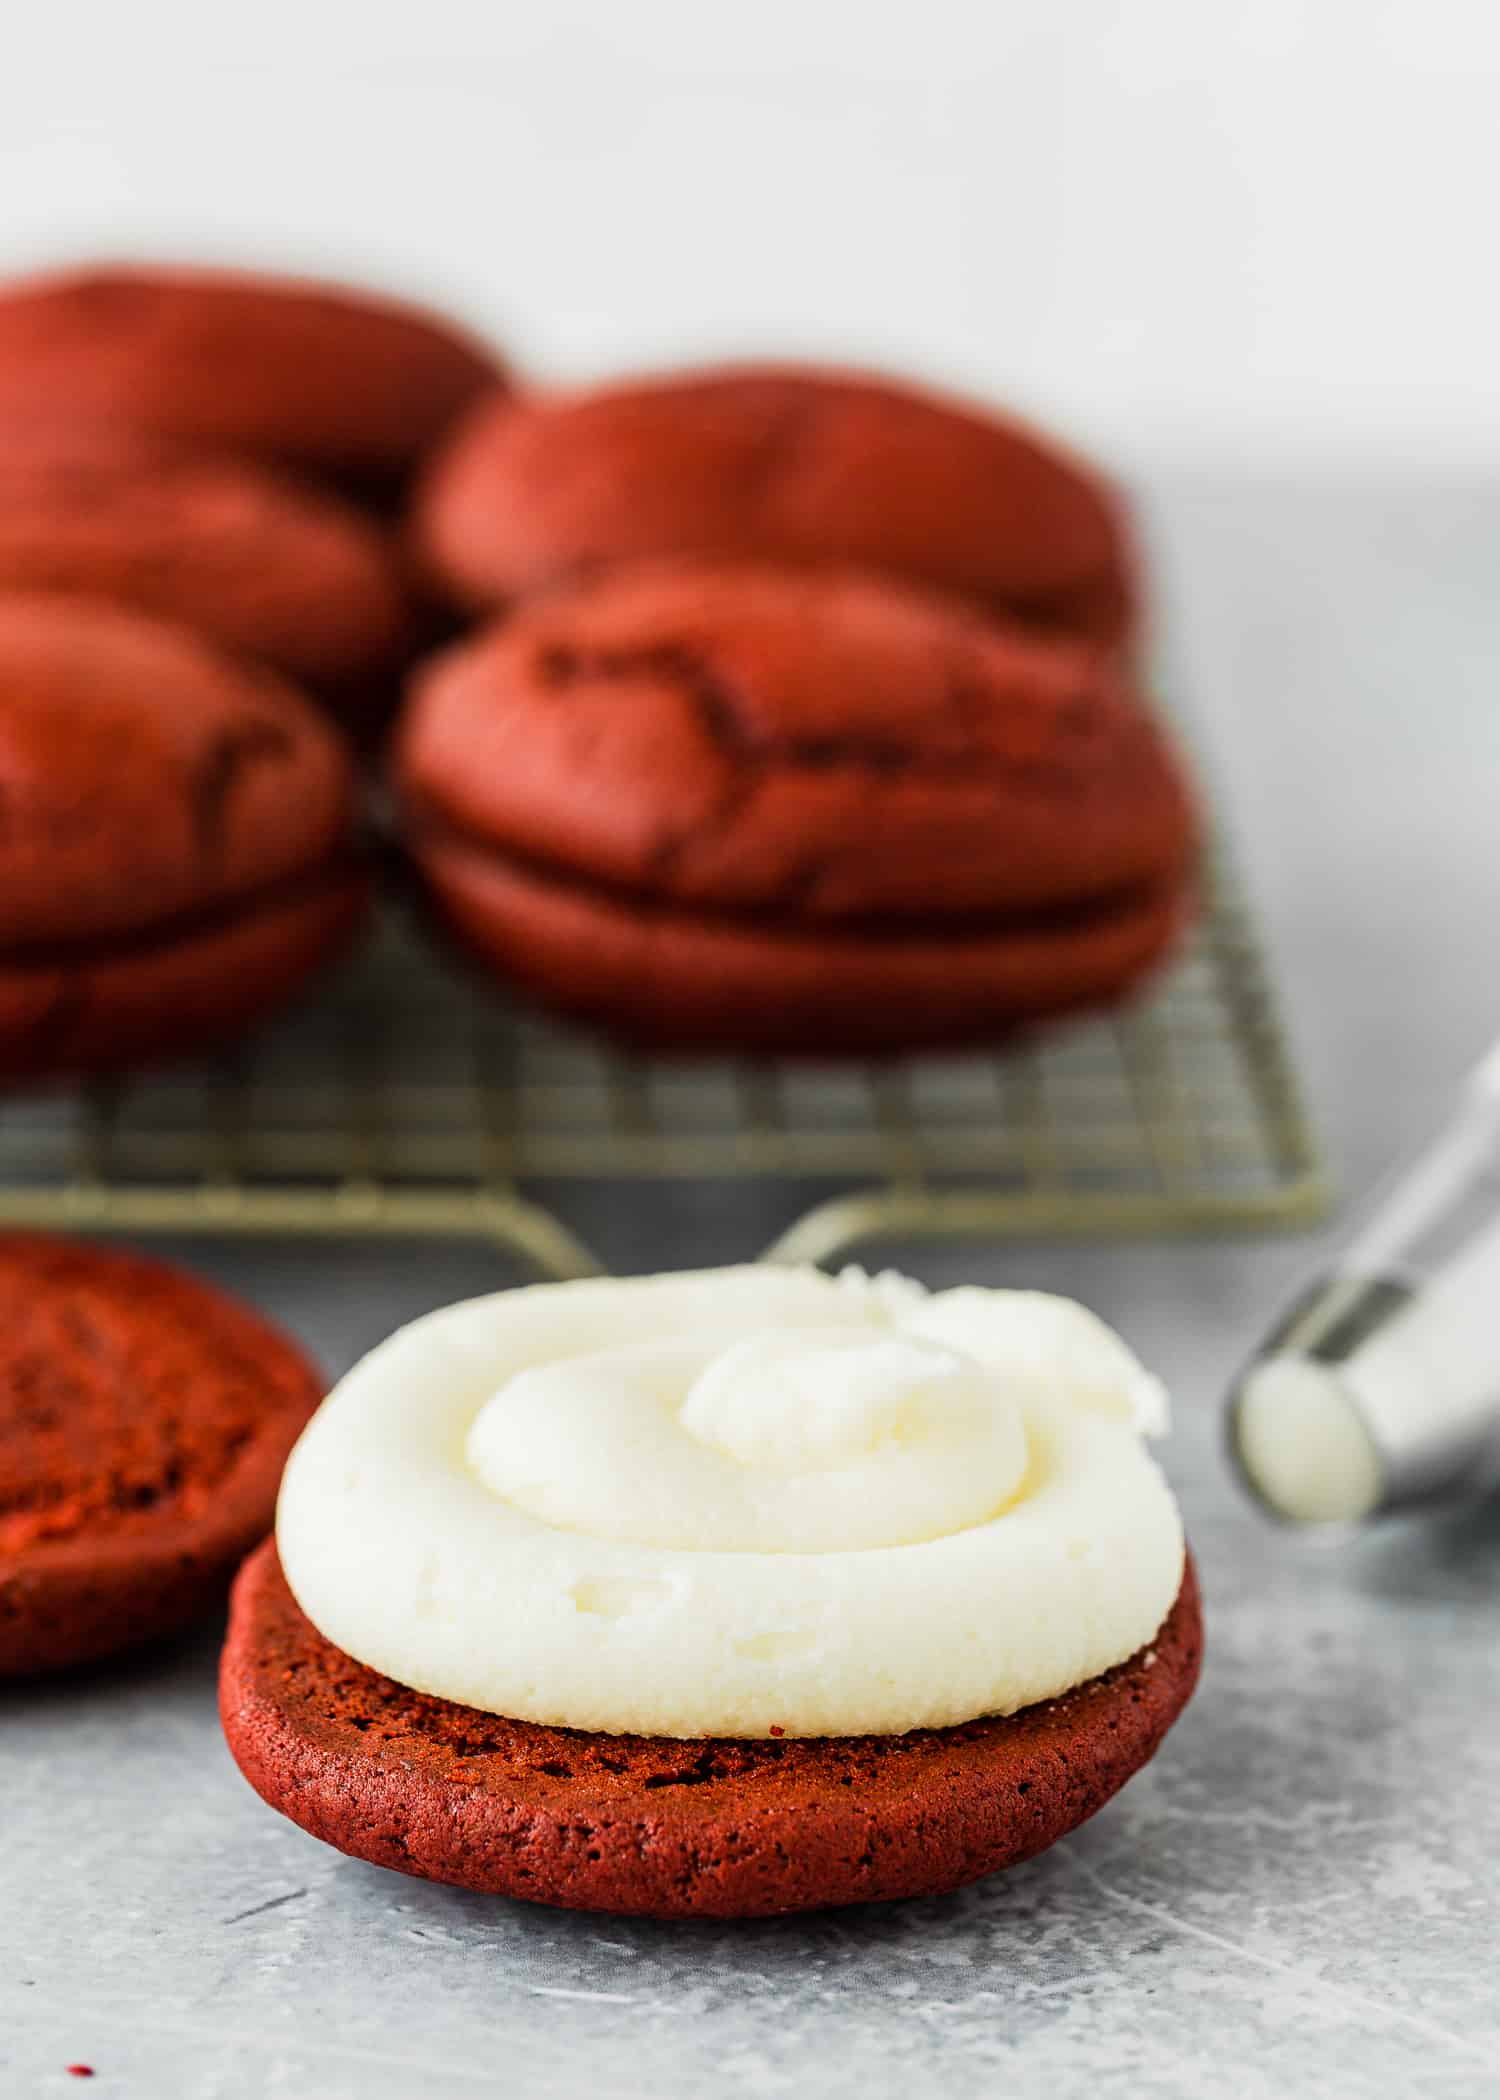
Step 5 – Assemble
Pair the cookies up based on their size. Spread cream cheese filling onto the flat side of one cookie and sandwich it with the other.
Eggless Whoopie Pies Baking Tips
Measure the ingredients correctly. I highly recommend using a kitchen scale.
Preheat the oven for at least 15 minutes before getting started to give it plenty of time to reach the ideal recipe temperature.
Don’t overmix the batter. Mix just until you’ve evenly distributed the ingredients throughout the batter.
Bake the whoopie pies as soon as the batter is ready.
I like to use a medium cookie scoop to portion each cookie; it should be about 1 1/2 tablespoons of batter each.
Use damp fingers to shape the batter into a ball and smooth the tops after scooping it onto the baking sheet.
Don’t open the oven door until the whoopie pies have set. Leave the oven closed until the minimum time is stated in the recipe.
Every oven is different, so baking times always have to be taken with a grain of salt. Oven thermostats can be wildly off, and that will all affect baking time, so keep an eye on yours. The whoopie pies are done when centers appear set, and the tops spring back when lightly touched.
Smaller Whoopie Pies
If you want smaller whoopie pies, measure one scant tablespoon of batter for each cookie to yield about 28 – 30 smaller pies. Bake until centers appear set and the tops spring back when lightly touched.
Storing & Freezing Instructions
STORE: Place leftover whoopie pies in an airtight container and store them in the refrigerator for up to 1 week.
FREEZE: You can freeze the baked and filled whoopie pies for up to 2 months. Wrap them individually with plastic wrap and place them in a large freezer bag or container. Thaw wrapped whoopie pies overnight in the refrigerator or at room temperature.
Frequently Asked Questions
Whoopie pies are little mounds of cake sandwiched together with a sweet filling. They are also known as Gobs – what a funny name!
Yes, If you want smaller whoopie pies, measure one scant tablespoon of batter for each cookie to yield about 28 – 30 smaller pies. Bake until centers appear set and the tops spring back when lightly touched.
More Recipes You’ll Love!
- Eggless Red Velvet Cake
- Eggless Sugar Cookies
- The Best Eggless Chocolate Cake Ever
- Eggless Snickerdoodle Cookies
- Eggless Vanilla Cake Recipe
- The Best Eggless Chocolate Chip Cookies
- Eggless Vanilla Cupcakes
- Eggless Chocolate Cupcakes
- More recipes…
❤️ Love what you see? JOIN my Private Baking Club. Also, SUBSCRIBE to Mommy’s Home Cooking, so you’ll never miss a recipe! And FOLLOW along on Instagram, Pinterest, and Facebook for more fun!
Recipe Card 📖

Eggless Red Velvet Whoopie Pies
Equipment
Ingredients
- 2 cups (280 g) all-purpose flour
- 3 tablespoons (23 g) unsweetened natural cocoa powder
- 1 teaspoon baking soda
- 1/2 teaspoon baking powder
- 1/2 teaspoon salt
- 1/2 cup (115 g) unsalted butter, softened
- 1 cup (200 g) brown sugar
- 2 tablespoons (30 g) regular plain yogurt
- 2/3 cup (160 ml) buttermilk, room temperature
- 2 teaspoons (10 ml) pure vanilla extract
- 1 teaspoon gel red food coloring
Cream Cheese Filling:
- 6 oz (170 g) full fat cream cheese, softened
- 1/4 cup (58 g) unsalted butter, softened
- 1 1/2 cups (180 g) confectioners’ sugar, sifted
- 1/2 teaspoon pure vanilla extract
Instructions
- Preheat oven to 350º F (180º C). Line 2 baking sheets with parchment paper or silicone baking mat.
- In a medium bowl, whisk flour, cocoa powder, baking soda, baking powder, and salt together. Set aside.
- Using an electric hand mixer or a stand mixer, cream the butter for 1 minute on medium-high speed until completely smooth and creamy. Add brown sugar, beat until light and fluffy, about 3 – 4 minutes. Beat in yogurt, buttermilk, and vanilla; beat until fully combined. Scrape down the sides and bottom of the bowl as needed.
- Add the dry ingredients to the wet ingredients, then mix on low until combined. Add enough food coloring to achieve a deep red hue (usually about 1 teaspoon gel is enough).
- Spoon or scoop mounds of batter, about 1 1/2 tablespoons each, onto prepared baking sheets– about 3 inches apart. PRO TIP: Use damp fingers to shape the batter into a ball and smooth the tops after scooping it onto the baking sheet.
- Bake the cookies for 10-12 minutes or until centers appear set, and the tops spring back when lightly touched. Allow cooling completely before sandwiching.
Make the Filling:
- In a large bowl, beat the cream cheese with a hand-held or stand mixer for 1 minute on high speed, until completely smooth and creamy. Add butter; beat until combined. Add the confectioners’ sugar and vanilla and beat on medium-high speed until combined and creamy.
- PRO TIP: If the frosting is not stiff enough, transfer the frosting into a piping bag or a gallon-sized zip lock bag and then place it in the refrigerator for 30 minutes.
Assemble:
- Pair the cookies up based on their size. Pipe or spread cream cheese filling onto the flat side of one cookie and sandwich with the other. Repeat with the remaining cookies. NOTE: You can spread the filling onto the flat side of the cookie with a knife or you can use a piping tip. I use a piping bag fitted with an Ateco #808 piping tip.
- Measure the ingredients correctly. I highly recommend using a kitchen scale.
- Preheat the oven for at least 15 minutes before getting started to give it plenty of time to reach the ideal recipe temperature.
- Don’t overmix the batter. Mix just until you’ve evenly distributed the ingredients throughout the batter.
- Bake the whoopie pies as soon as the batter is ready.
- I like to use a medium cookie scoop to portion each cookie; it should be about 1 1/2 tablespoons of batter each.
- Use damp fingers to shape the batter into a ball and smooth the tops after scooping it onto the baking sheet.
- Don’t open the oven door until the whoopie pies have set. Leave the oven closed until the minimum time is stated in the recipe.
- Every oven is different, so baking times always have to be taken with a grain of salt. Oven thermostats can be wildly off, and that will all affect baking time, so keep an eye on yours. The whoopie pies are done when centers appear set, and the tops spring back when lightly touched.
Nutrition
Eggless Baking Frequently Asked Questions
You’ve asked, and I’ve answered! Read on for a handful of answers to the most frequently asked questions about eggless baking.
This recipe was originally published in January 2021. The recipe remains the same, but more notes, tips, photos, and information have been added to the post in December 2022 to make it as helpful as possible!
Leave a Reply