
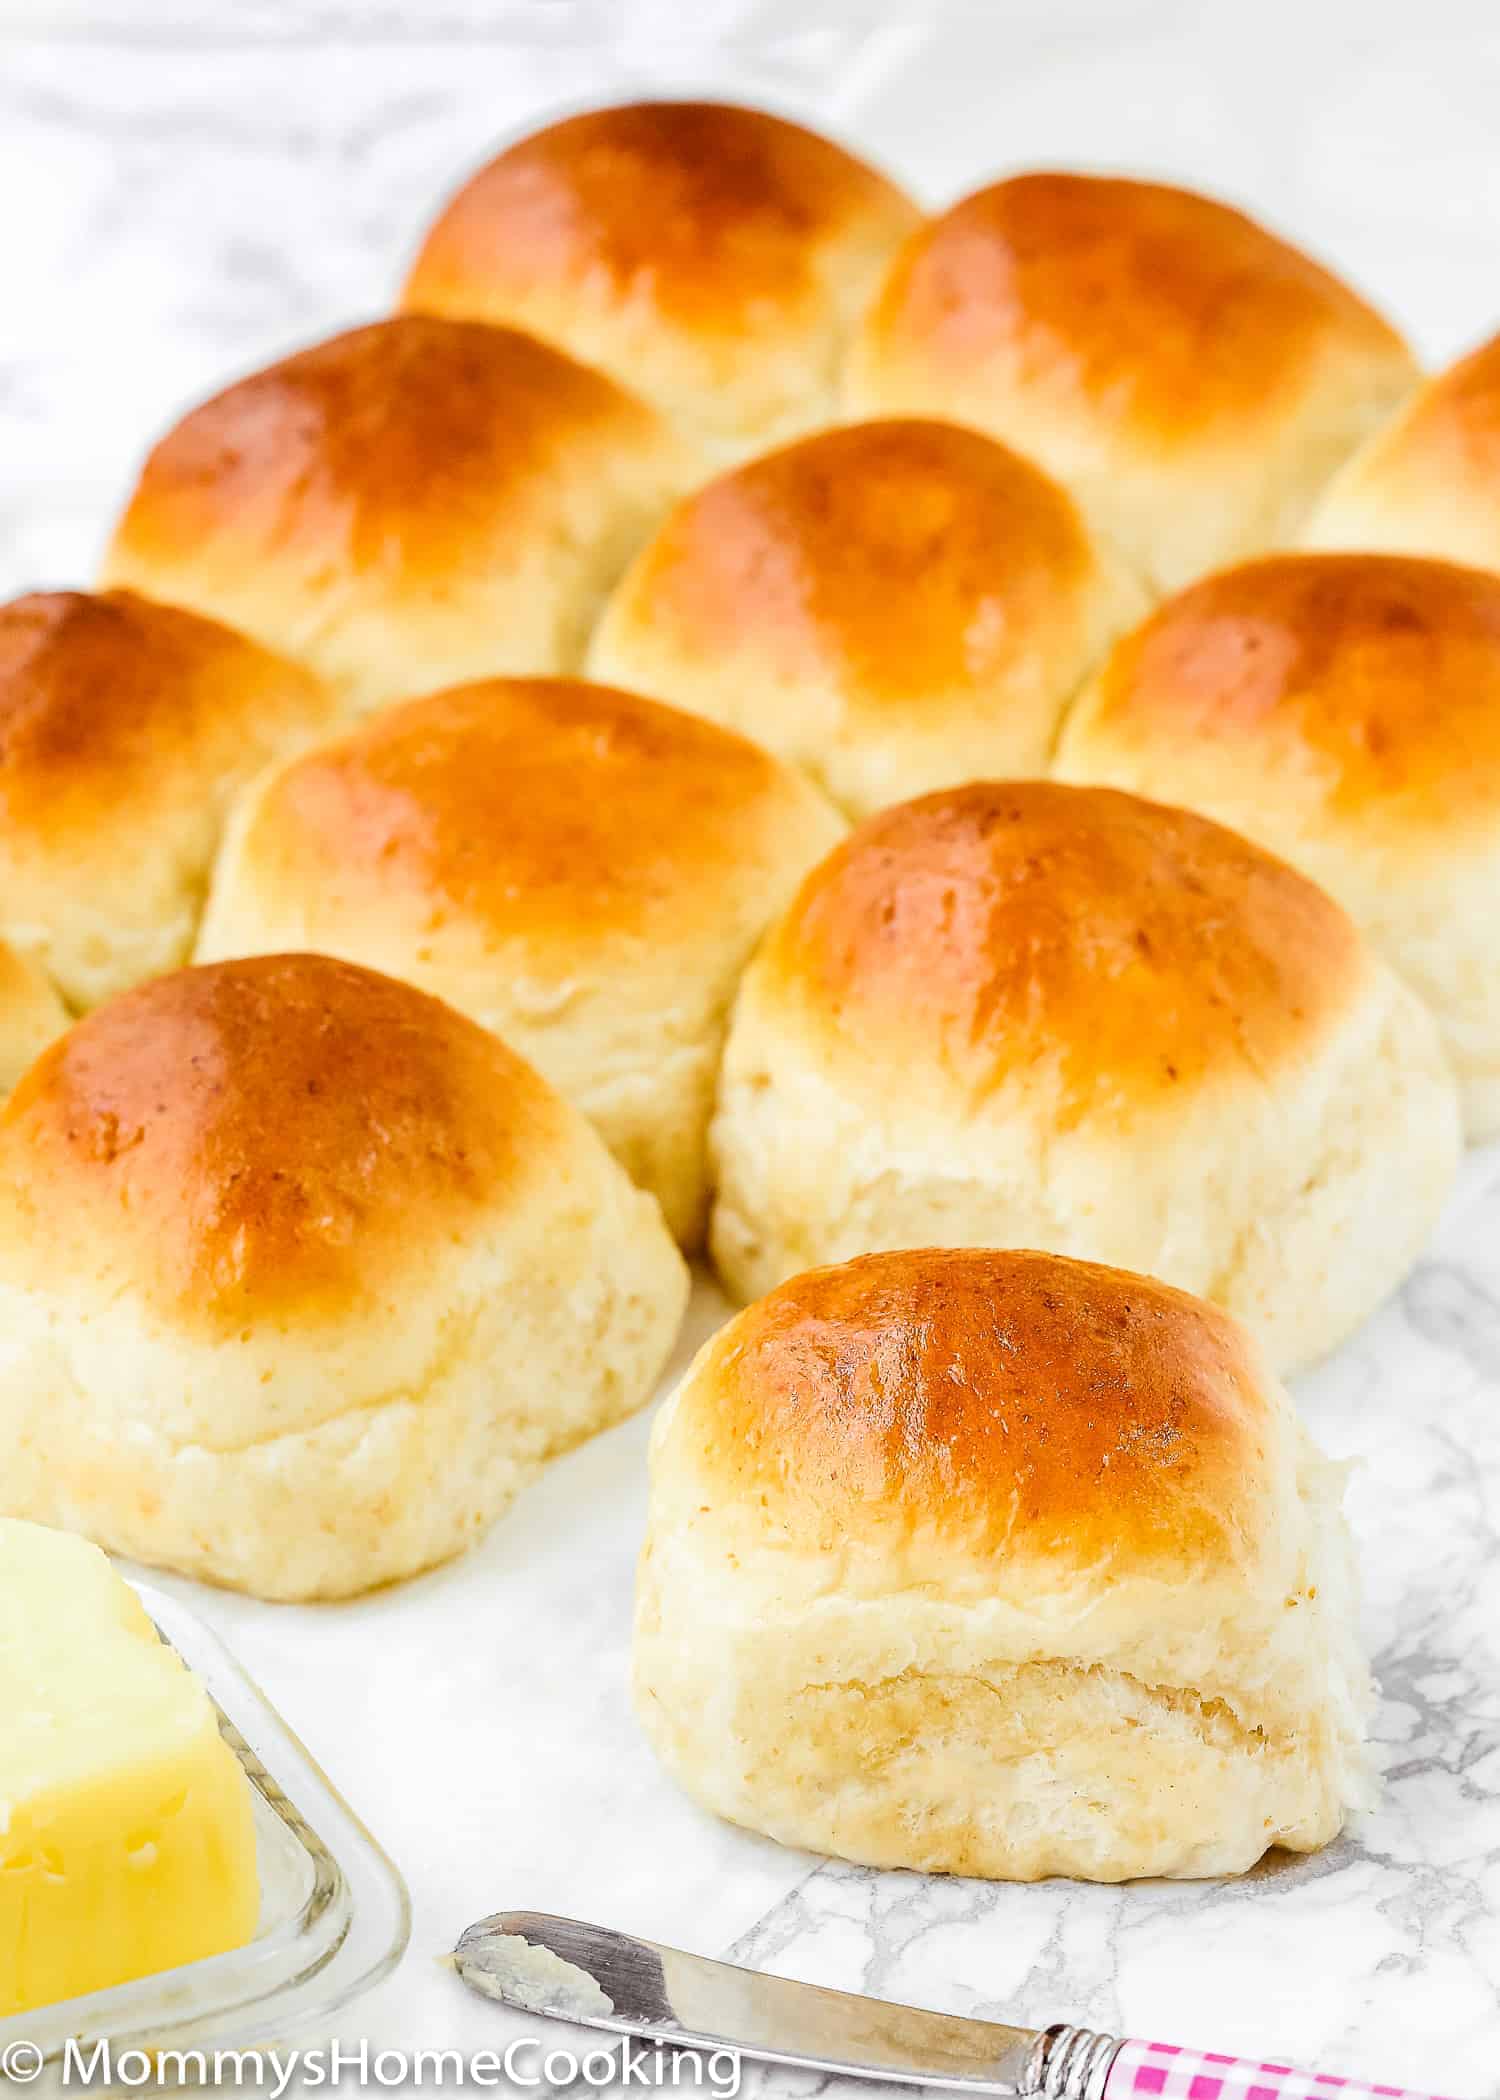
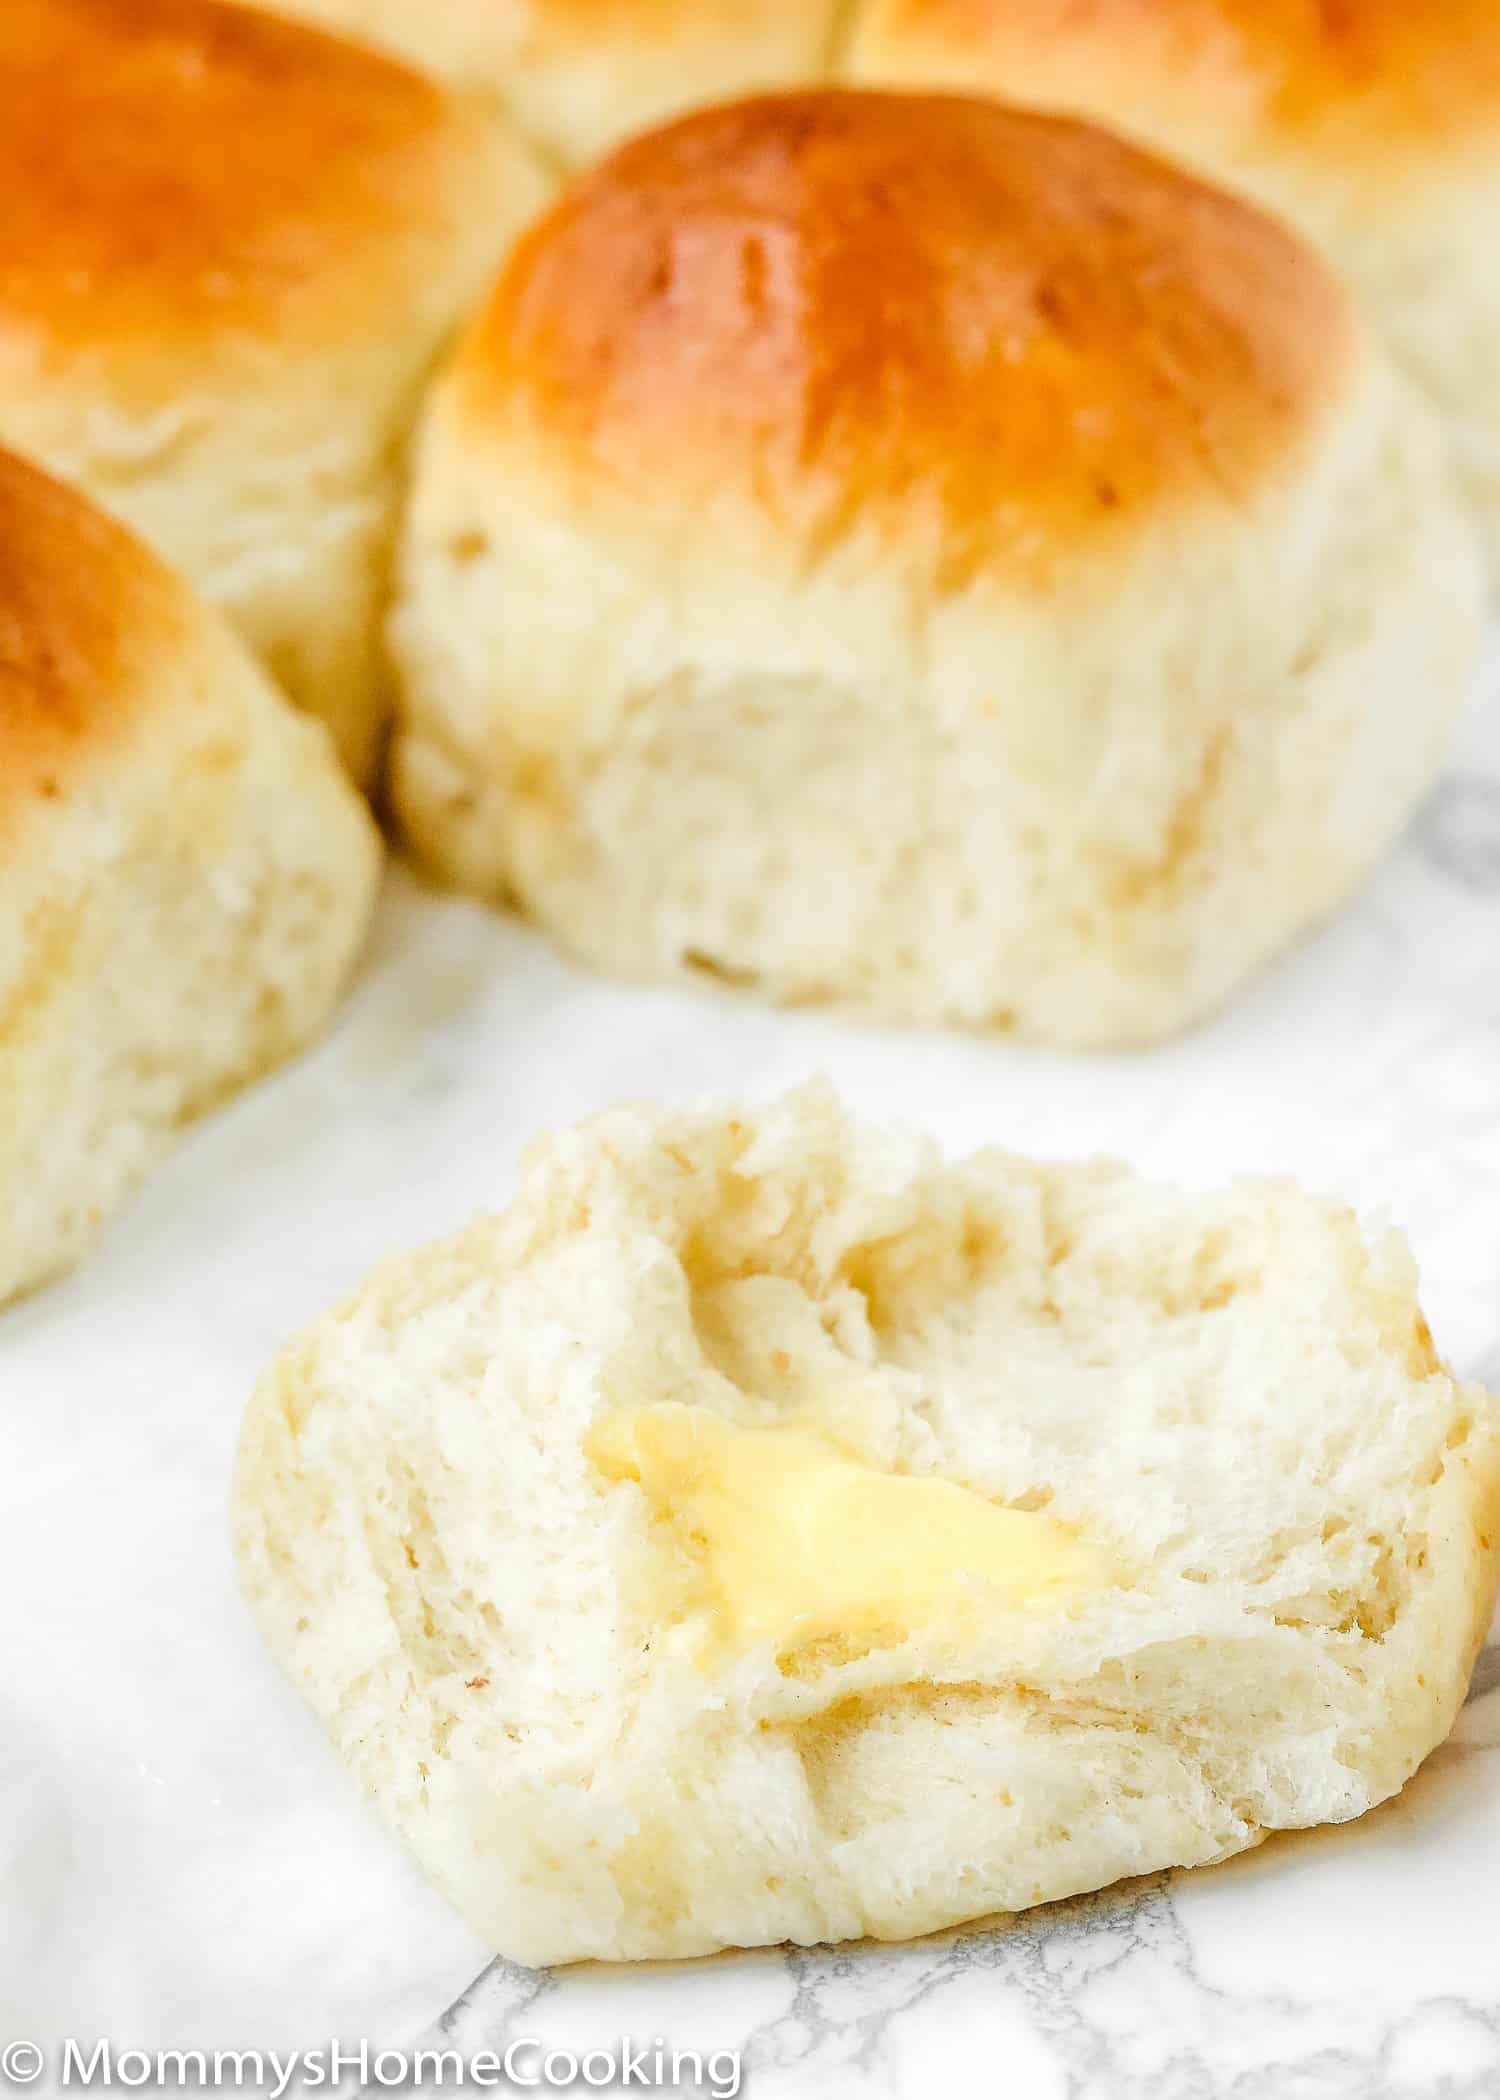
These Soft Eggless Dinner Rolls are fluffy, buttery, straightforward, and delicious! They’re super easy to make. The perfect addition to any dinner menu. The recipe includes step-by-step photos and lots of tips.
A Soft & Fluffy Egg-Free Dinner Roll Recipe
These Soft Eggless Dinner Rolls are SO delicious and easy to make! I know there are tons of frozen and canned bread out there, and don’t get me wrong, I use them very often since they are super convenient. But I think there is nothing like the smell of fresh homemade bread out of the oven.
Seriously…when these eggless rolls are in the oven, the whole kitchen smells heavenly. And once they’re out… everyone makes their way into the kitchen to get a roll to try!
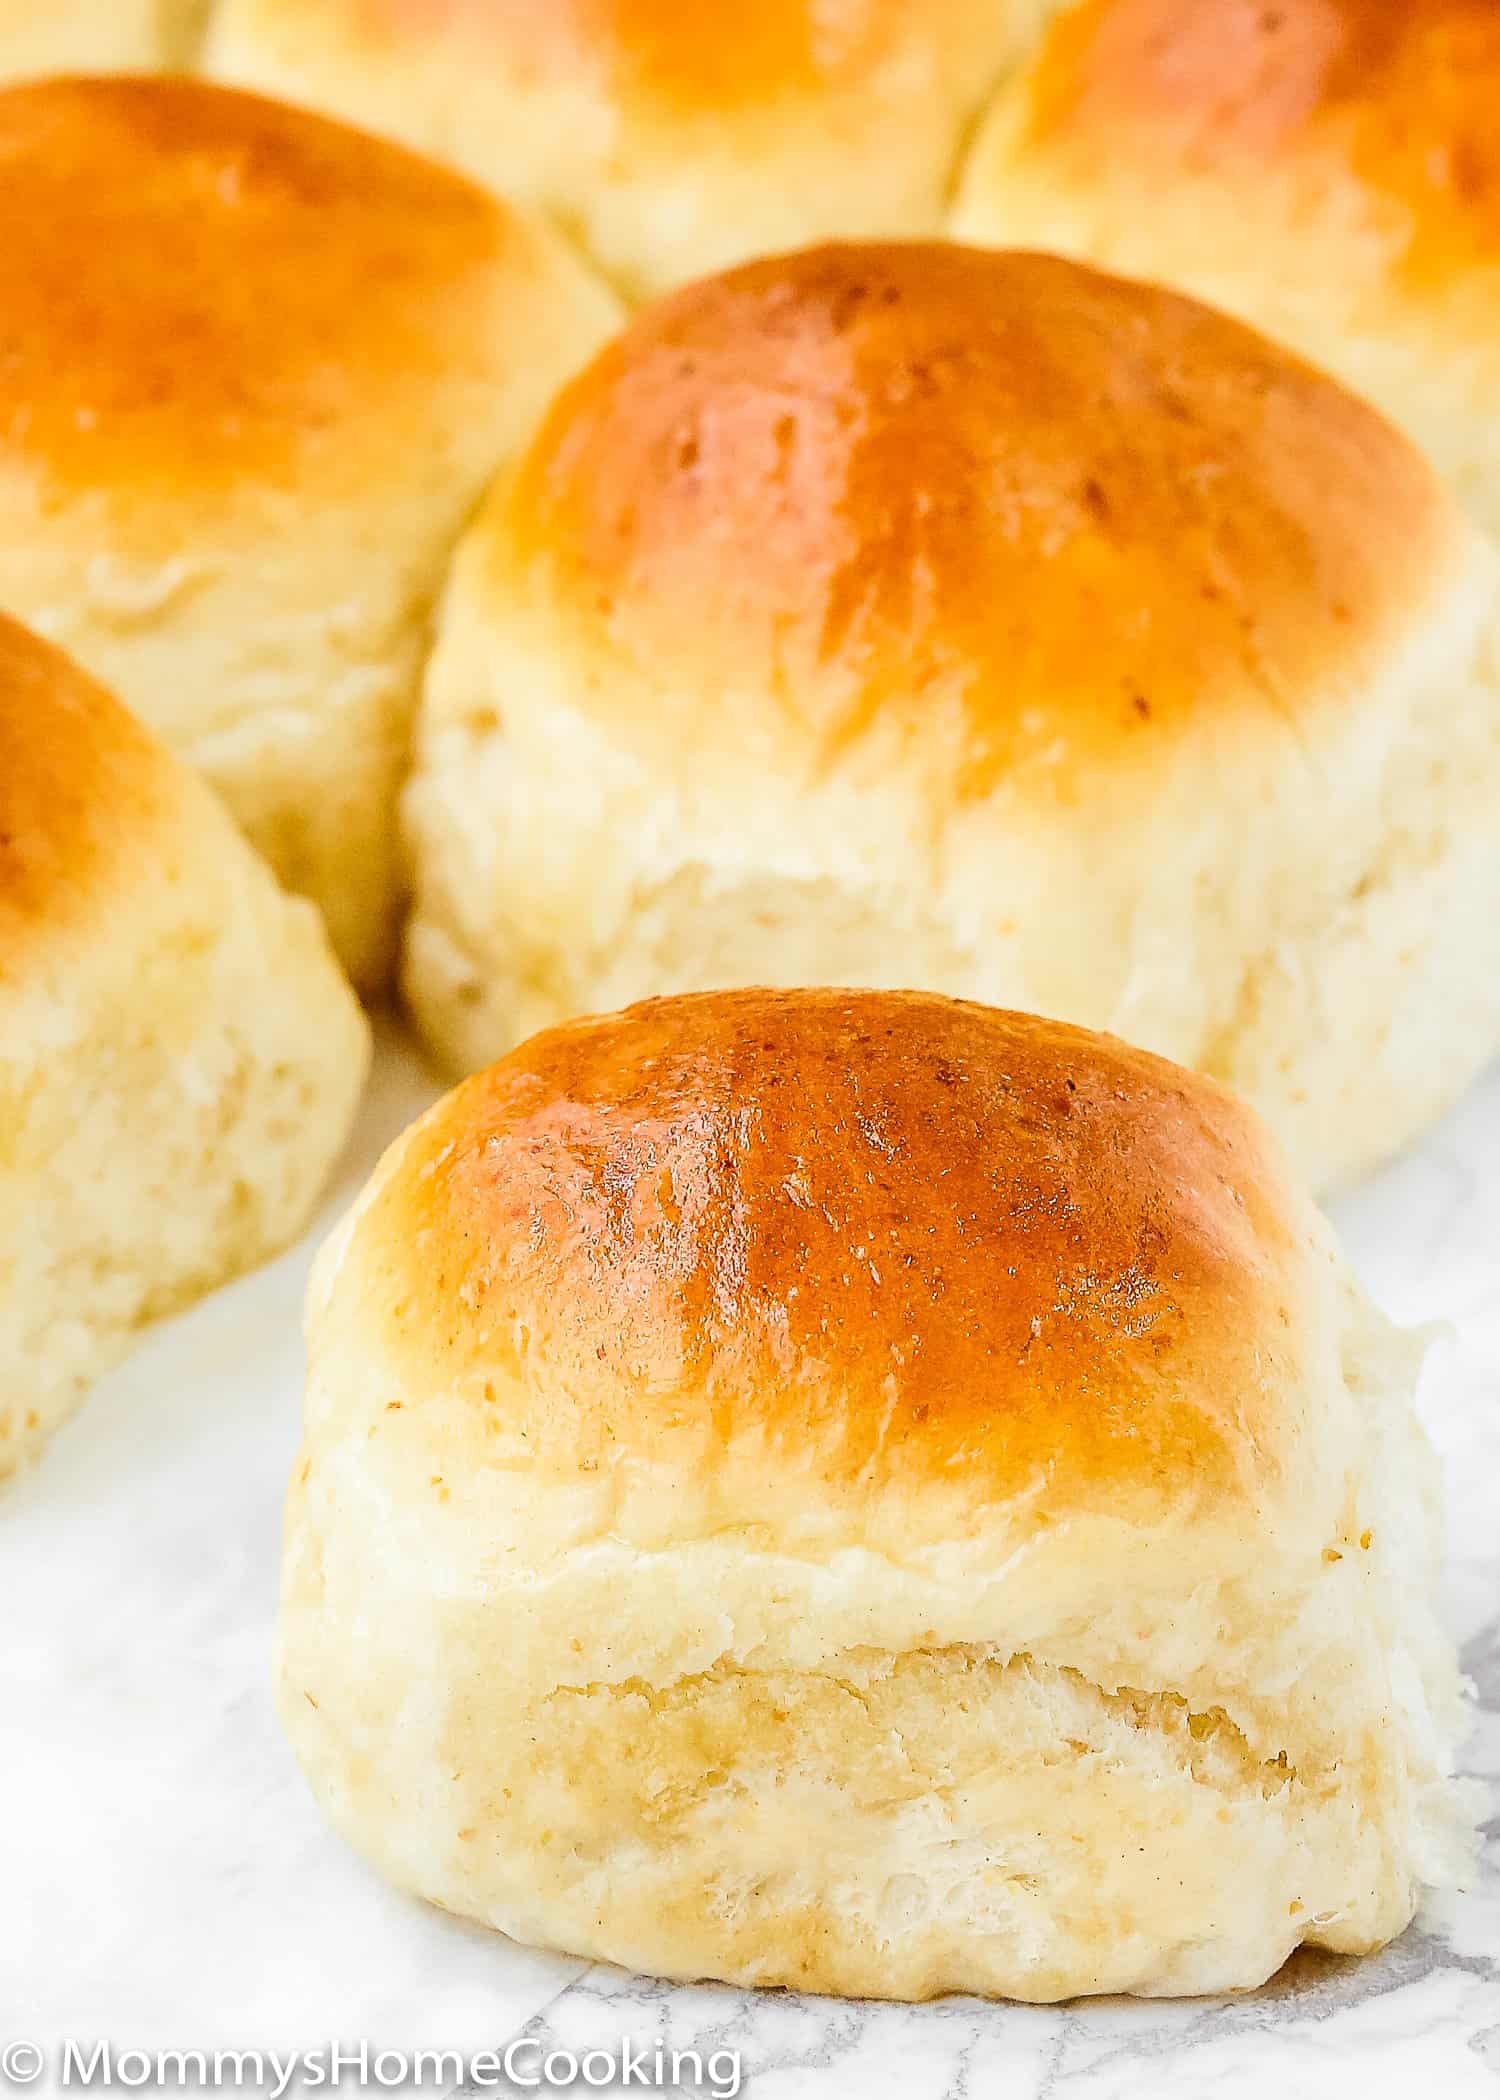
They’re so fluffy, buttery, and soft. Despite being eggless, these rolls have a golden brown exterior and a pillowy center. Even better, they’re so easy to make that anyone can make this recipe!
These soft eggless dinner rolls are a MUST at family gatherings, holiday dinners, or just any occasion.
They are, of course, fantastic slathered with butter (my personal favorite) but are also great for dipping in soups, chili, and mopping up gravy and/or sauce.

Eggless Dinner Roll Ingredients & Notes
Amounts are included in the printable recipe below (scroll down). Most of these items you probably already have in your pantry, which is why it will be easy on the budget! Here’s what you’ll need:
- Water: You will need warm water to activate the yeast (if using active yeast), and cold water to make the flax eggs.
- Sugar: Regular white granulated sugar o caster sugar.
- Yeast: You can use active yeast or instant yeast. If using instant yeast, you don’t need to activate it, just mix it with the dry ingredients.
- Golden flax meal: In this recipe, I used golden flax seed meal as an egg replacement. You can substitute the flax eggs for 90 ml (6 tablespoons) of evaporated milk.
- Flour: When available, I use bread flour, but this recipe will work fine with all-purpose flour too.
- Salt: I prefer kosher or sea salt. If you only have table salt handy, I recommend reducing the amount to half.
- Milk: For baking, I like to use whole milk. However, you can use any milk you have handy.
- Butter: I use unsalted butter, but if you only have salted butter handy, you can use it. In this case, skip the salt called in the recipe.
Step By Step Recipe Photo Tutorial
Detailed instructions are included in the printable recipe below (scroll down).
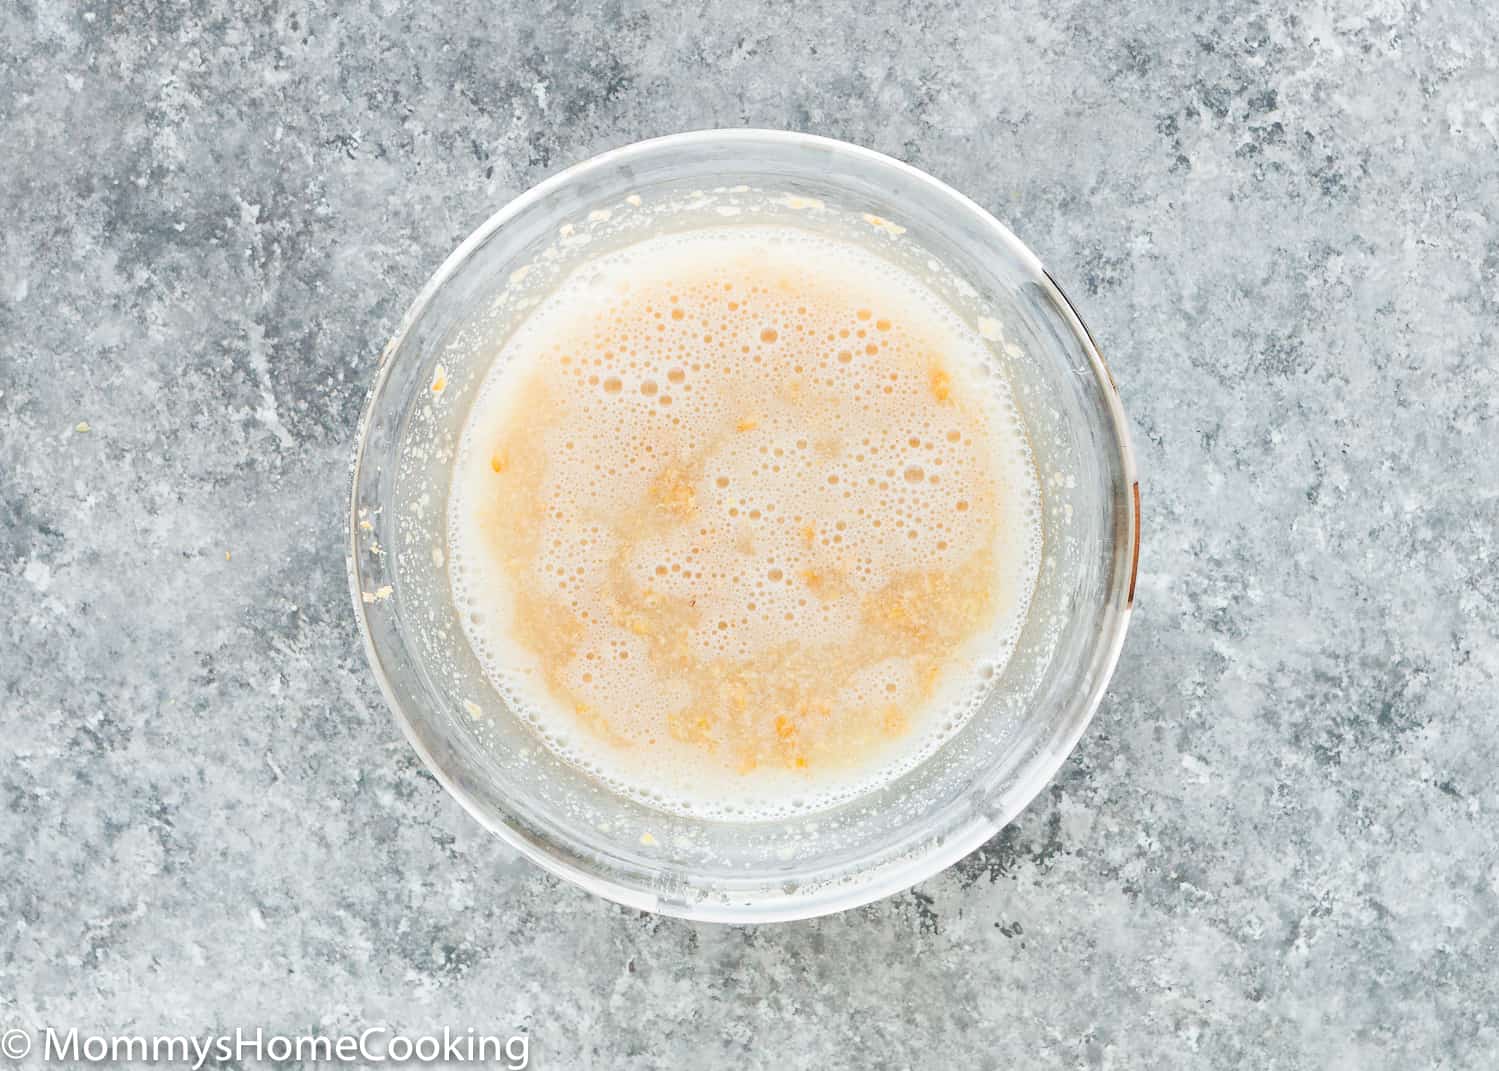
1 – Bloom Your Yeast (if using active yeast)
Place warm water and sugar in a small bowl; mix to combine. Sprinkle with yeast, and let stand until foamy, about 5 – 7 minutes. Note: If using instant yeast, you can omit this step, and just mix the yeast with the dry ingredients.
2 – Make The Flax Eggs
To make the 2 flax eggs: Mix 6 tablespoons of cold water and 2 tablespoons of golden flax meal in a small bowl until well combined. Let it rest for 5 – 10 minutes to thicken.
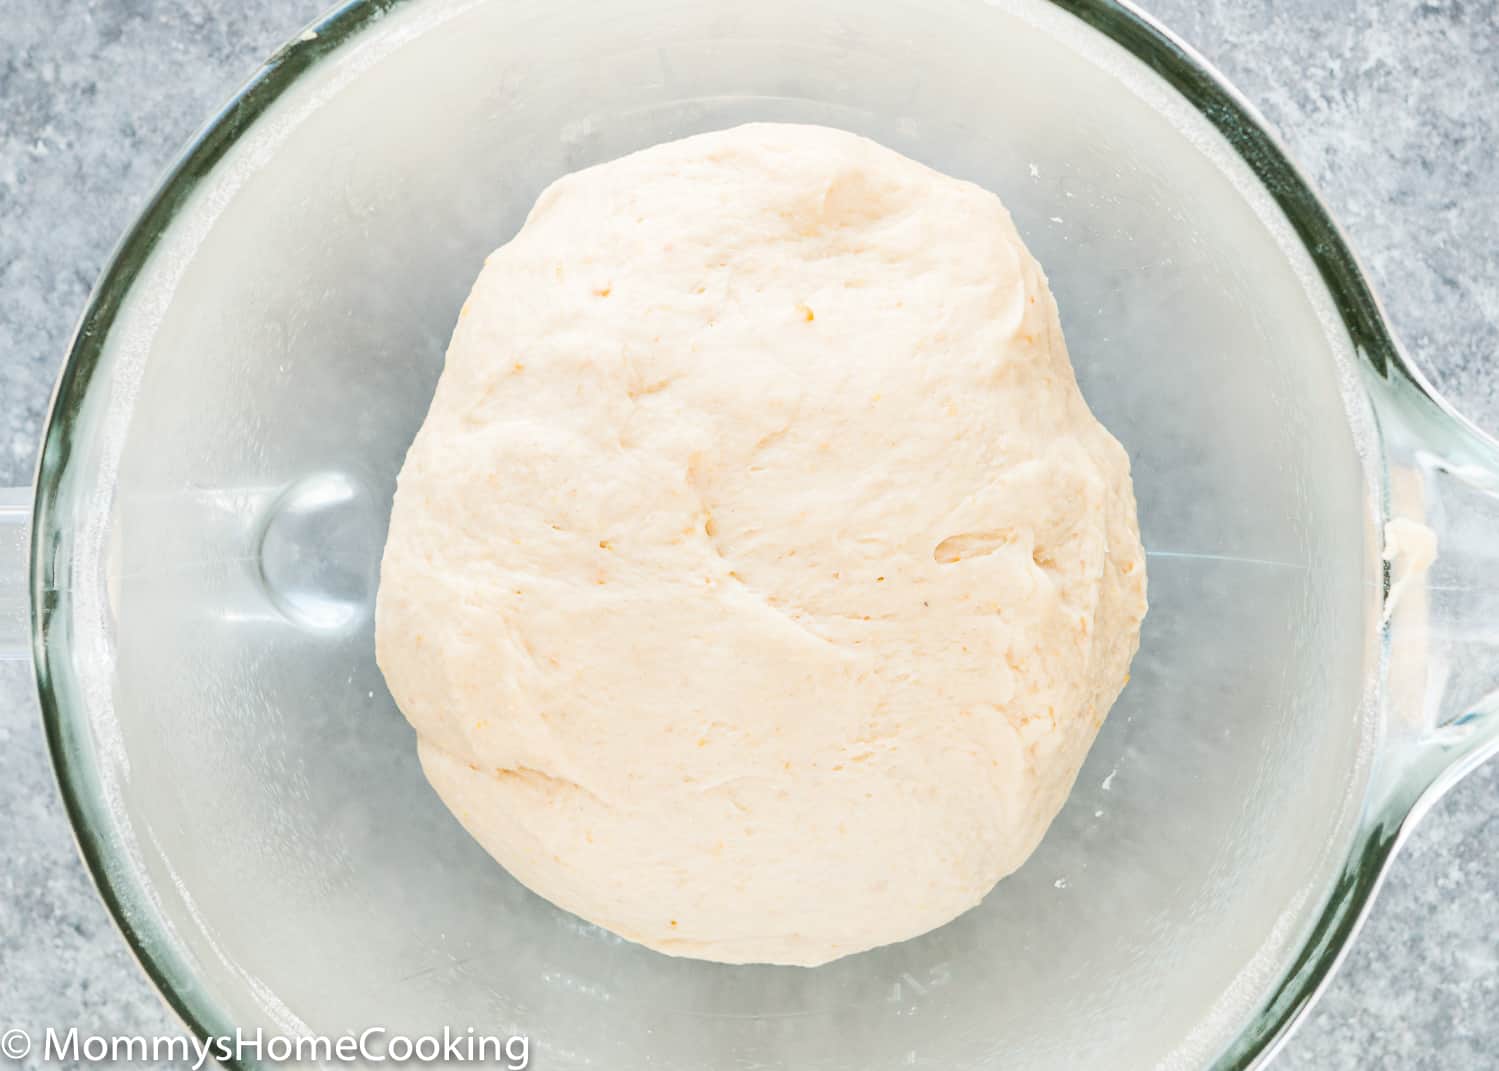
3 – Make the Egg-Free Bread Dough
Place all the dry ingredients together in the bowl of your stand mixer; mix to combine.
Pro Tip: If you do not own a stand mixer, you can do this in a large mixing bowl; just mix the dough together with a large wooden spoon/rubber spatula. It will take a bit of arm muscle. A hand mixer could work, but mixing by hand with a wooden spoon or rubber spatula is a better choice than a hand mixer, in my opinion, since the dough recurrently gets stuck in the beaters.
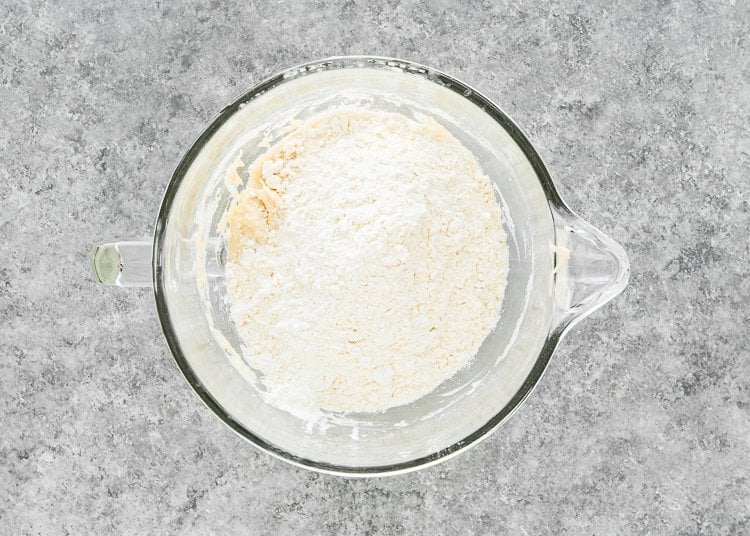
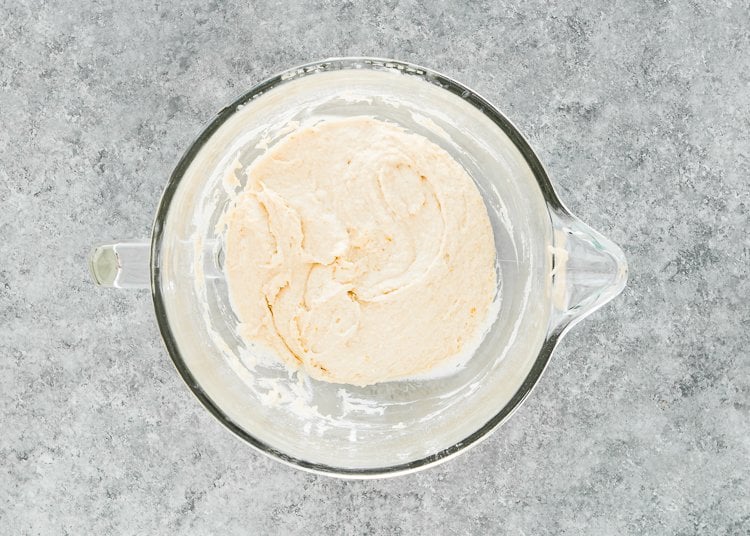
Make a well in the center. Add wet ingredients and mix until all the ingredients are well combined, and the dough comes together in a ball, about 2-3 minutes. Continue mixing for about 2 – 3 more minutes to knead the dough until smooth and bounces back when pressed.
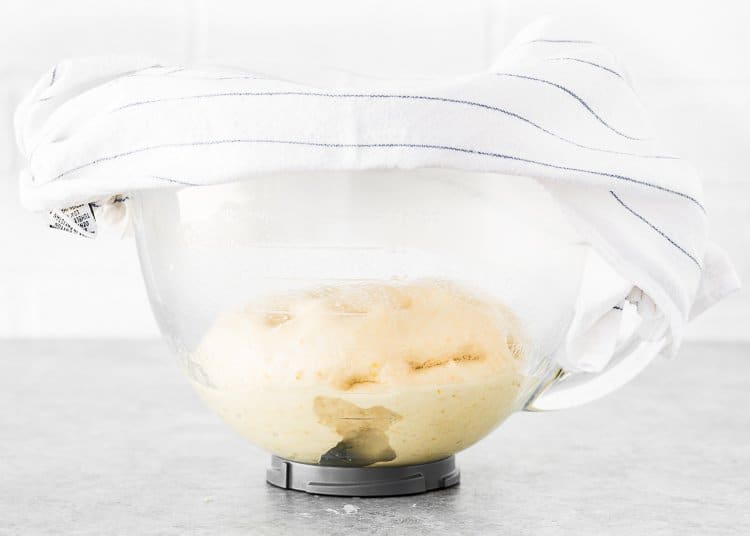
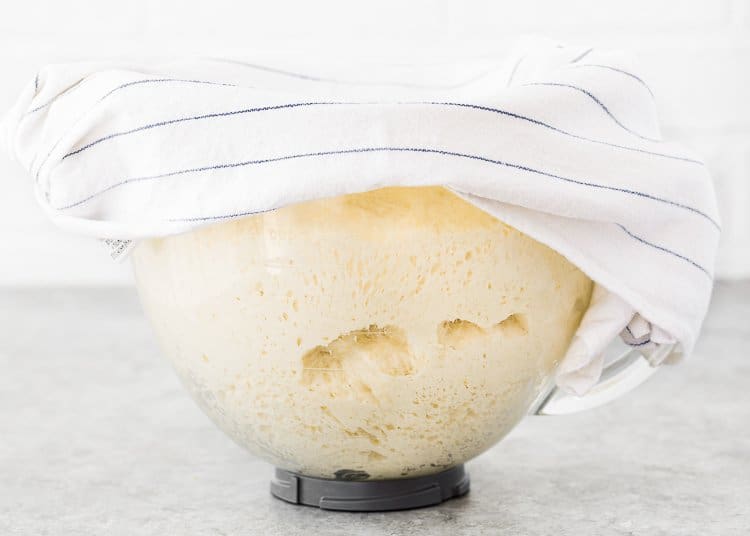
4 – Let the Dough Rise
Place in an oiled bowl, cover with plastic wrap, and place in a warm place to rise until doubled in size, about 1 – 2 hours.
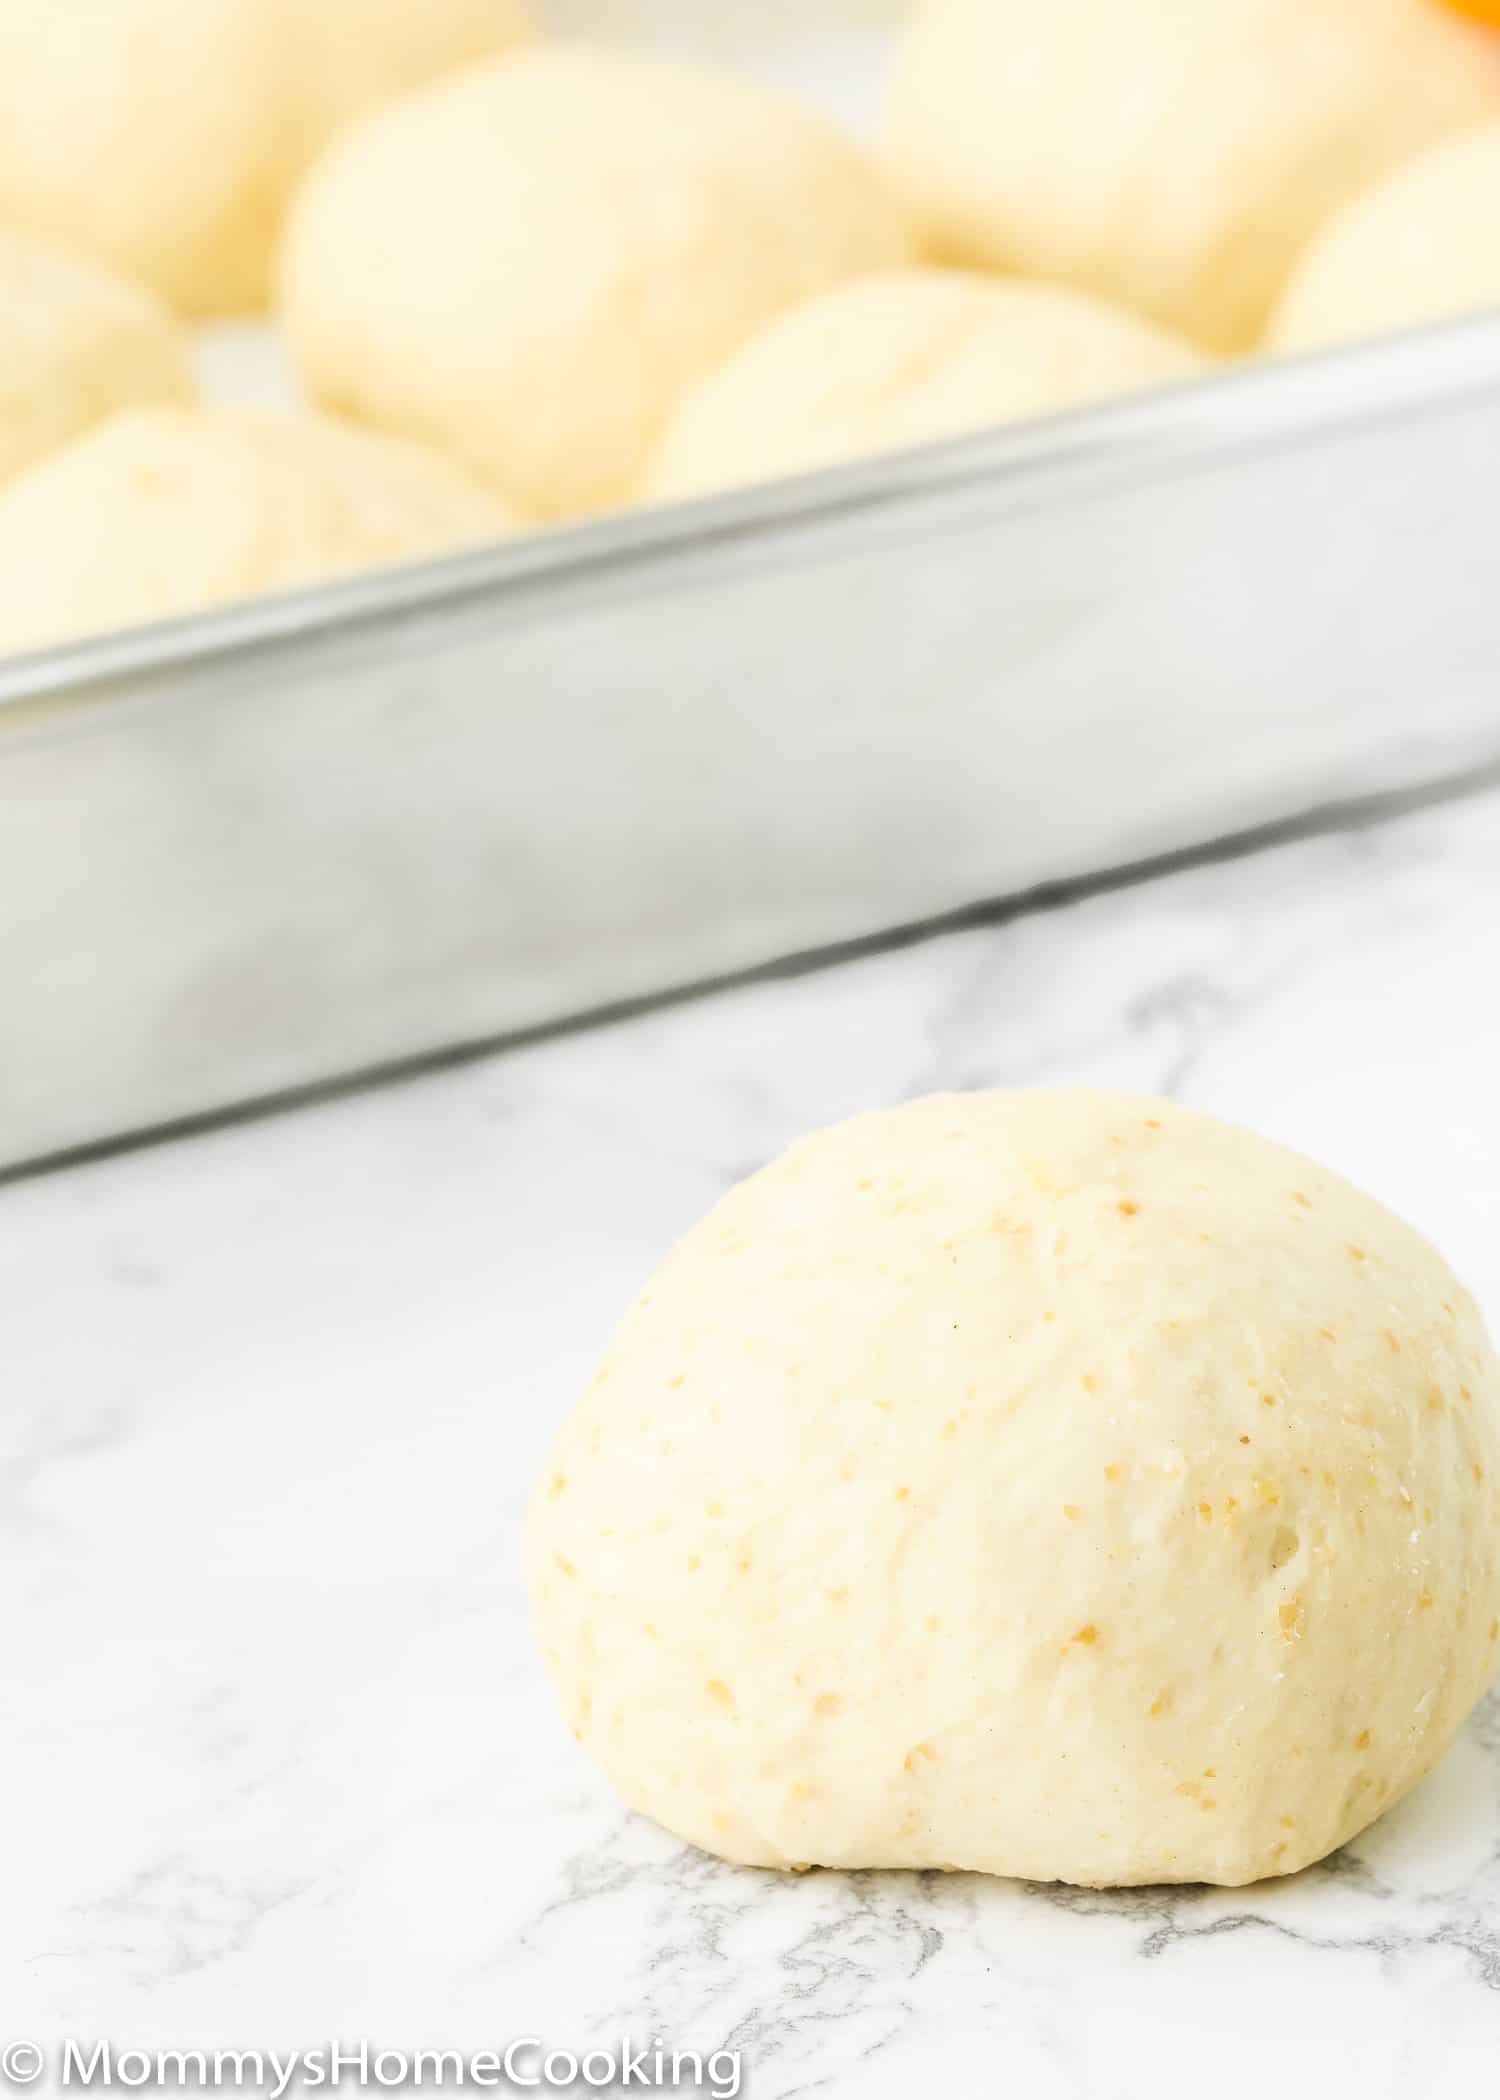
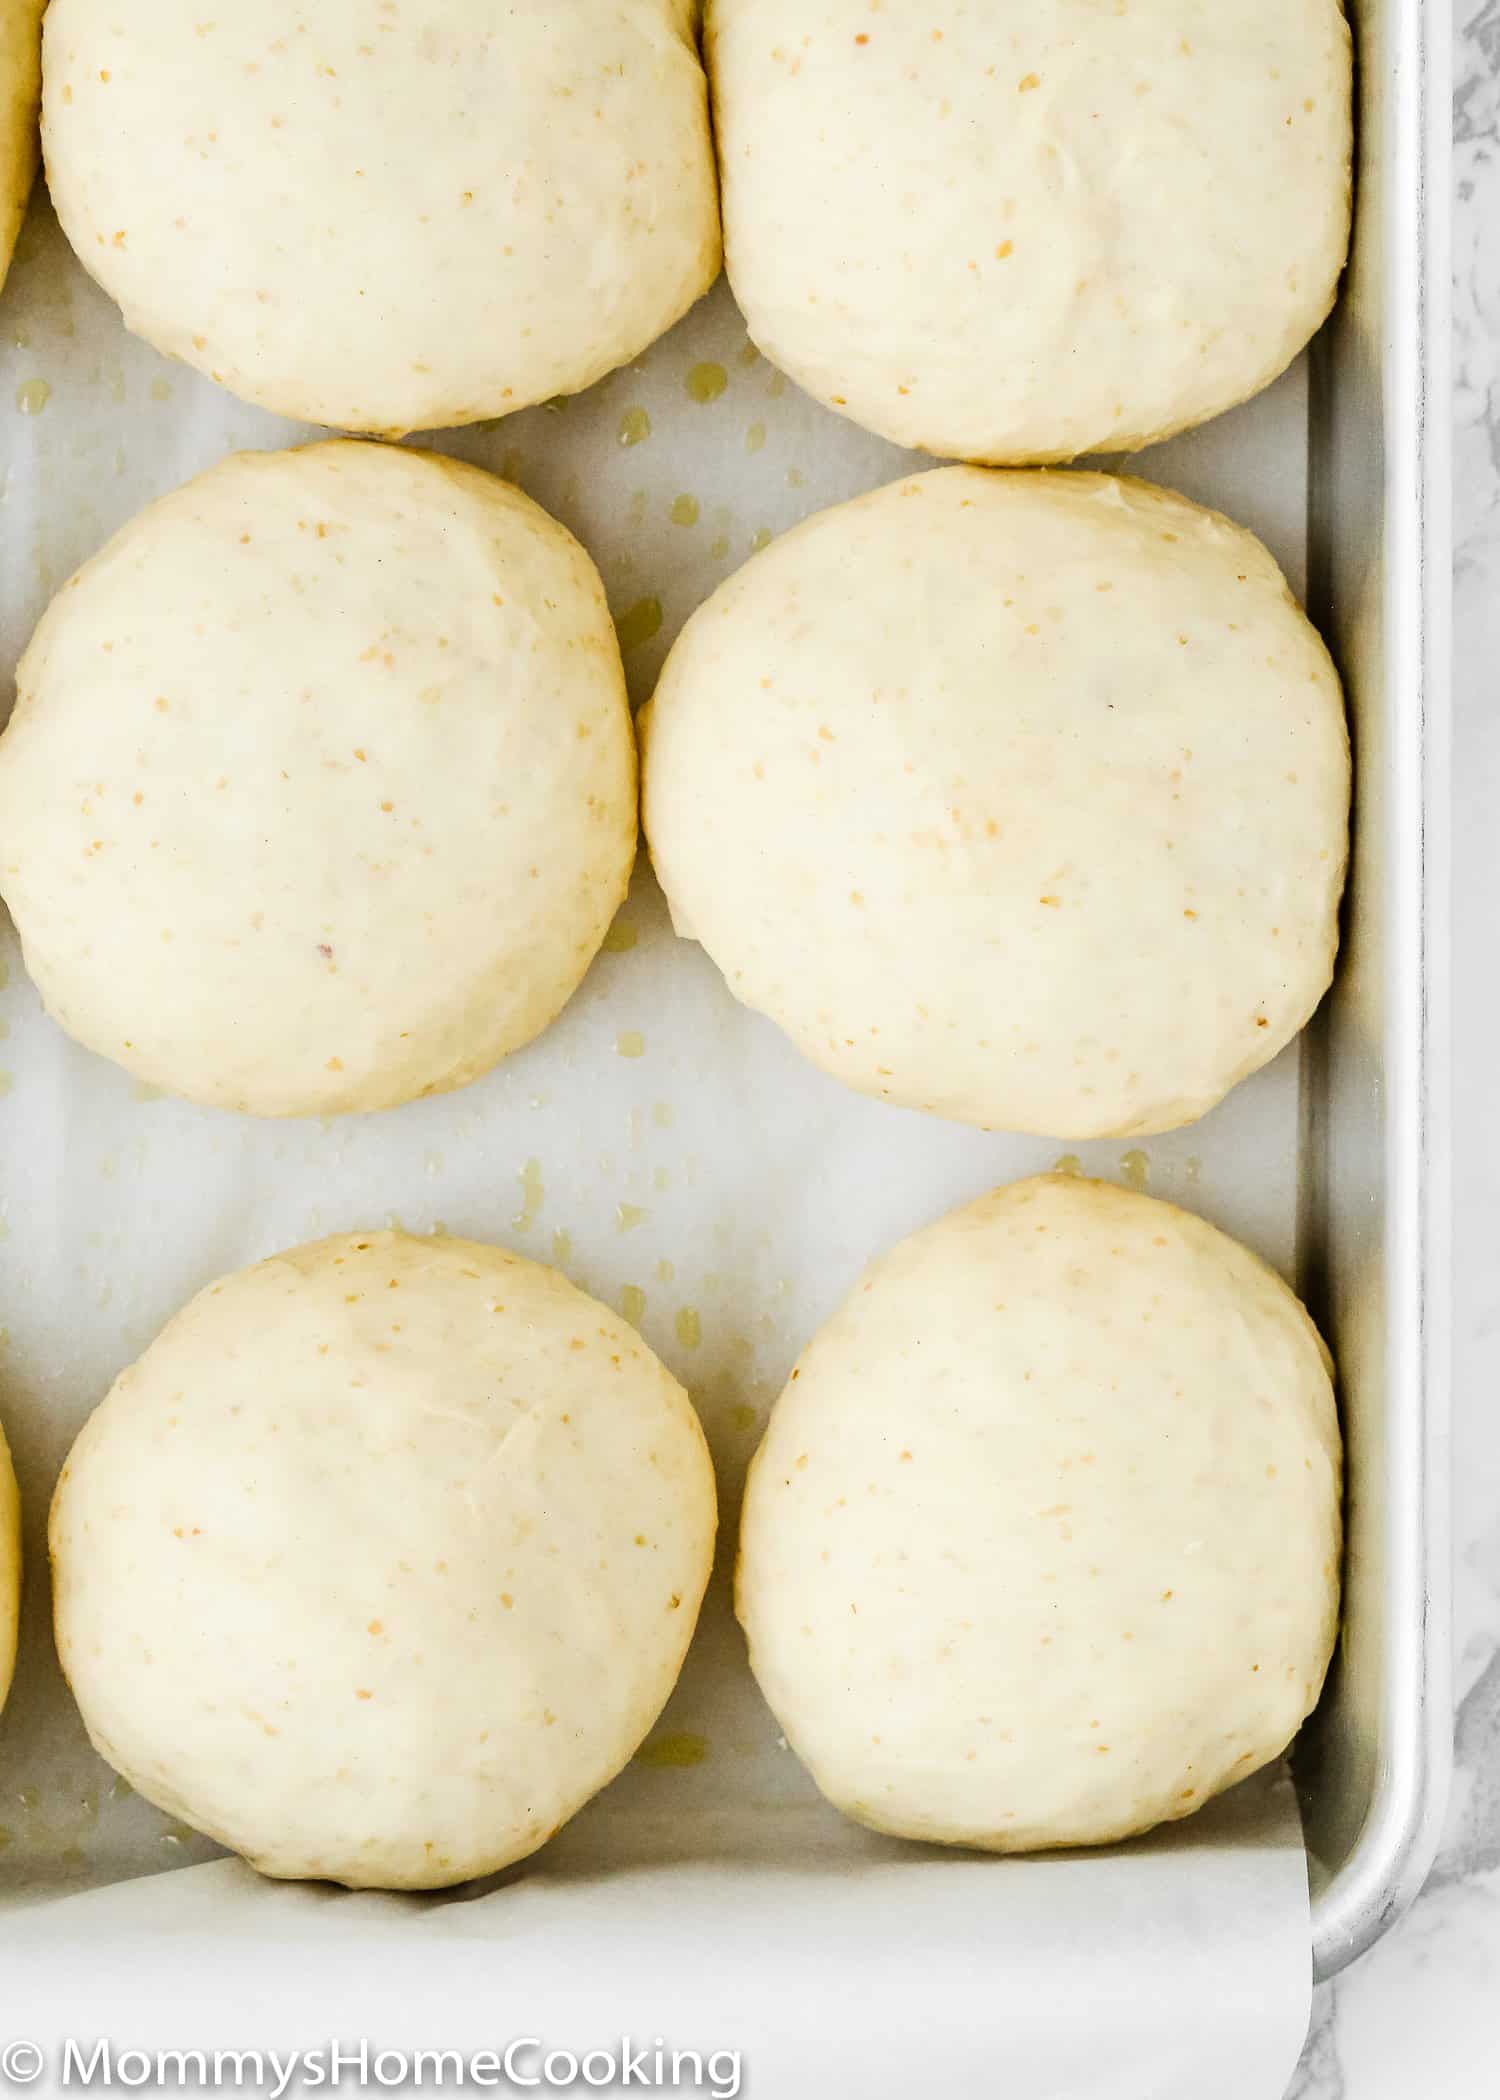
5 – Form the Rolls
Turn the risen dough out onto your counter, then press down and divide into 12 equal pieces. Take each piece of dough and roll it into a smooth ball. Place the ball seam side down in the prepared baking pan.
Pro Tip: To form a nice and smooth roll, I recommend cupping the ball with your hands and moving in a tight circular motion. This will pull the edge down and in creating a nice roll.
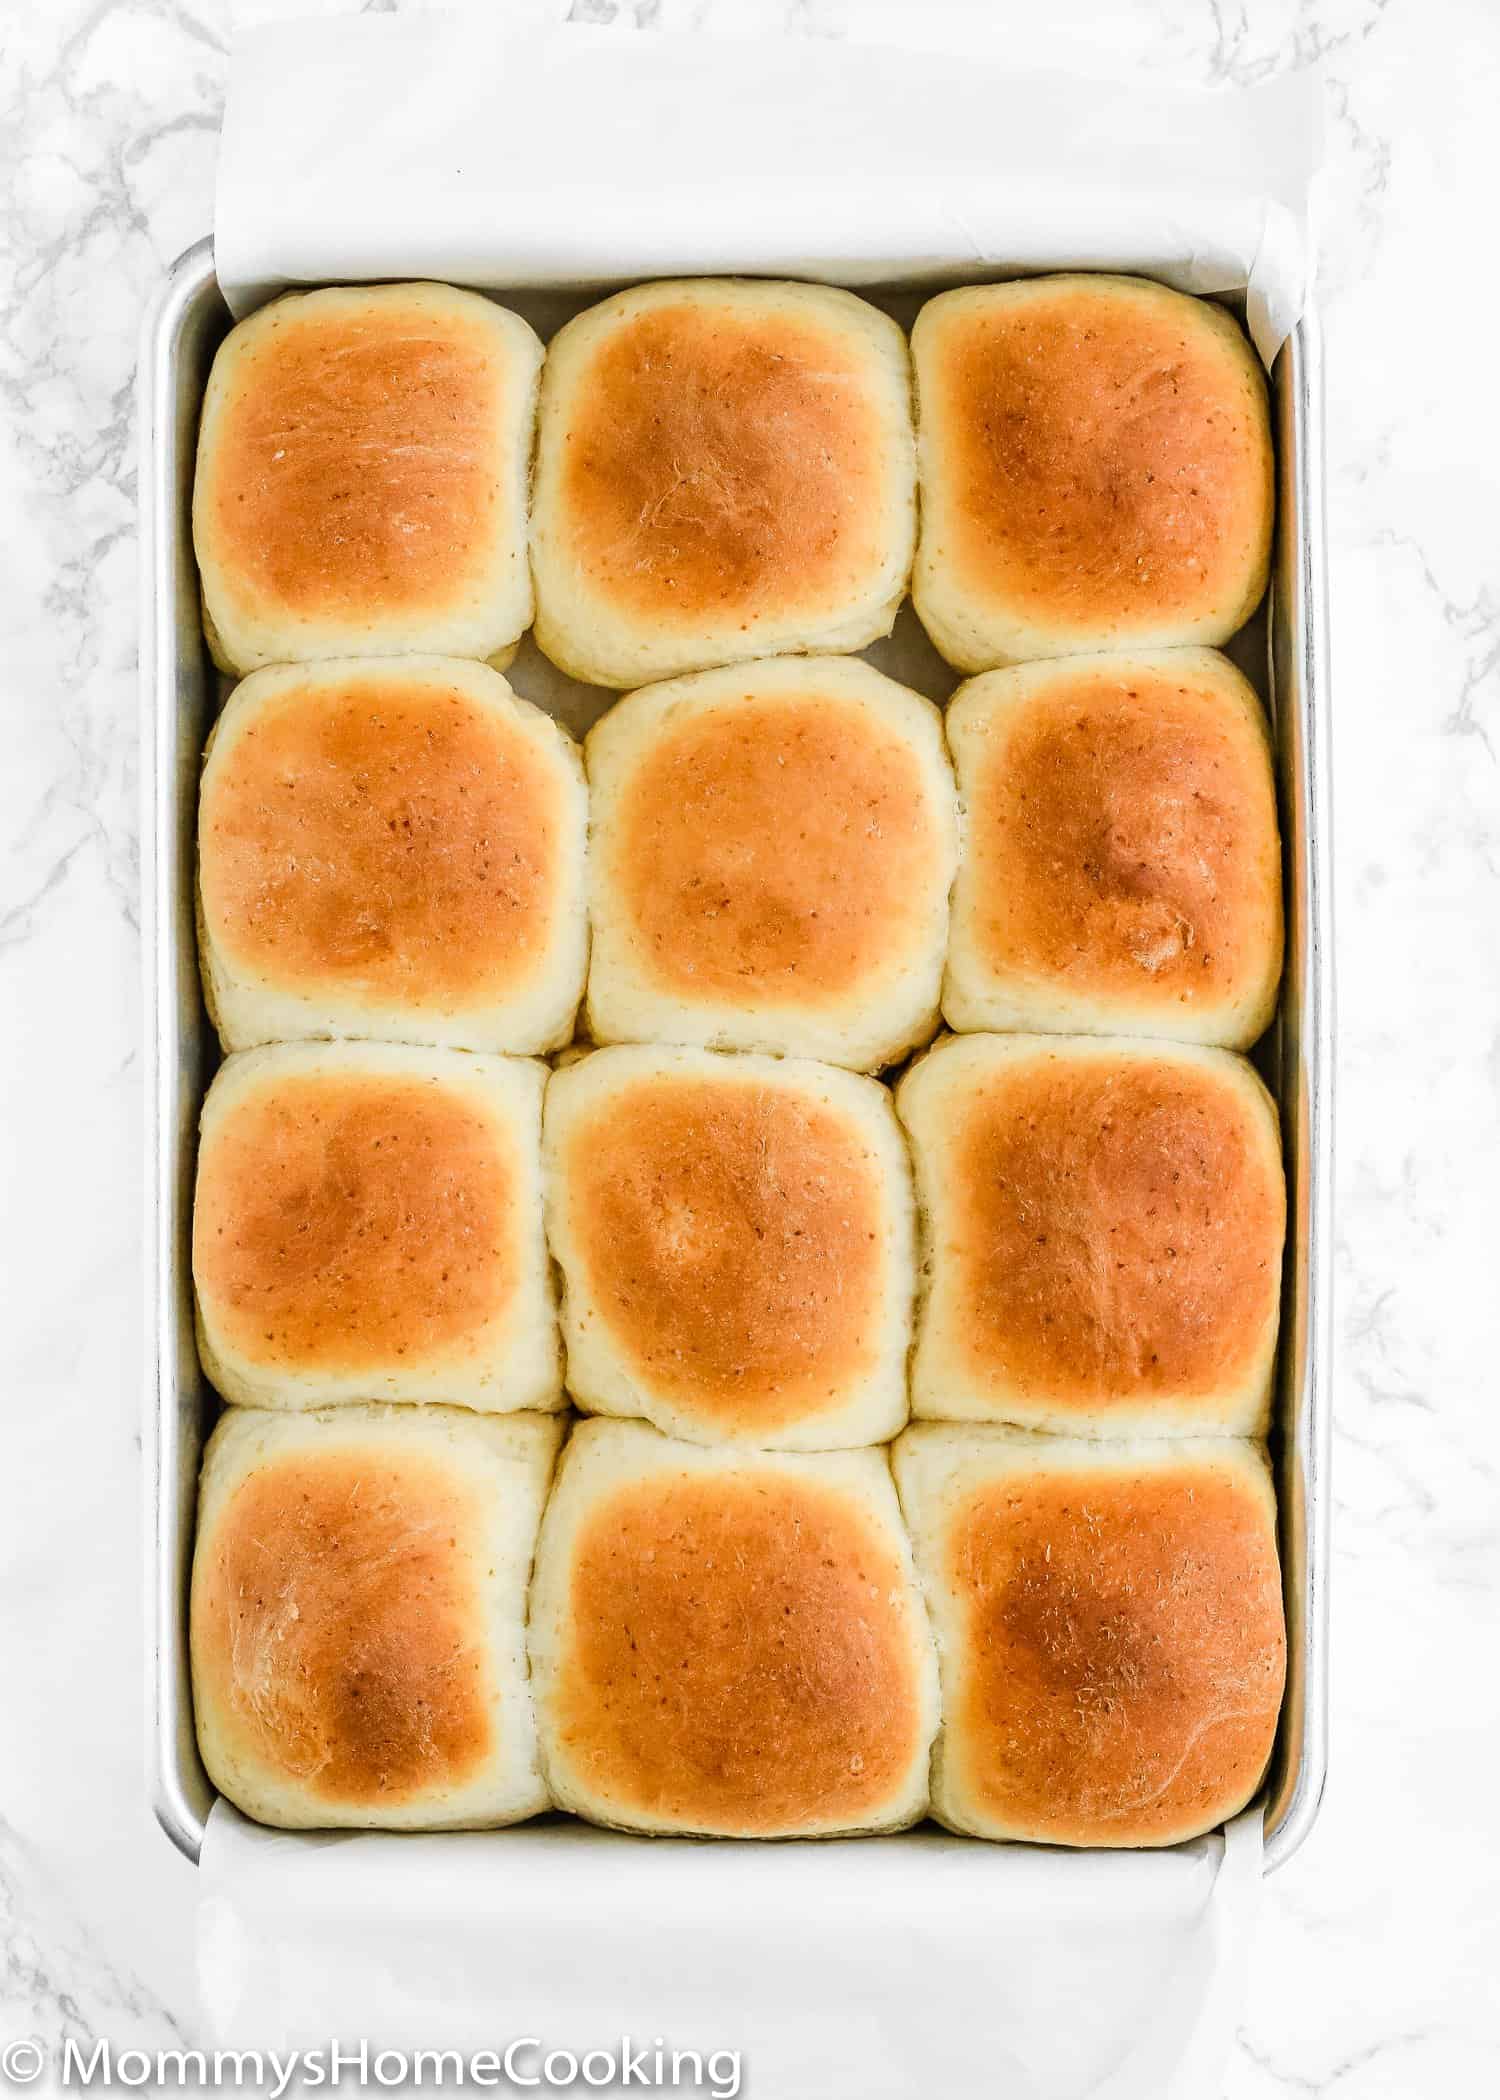
5 – Let the Rolls Rise Again
Cover the baking pan with a kitchen towel so that the formed buns won’t dry out. Return pan to warm place and leave for 45 – 60 min, or until the dough has risen and almost double in volume.
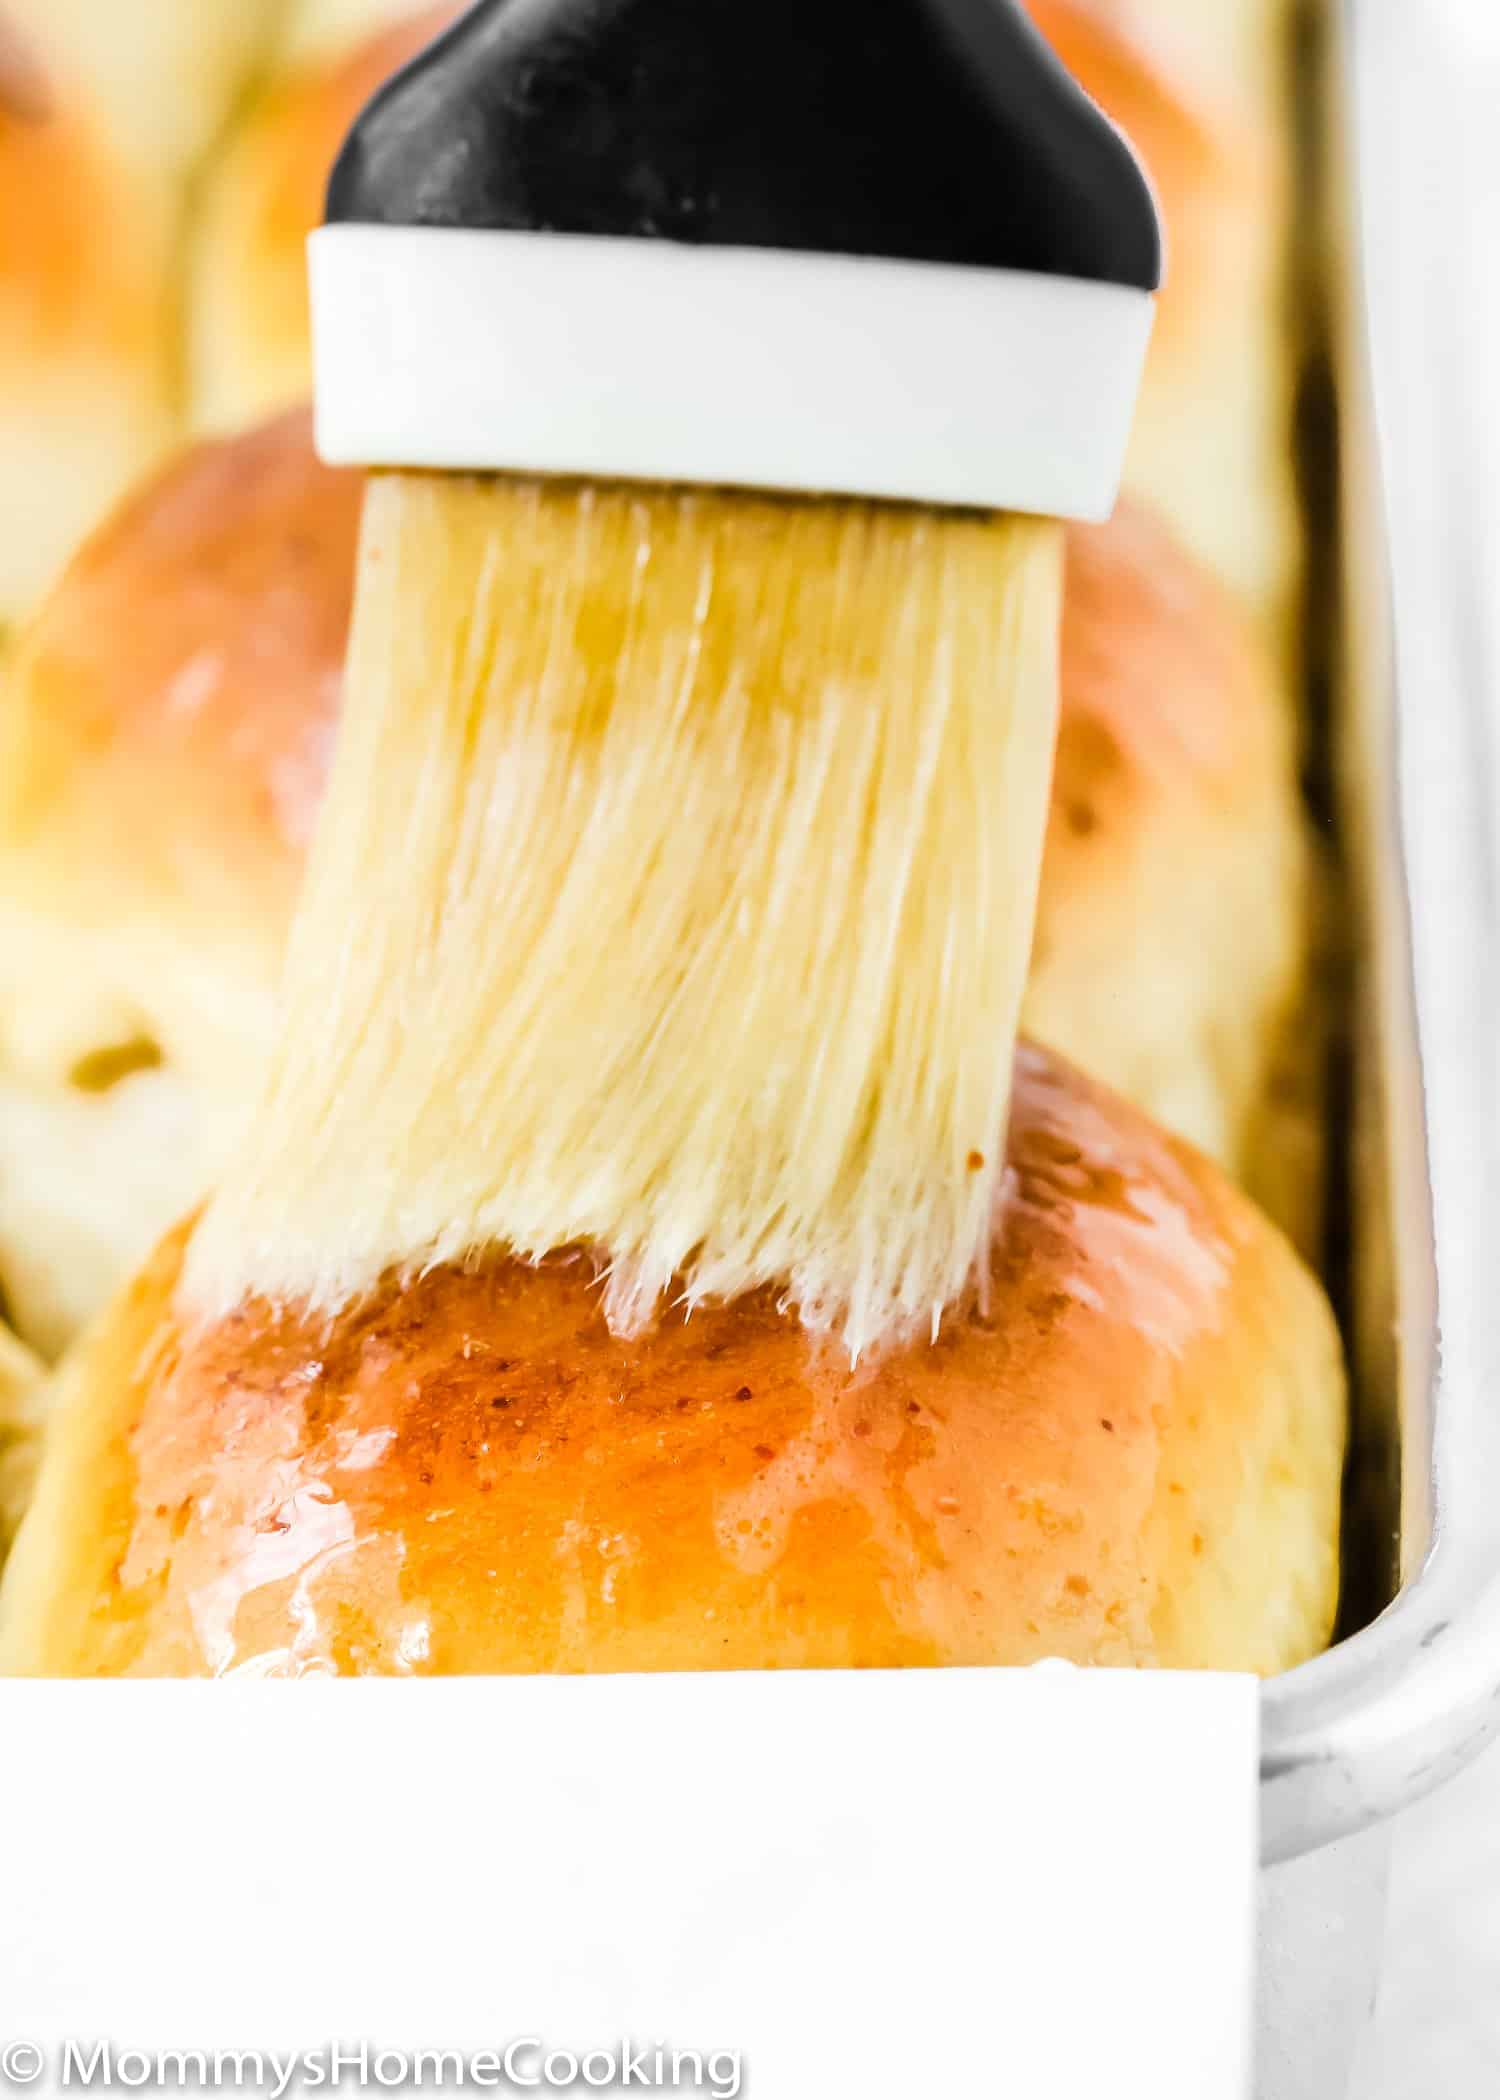
6 – Bake & Enjoy
Once the rolls have risen, Preheat the oven and then bake them for about 15 – 20 minutes or until golden brown. Brush them with melted butter immediately when they come out of the oven.
Recipe Tips
If Using Active Yeast. It’s important to have warm water to bloom your yeast in. If your water is too hot, then your yeast will die. If your water is too cold, then your yeast won’t activate. The ideal temperature of the water is 68° to 81°F. The yeast should begin to foam after 5 to 8 minutes. You will be able to see creamy foam and bubbles on the surface of the water.
Bread flour has more protein content than all-purpose, which helps with gluten development, and it is recommended if you want to make a chewy and elastic crumb. Having said that, you can also use all-purpose flour for this recipe. The dough’s consistency and texture of the bread may vary slightly, but you’ll still be rewarded with delicious homemade rolls regardless of whether you use bread flour or all-purpose flour.
You can place the eggless dinner rolls into any baking pan: rectangular, round, or a combination of pans.
Always preheat the oven for 15 – 20 minutes for the best results.
The time it takes to rise may vary based on the temperature of your kitchen. Be sure to wait until the dough has doubled. Alternatively, you can let the rolls rise inside of an OFF oven with the light on.
Variations You Can Apply To This Recipe
You easily jazz this rolls up! Just add any herbs or spices you like to the dough, such as chopped rosemary, dried basil, dried parsley, Italian seasoning, or garlic (about 2 tablespoons). You can also add in some grated cheddar cheese or mozzarella to make a cheesy version (about 1 cup). Other cheese varieties work but avoid super soft cheeses. You can also mix melted butter with garlic and brush over the top as soon as they are out of the oven.
Make Ahead Egg-Free Dinner Rolls
Overnight Egg-Free Dinner Rolls
You can easily make these dinner rolls ahead of time by rolling the dough into rolls and then refrigerating overnight (uncooked). When you’re ready to bake them, at least 3 hours before you need them, remove the rolls from the refrigerator and allow them to rise in a warm place for about 1-2 hours before baking.
Freeze Unbaked Egg-Free Dinner Rolls
To freeze the dough after it has risen, shape the dough into rolls and place them in the baking pan. Place the baking pan into the freezer and freeze until the rolls are very firm. Transfer the frozen-shaped rolls into a plastic bag and freeze for up to 2 weeks.
Defrost & Bake Egg-Free Bread Rolls
Place frozen rolls in a lightly greased baking pan. Cover with plastic wrap or a damp towel and let rise until puffy, about 2- 3 hours, then bake as instructed in the recipe.
Storing & Freezing Instructions
These egg-free dinner rolls are so delicious that you might not even have leftovers to pack up! But if you do have leftovers or you’re planning on making these ahead of time for a party, here’s how to do so.
Leftovers
The eggless dinner rolls will stay fresh in an airtight container or wrapped in aluminum foil at room temperature for up to 4 days. You can also warm them in a toaster oven or microwave if you’d like them to be toasty.
Freeze Baked Dinner Rolls
You can freeze these dinner rolls for later if you have too much. Simply let the eggless dinner rolls cool and then wrap them up tightly with aluminum foil or plastic freezer wrap and freeze for a month. Thaw and reheat until warm before enjoying.
Frequently Asked Questions
Absolutely! You can do this recipe in a large mixing bowl, and mix the dough together with a large wooden spoon/rubber spatula. It will take a bit of arm muscle. A hand mixer could work too, but mixing by hand with a wooden spoon or rubber spatula is a better choice than a hand mixer, in my opinion, since the dough recurrently gets stuck in the beaters.
Probably you’ve added too much flour, this can easily happen if you don’t measure the flour correctly. The best way to do it is using a kitchen scale, but if you don’t have one, a spoon the flour into the measuring cup, and then I use a knife (straight-edged) to level the flour across the measuring cup. Do not dip a measuring cup directly into the flour bin, or you can compact it and get up to 25% more flour.
Yes, you can easily make these dinner rolls ahead of time by making the dough, then rolling the dough into rolls, and then refrigerating overnight (uncooked). When you’re ready to bake them, at least 3 hours before you need them, remove the rolls from the refrigerator and allow them to rise in a warm place for about 1-2 hours before baking.
In this recipe, you can use the same amount of evaporated milk instead.
Somewhere between 95°F and 110°F will be fine!
The yeast should begin to foam after 5 – 8 minutes. You will be able to see a creamy foam and bubbles on the surface of the water.
Yes! Let them cool completely, then wrap them tightly in aluminum foil. Place the foil-wrapped rolls in a freezer bag or container and freeze for up to a month.
Yes! After the dough rises for the first time. Shape the rolls and place them in the baking pan. Place the baking pan into the freezer and freeze until the rolls are very firm. Transfer the frozen-shaped rolls into a plastic bag and freeze for up to 2 weeks.
❤️ Love what you see? JOIN my Private Baking Club. Also, SUBSCRIBE to Mommy’s Home Cooking, so you’ll never miss a recipe! And FOLLOW along on Instagram, Pinterest, and Facebook for more fun!
Recipe Card

Soft Eggless Dinner Rolls
Equipment
Ingredients
- ½ cup (120 ml) warm water
- 2 teaspoons (8 g) granulated sugar
- 1 tablespoon (11 g) active yeast (see notes for instant yeast)
- 6 tablespoons (90 ml) cold water
- 2 tablespoons (16 g) golden flax meal (see notes for substitute )
- 4 cups (580 g) bread or all-purpose flour (see notes)
- 1/4 cup (50 g) granulated sugar
- 1 1/2 teaspoons kosher salt
- 1 cup (240 ml) whole milk, lukewarm
- 4 tablespoons (56 g) unsalted butter, melted
For Brushing:
- 2 tablespoons (28 g) butter, melted
Instructions
Activate the Yeast:
- Place warm water and sugar in a small bowl; mix to combine. Sprinkle with yeast, and let stand until foamy, about 5 – 7 minutes. Note: If using instant yeast, you don't need to activate it in the warm water (step 1); just skip this step and add it along with the flour and other dry ingredients in step 3.
Make the Flax Eggs:
- To make the 2 flax eggs: Mix 6 tablespoons of cold water and 2 tablespoons golden flax meal in a small bowl until well combined. Let it rest for 5 – 10 minutes to thicken. Note: Skip this step if using evaporated milk.
Make the Dough:
- Place flour, ¼ cup sugar, and salt in the bowl of your stand mixer; mix to combine. Make a well in the center. Note: If using instant yeast add here too.
- Add milk, melted butter, yeast mixture (if using active yeast), and flax eggs into the well. Mix, on medium speed, until all the ingredients are well combined, and the dough comes together in a ball,about 2-3 minutes. Continue mixing for about 2 – 3 more minutes to knead thedough until smooth and bounces back when pressed. Note: If you do not own a stand mixer, you can do this in alarge mixing bowl and in the next step, mix the dough together with a largewooden spoon/rubber spatula. It will take a bit of arm muscle. A hand mixer couldwork, but xixing by hand with a wooden spoon or rubber spatula is a betterchoice than a hand mixer, in my opinion, since but the dough recurrently getsstuck in the beaters.
Let the Dough Rise:
- Lightly spray a large bowl with cooking spray and place the dough in the bowl. Spritz the top of the dough with spray as well and cover the bowl lightly with plastic wrap or a clean kitchen towel. Place the covered bowl in a warm place. Let rise for 1 ½ – 2 hours in a warm place or until the dough is full and puffy. It will double in volume.
Form the Rolls:
- Gently deflate the dough and pat out to a rough rectangle about 8 inches by 12 inches. Cut the dough into 4 equal long strips, then cut each strip into 3 portions for a total of 12 dough balls. For smaller rolls cut each strip into 6 portions for a total of 24 dough balls.
- Line with parchment paper a 9×13 inch baking pan or lightly grease with either butter or cooking spray and set aside. Note: You can place the rolls into any baking pan: rectangular, round, or a combination of pans.
Let the Rolls Rise:
- Take each piece of dough and roll it into a smooth ball, place the ball seam side down in the prepared baking pan. Cover the baking pan with a kitchen towel so that the formed buns won't dry out. Return pan to warm place and leave for 45 – 60 min, until the dough has risen and almost double in volume.
Bake:
- Preheat oven to 375º F (190º C) and position one of the oven racks into the center of the oven.
- Once the rolls have risen, bake them for about 15 – 20 minutes or until golden brown. Brush them with melted butter immediately when they come out of the oven.
Nutrition
Eggless Baking Frequently Asked Questions
You’ve asked, and I’ve answered! Read on for a handful of answers to the most frequently asked questions about eggless baking.
Originally posted in March 2021, the post content was edited to add more helpful information, with no change to the recipe in August 2022.
