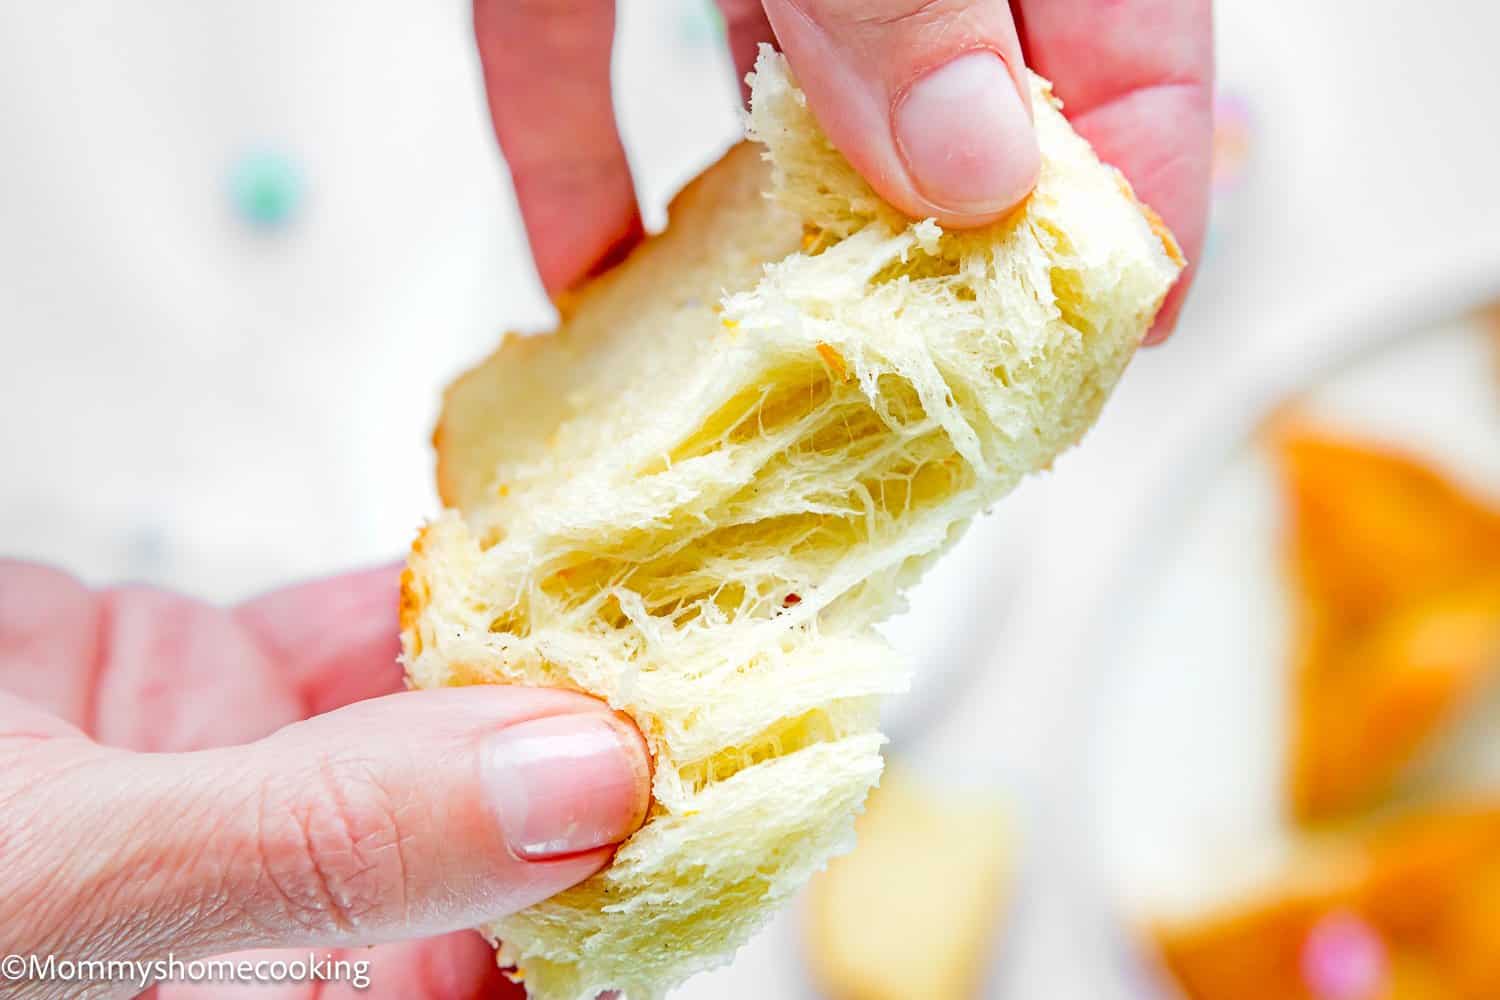
This Easter Sweet Bread is soft, tender, and lightly sweet with a hint of orange. Its beautiful braided appearance and irresistible aroma will impress your guests and make your table setting even more festive. Plus, leftovers make the most delicious French Toast.
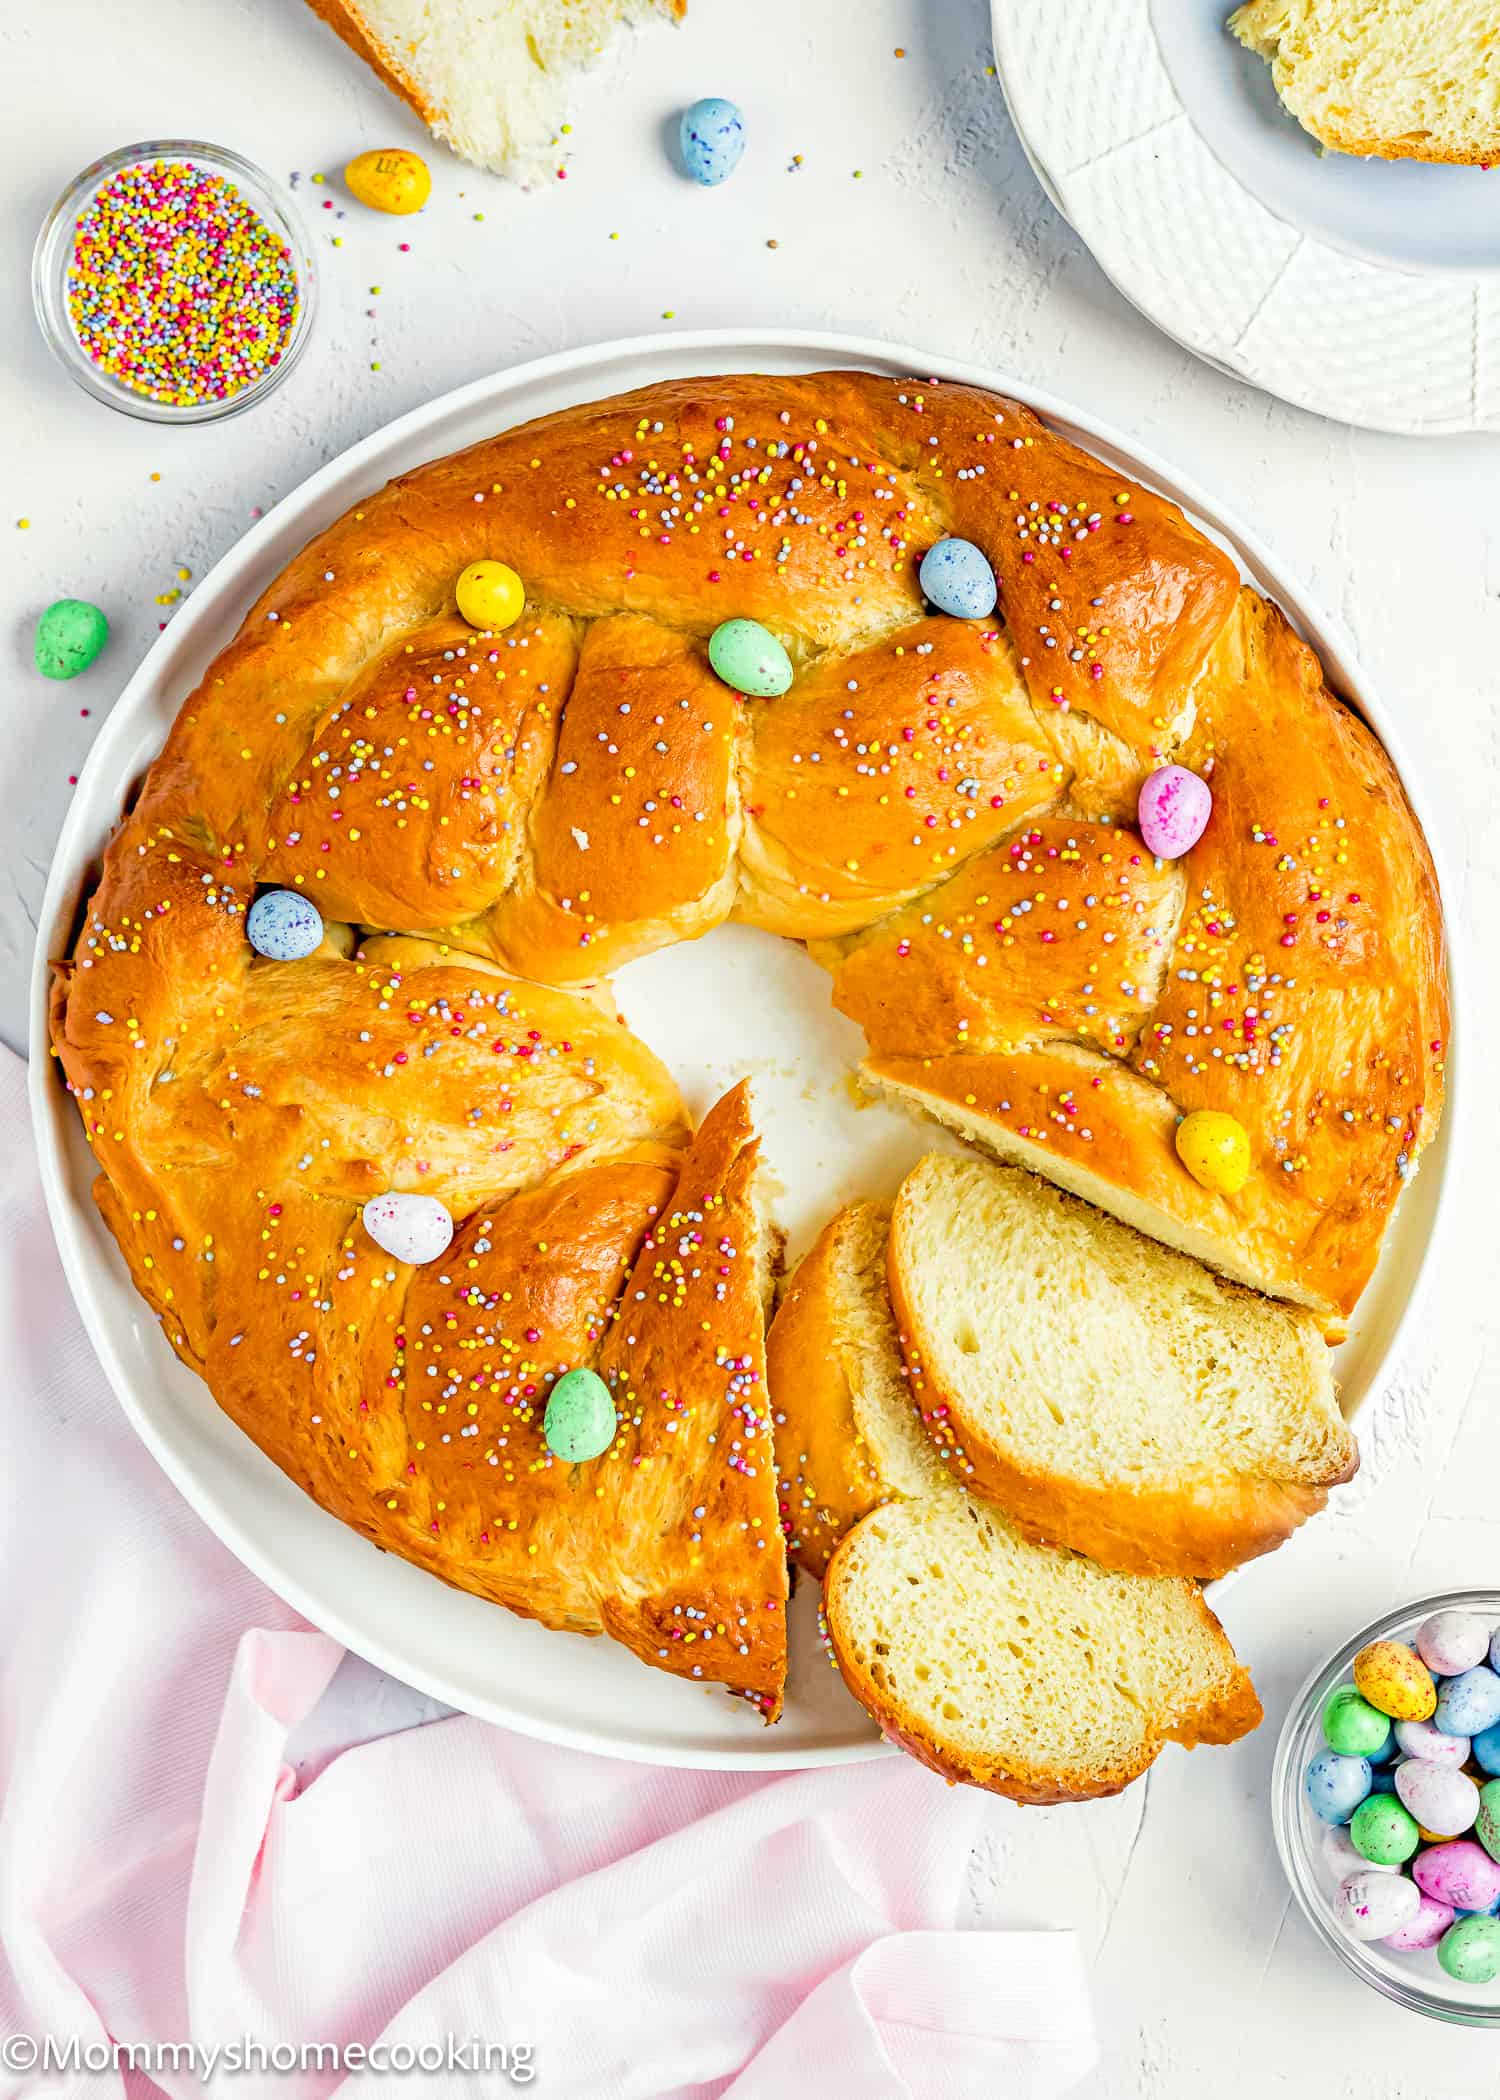
Easter Tradition Made Easy: Bake Your Own Sweet Bread!
This Easter Sweet Bread recipe is easy to make and adds a touch of homemade warmth to our Easter table. It’s soft and tender with a hint of sweetness, adorned with multi-colored sprinkles. This bread is not just bread—it’s a symbol of love, tradition, and togetherness.
Plus, the fun doesn’t end with Easter dinner; leftovers make the most delicious French toast for breakfast the next day.
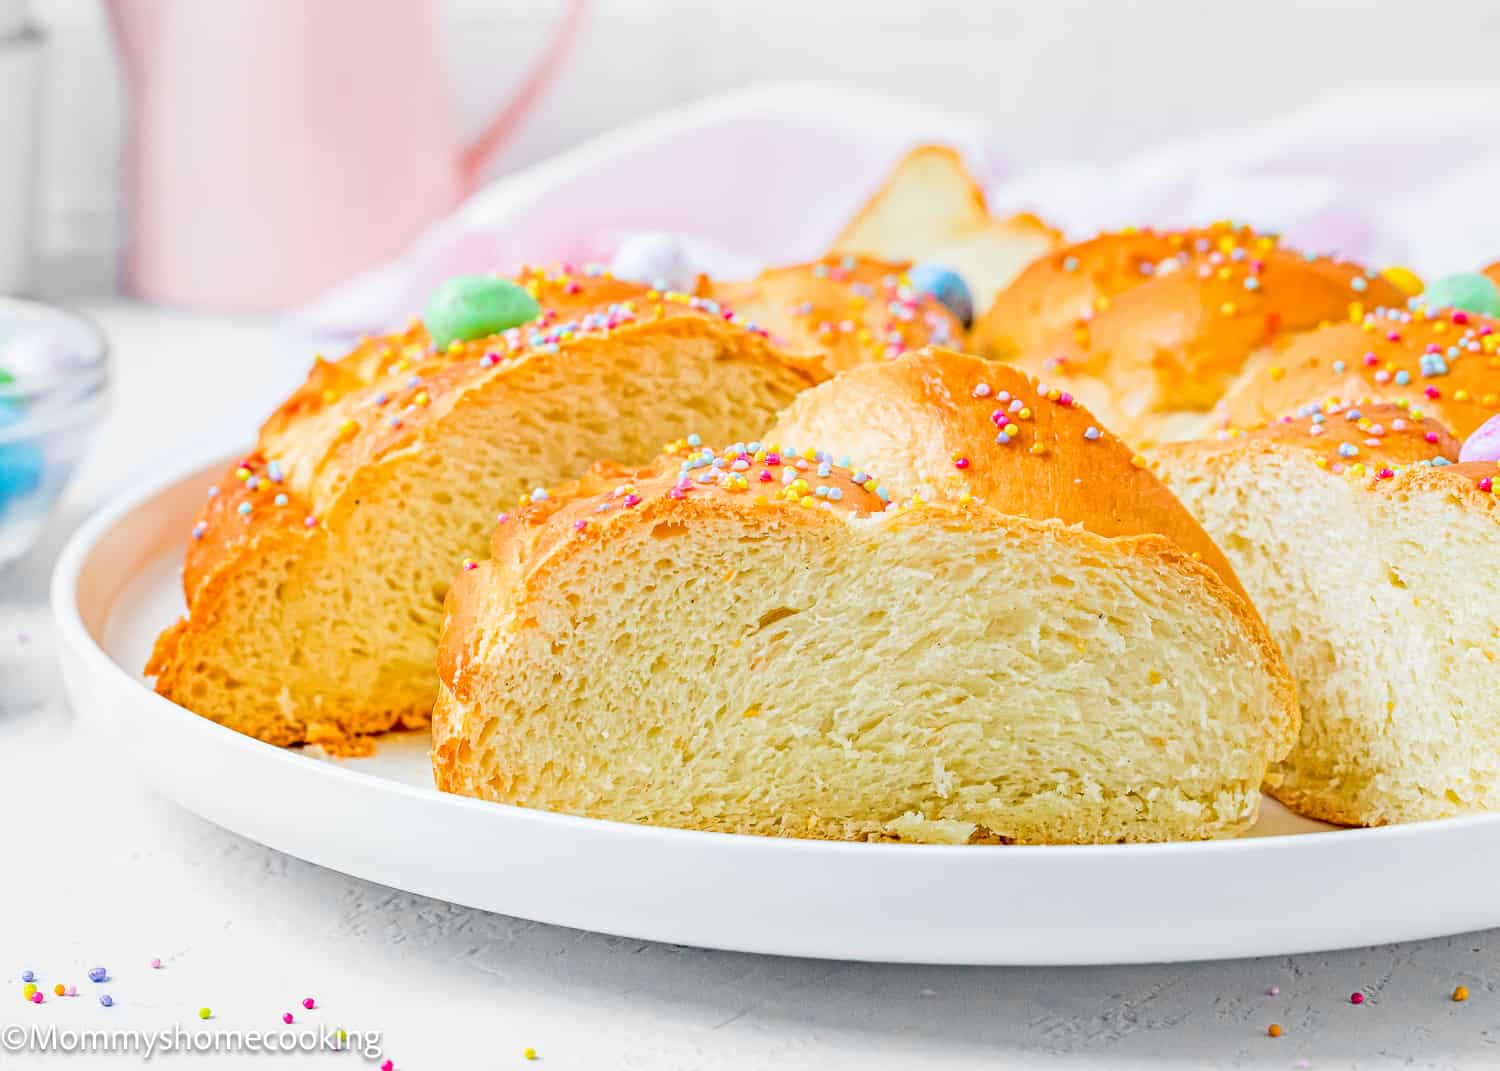
Traditionally, Easter bread is often adorned with dyed eggs nestled into the dough, symbolizing new life and rebirth. However, I skip this tradition for obvious reasons (egg allergy). In my household, we opt for a different approach to add a festive touch to our Easter Sweet Bread. After baking, instead of placing dyed eggs, I adorn the bread with more Easter chocolate mini eggs. These colorful and delicious chocolates add an extra element of festivity to the bread and provide a delightful surprise with every bite. It’s a fun and allergy-friendly twist on a beloved tradition that keeps the Easter spirit alive and well in our home.
Join me as I share this cherished family recipe, which I’ve passed down to my kids. They eagerly anticipate the opportunity to knead and braid the dough alongside me.
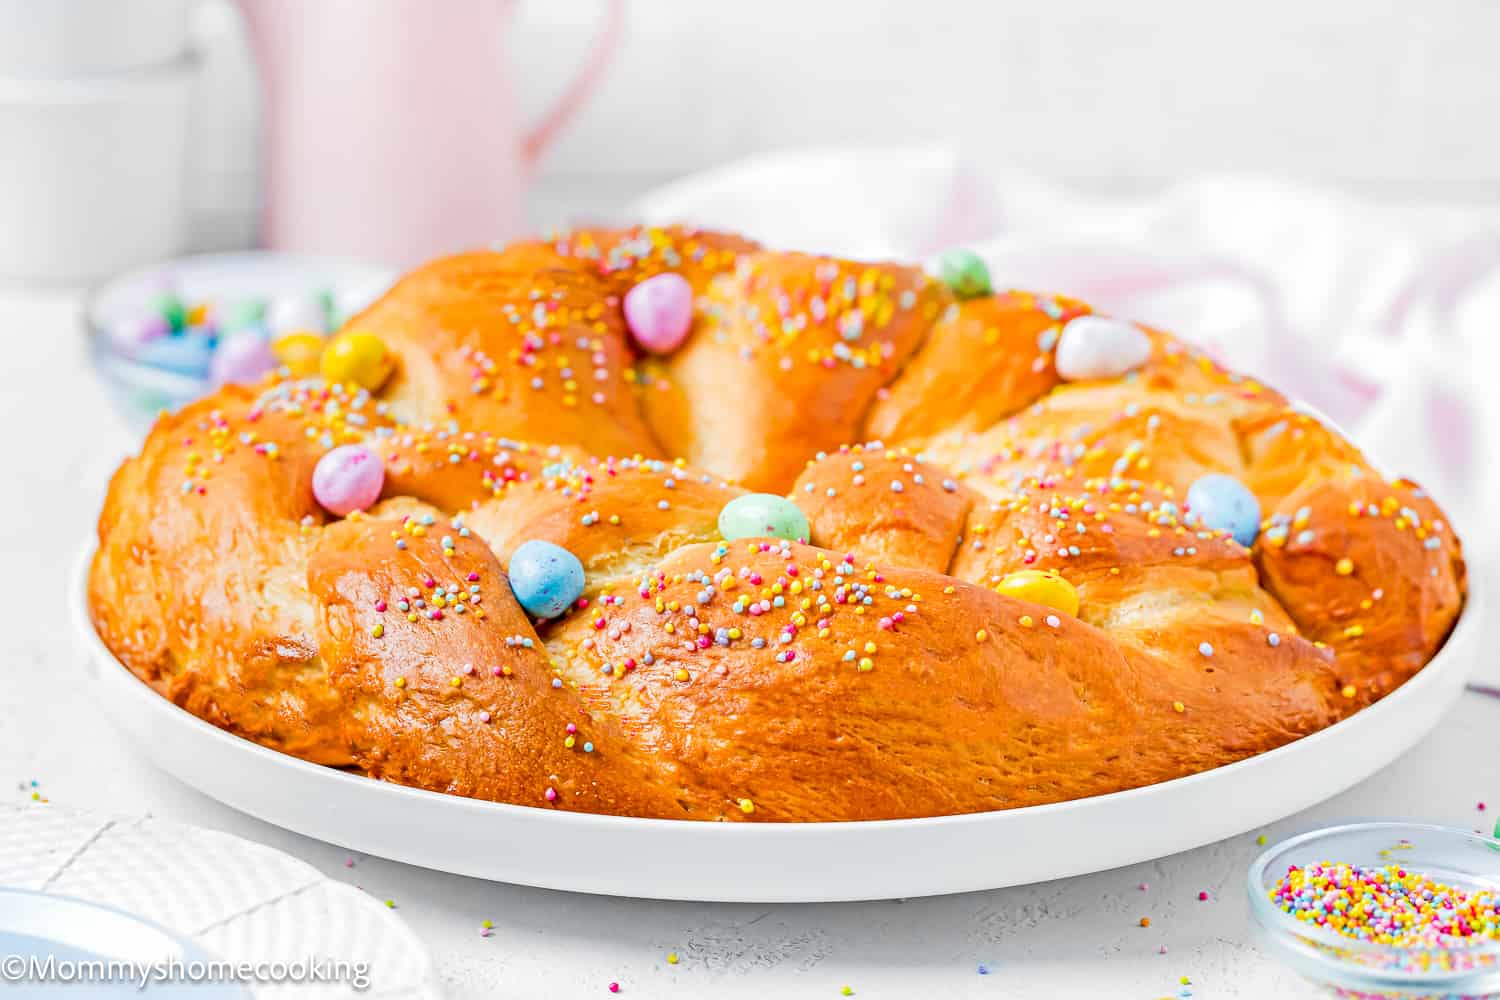
What To Love About This Recipe
- Easy to Make: With simple ingredients and straightforward instructions, this Easter Sweet Bread recipe is accessible for both novice and experienced bakers alike. No need to stress – it’s as easy as pie (or, in this case, bread)!
- Simple Ingredients: You won’t need any fancy or hard-to-find ingredients for this recipe, just basic pantry staples!
- Perfect Addition to Your Easter Table: Its beautiful braided appearance and irresistible aroma will impress your guests and make your table setting even more festive.
- Leftovers are Great for French Toast: Who says the joy of Easter ends after the main meal? Transform any leftover slices into heavenly French toast for a delightful breakfast or brunch. It’s a delicious way to start your morning!
- Absolutely Delicious: This Easter Sweet Bread boasts an incredibly soft and tender texture with just the right amount of sweetness. Each bite is a heavenly experience that’ll leave you craving more.
- A Family Tradition: Make this bread together to get the whole family involved in the Easter festivities. Kneading and braiding the dough isn’t just about cooking—it’s about creating cherished memories that will last a lifetime.
Ingredients You’ll Need, Substitutions & Notes
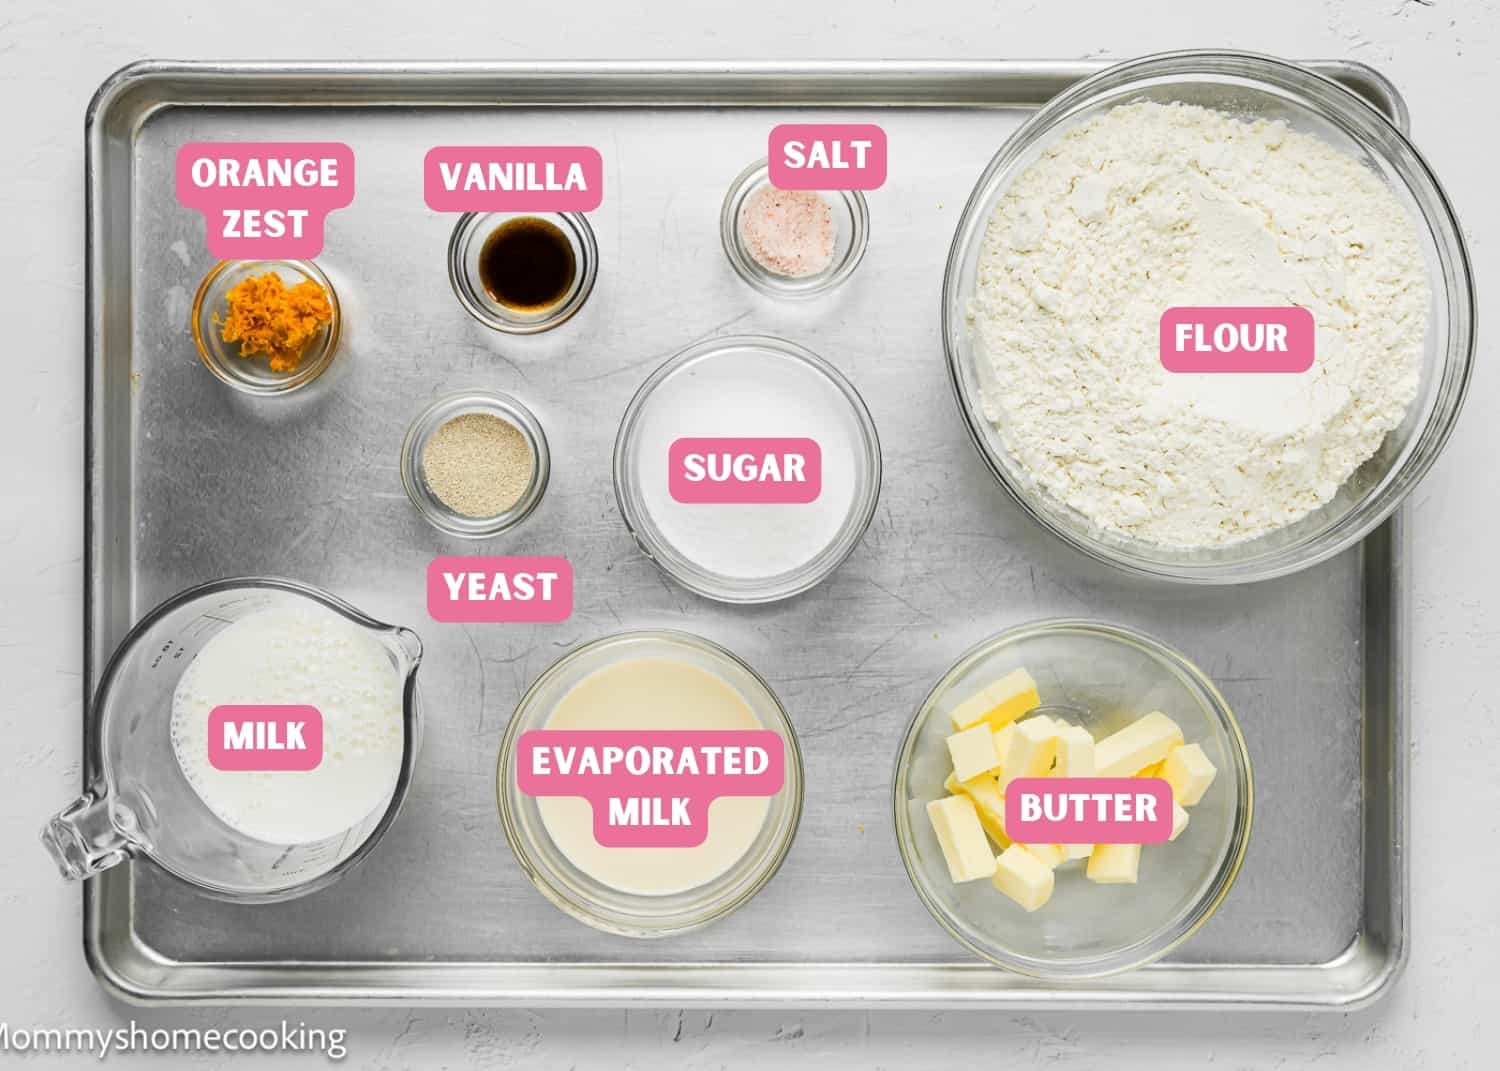
Please check the recipe card at the bottom of the post for exact quantities and detailed instructions (scroll down).
- All-Purpose Flour: Provides structure and texture to the bread. You can also use bread flour, if you prefer. Make sure to measure accurately. In my opinion, a kitchen scale is the best way to measure your ingredients.
- Granulated Sugar: Adds sweetness and helps with yeast activation.
- Instant Dry Yeast: The leavening agent makes the bread rise. I recommend using instant yeast since it doesn’t need to be activated; just mix it with the dry ingredients. You can substitute active dry yeast for instant dry yeast in equal amounts. However, you may need to proof it in warm liquid before using it in the recipe.
- Salt: Enhances the flavor of the bread. I prefer kosher or sea salt. If you only have table salt handy, I recommend reducing the amount to half.
- Whole Milk: Adds richness and tenderness to the dough.
- Evaporated Milk: Adds moisture and richness to the bread.
- Pure Vanilla Extract: Infuses the bread with a subtle, sweet aroma.
- Orange Zest: Adds a burst of citrus flavor, complementing the sweetness of the bread.
- Butter: Adds richness and flavor to the dough. I prefer to use unsalted butter, but if you only have salted butter handy, you can use it. In this case, skip the salt called in the recipe.
- Multi-colored sprinkles and Easter Chocolate Mini Eggs (Optional): They add a festive touch to the bread’s appearance.
Process Overview: How To Make Easy Easter Sweet Bread Step-by-Step
Please check the recipe card at the bottom of the post for exact quantities and detailed instructions (scroll down).
Step 1 – Make The Dough
- Combine flour, sugar, yeast, and salt in a stand mixer bowl.
- Mix whole milk, evaporated milk, vanilla, and orange zest in a separate bowl. Microwave for 1 minute until lukewarm (about 100°F/38°C) to activate the yeast.
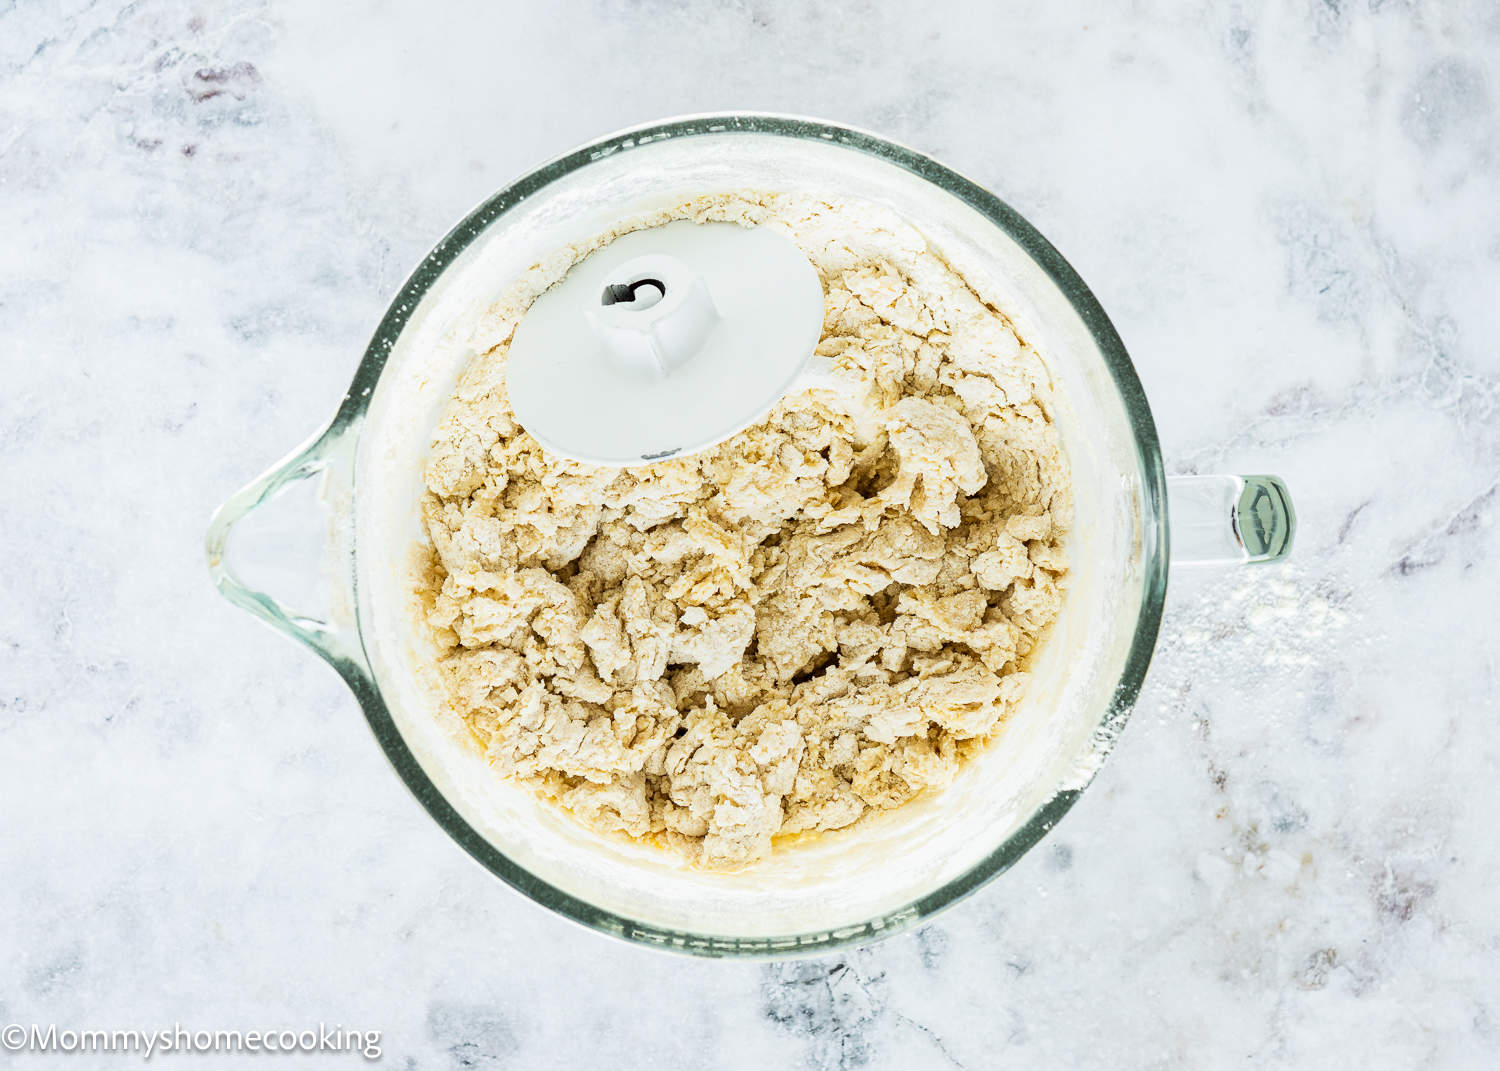
- Add the warm evaporated milk mixture to the flour mixture in the stand mixer bowl. Beat with a dough hook on low speed for 2-3 minutes, then increase to medium speed and knead until the dough comes together (about 3 more minutes).
- While the mixer runs, gradually add softened butter to the dough, one tablespoon at a time. Scrape down the sides of the bowl as needed.
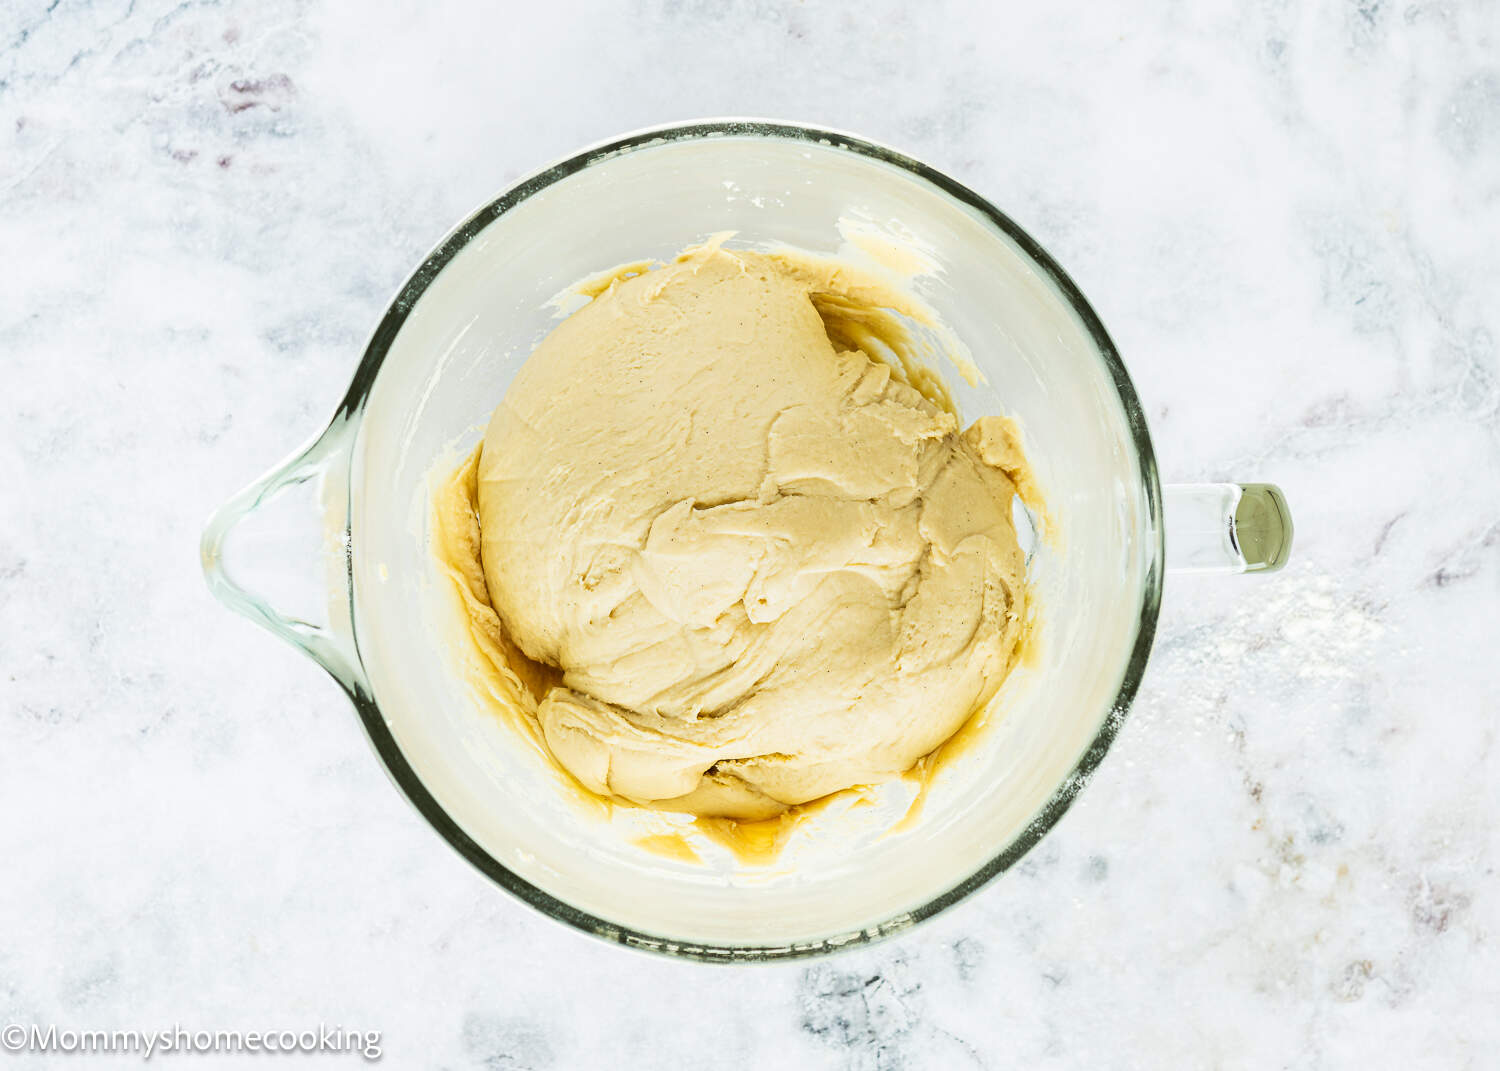
- Continue mixing the dough for 10-15 minutes until it is smooth, velvety, and passes the windowpane test. Proper kneading ensures light and fluffy bread without a dense or heavy texture.
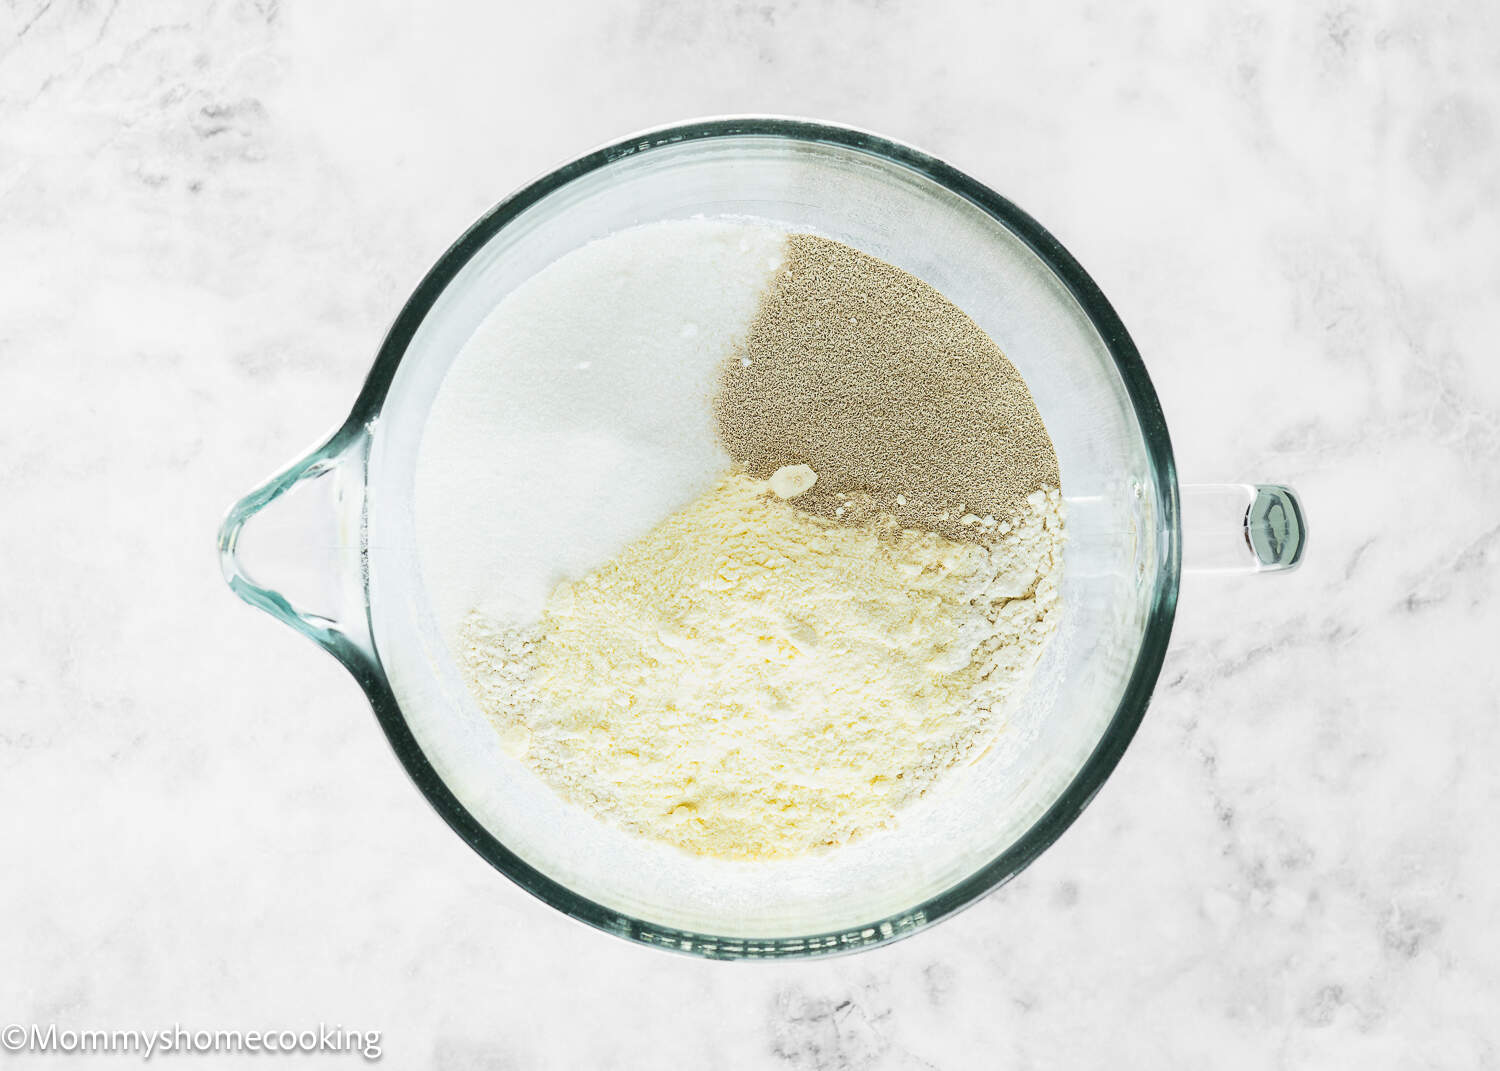
Step 2 – First Rise
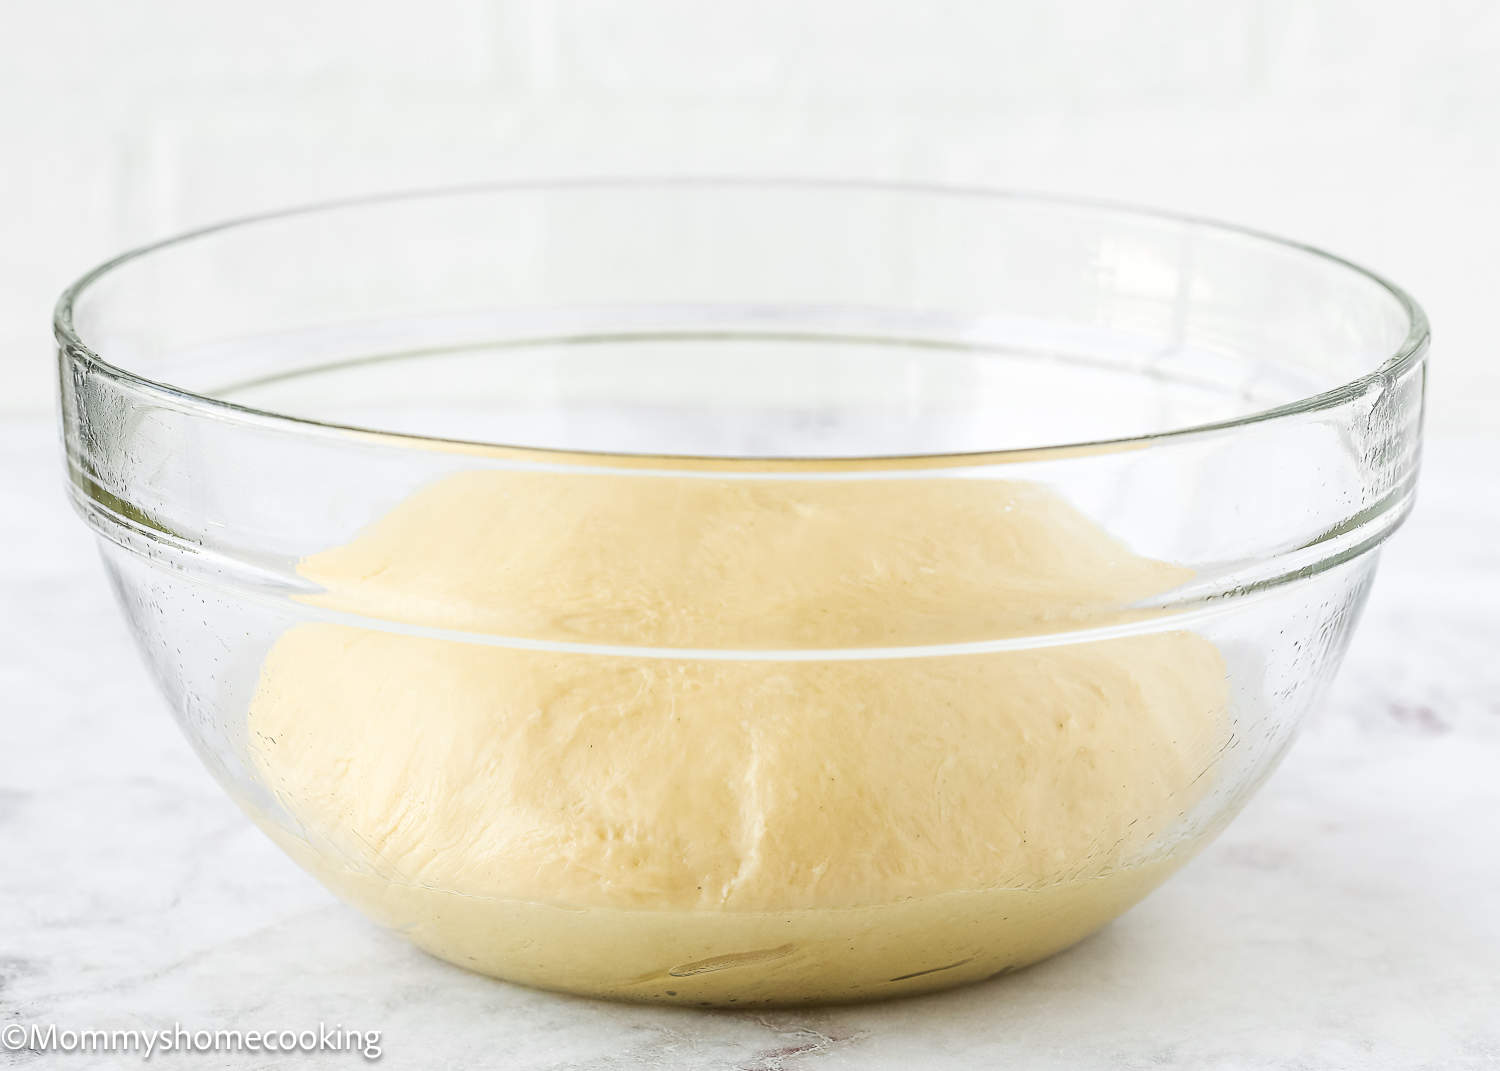
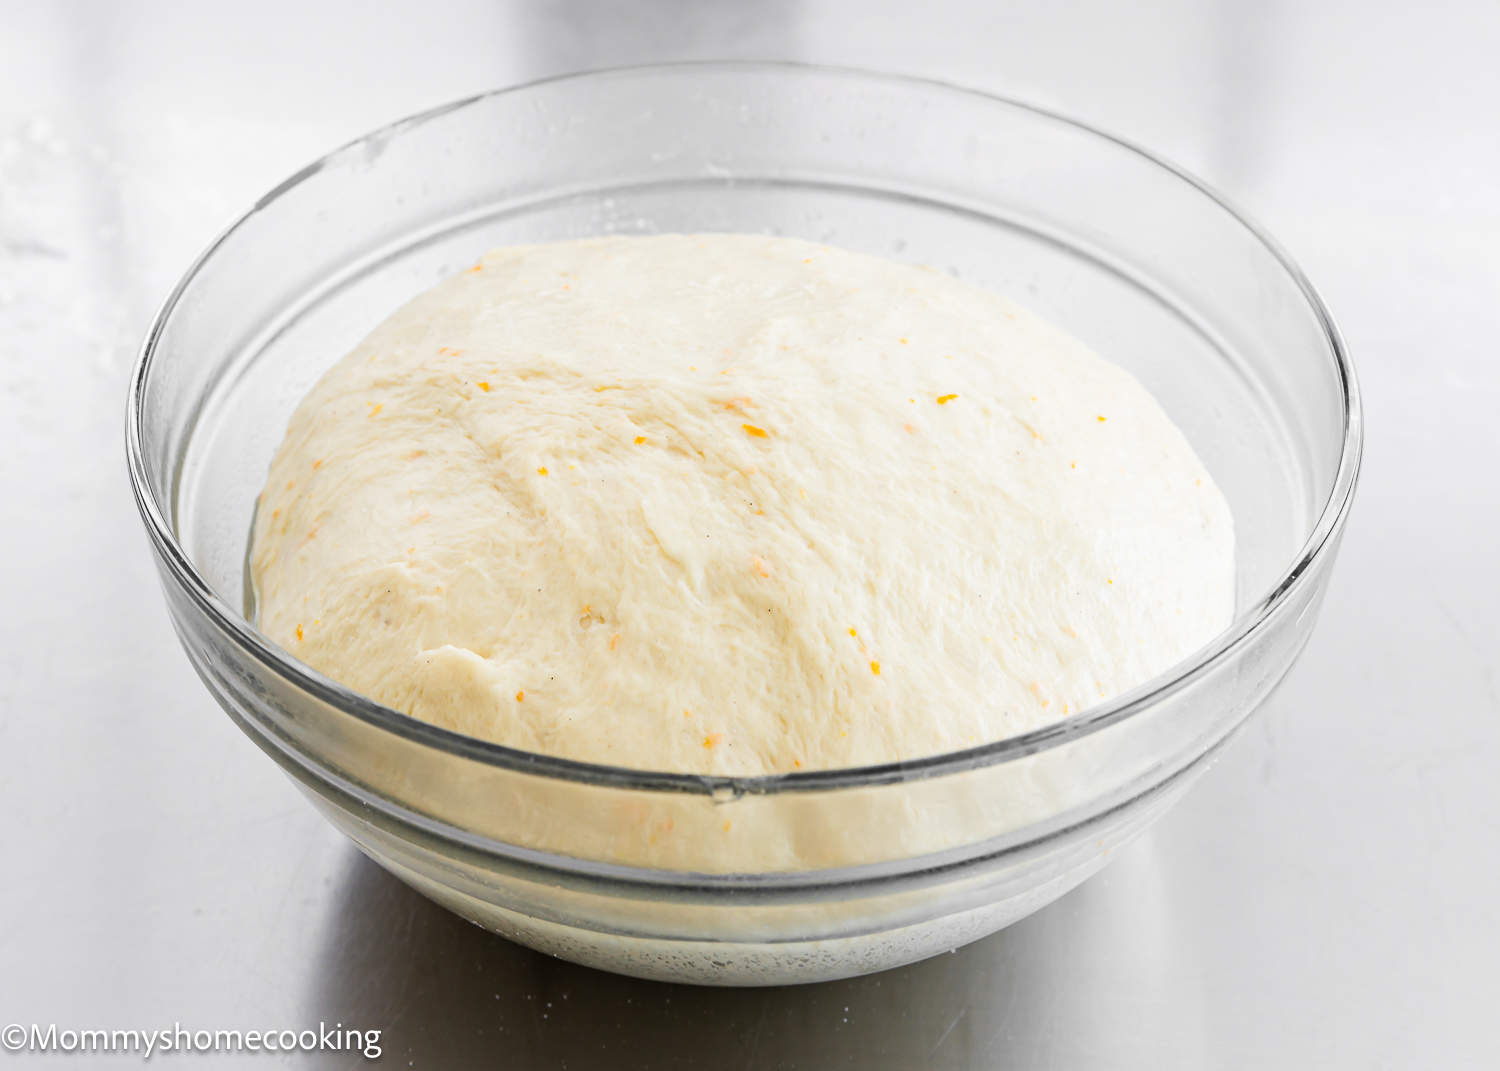
Roll the dough into a ball and place it in a lightly greased bowl. Cover and let it set in a warm place for 1 ½ – 2 hours, or until double in size.

Step 3 – Form
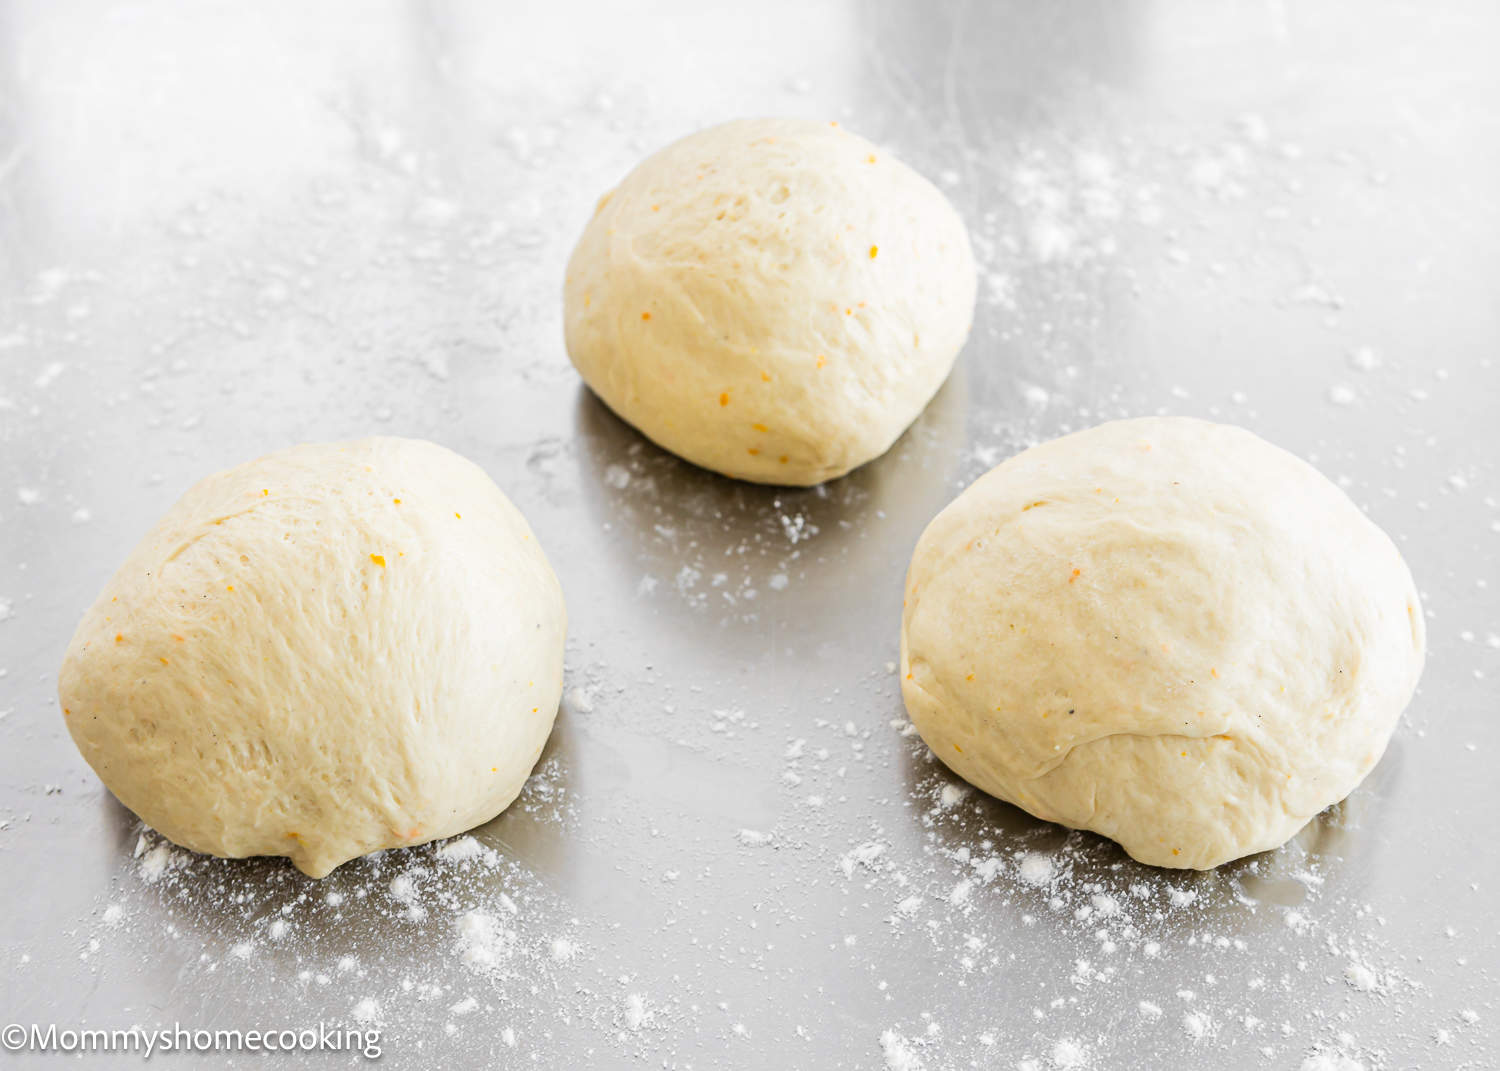
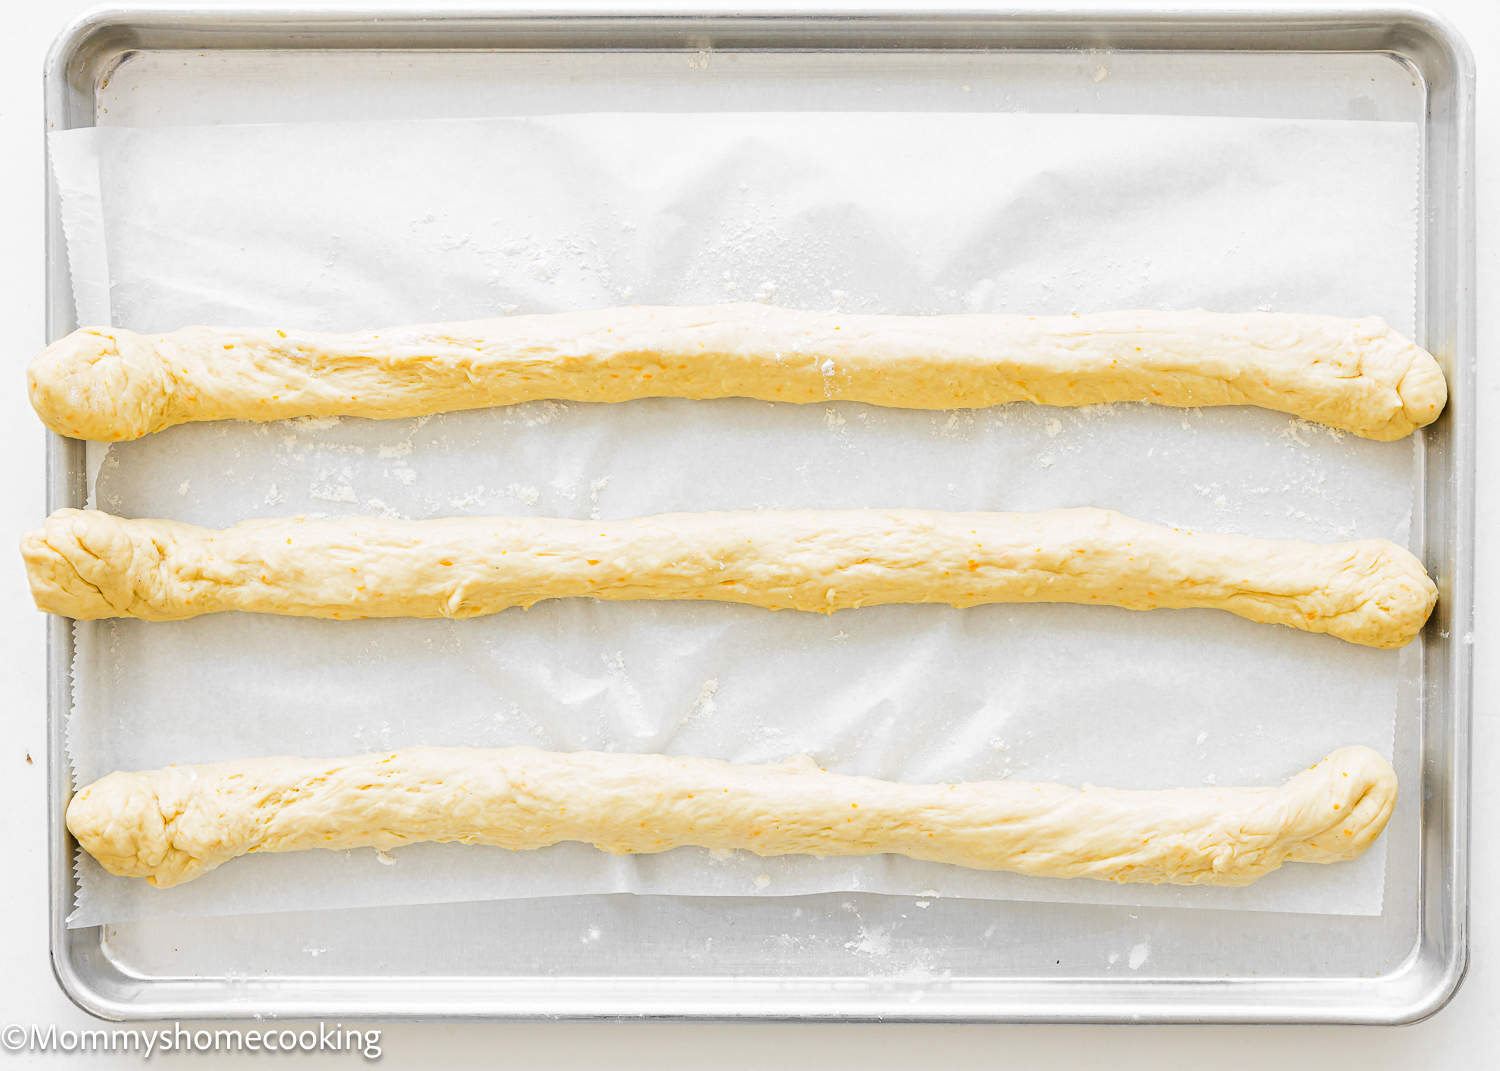
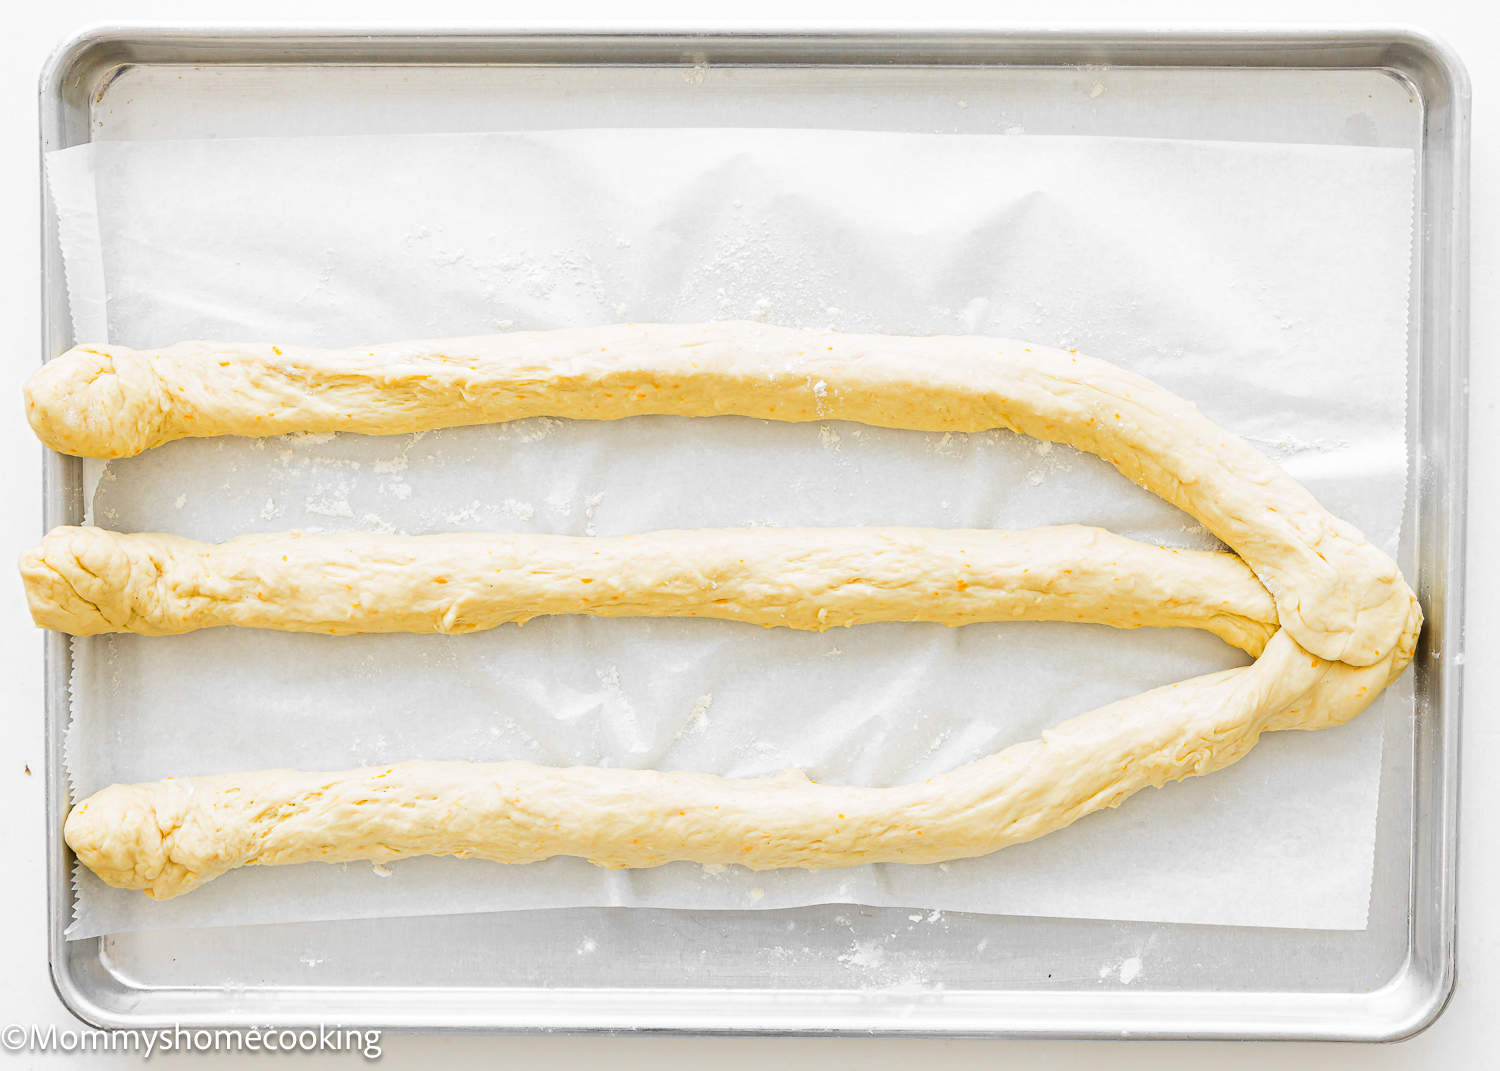
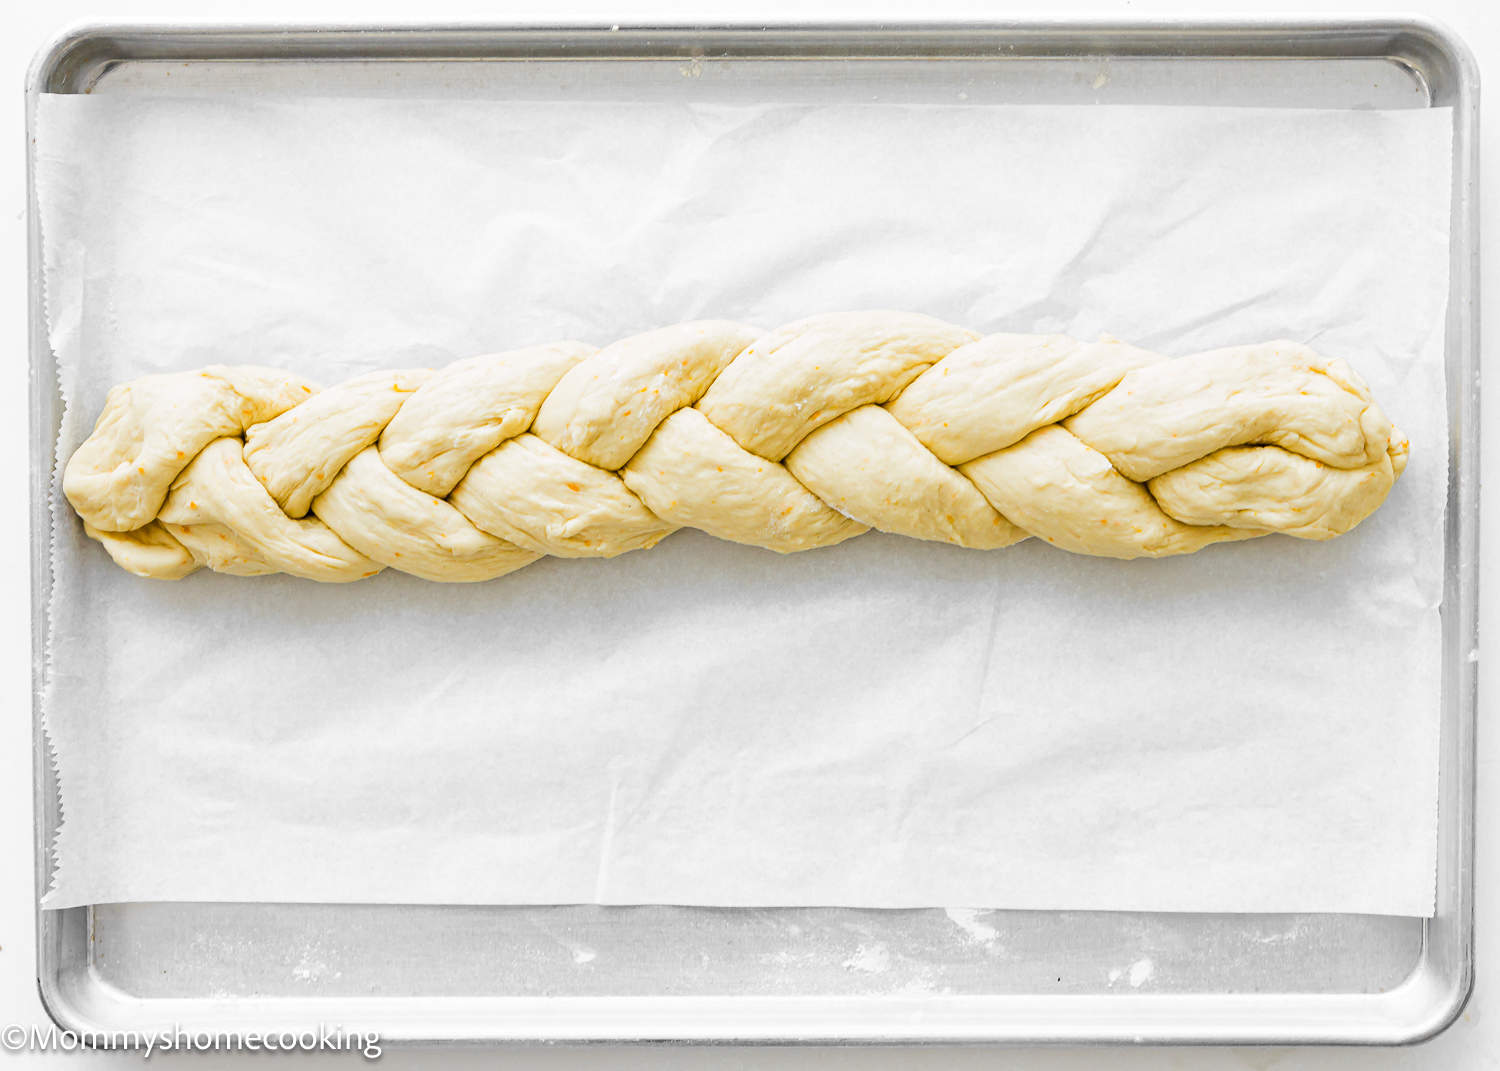
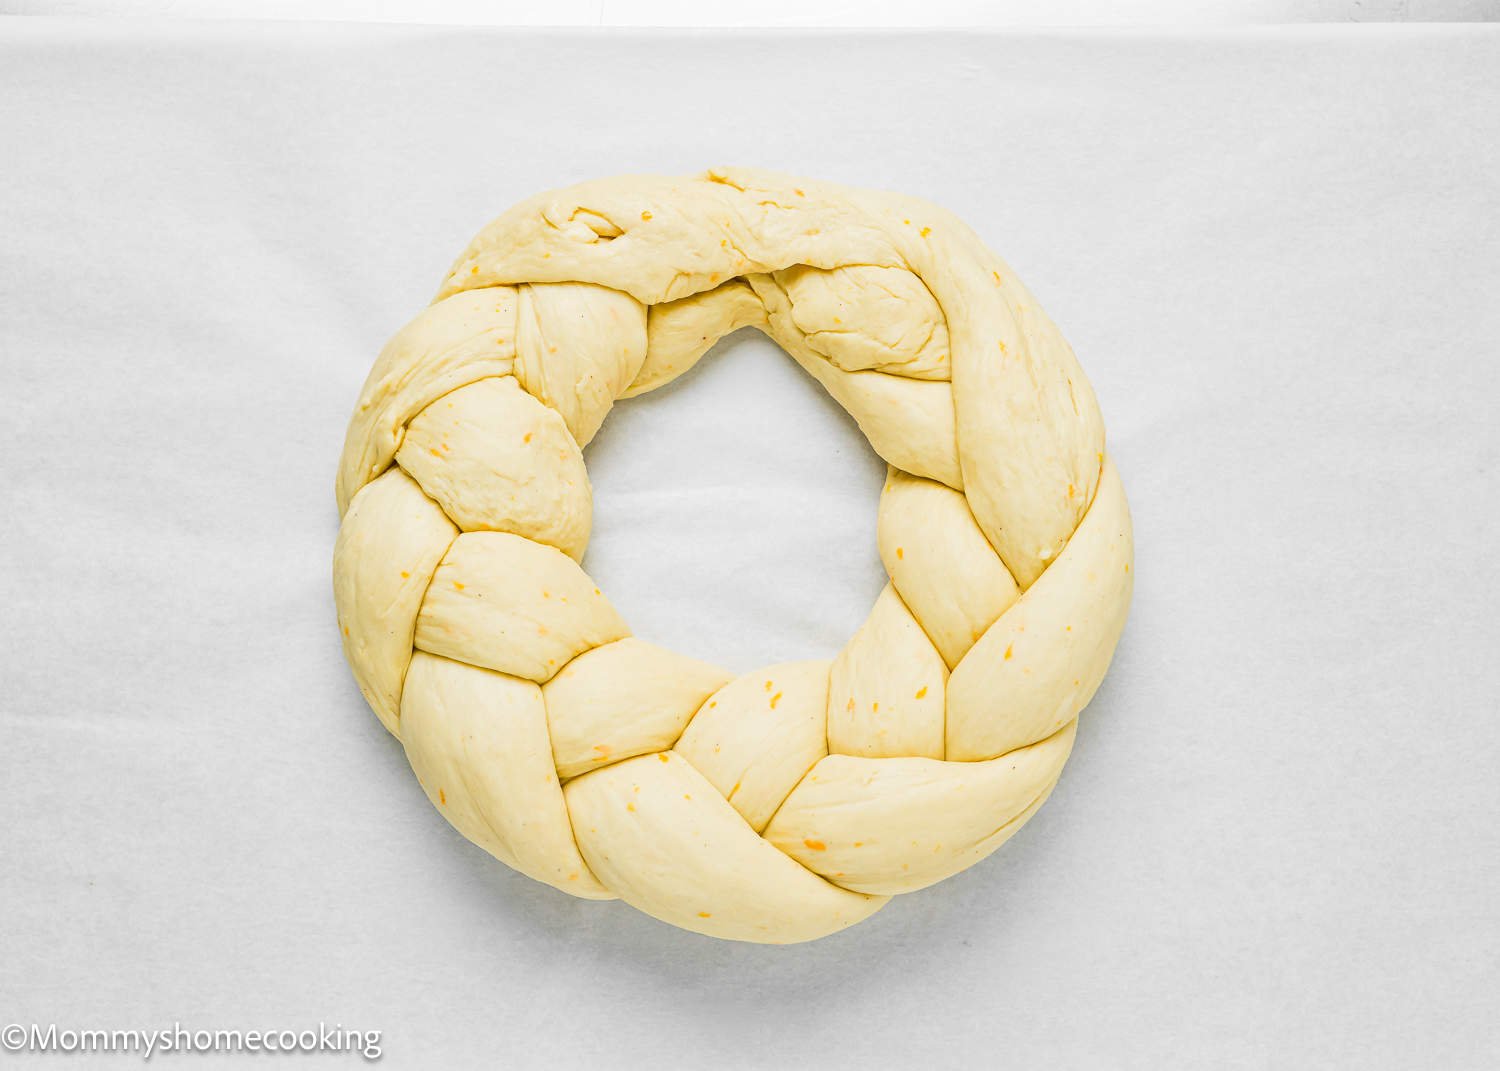
On a lightly floured surface, divide into 3 equal pieces, about 373 g each. Roll each piece to form a 1-inch wide rope, about 23- inches long. Place ropes side by side lengthwise on the prepared baking sheet. Pinch the top ends together, then tightly braid the ropes. Bring ends together to create a ring and pinch the ends together. Make sure the ends are securely joined together.
Step 4 – Second Rise
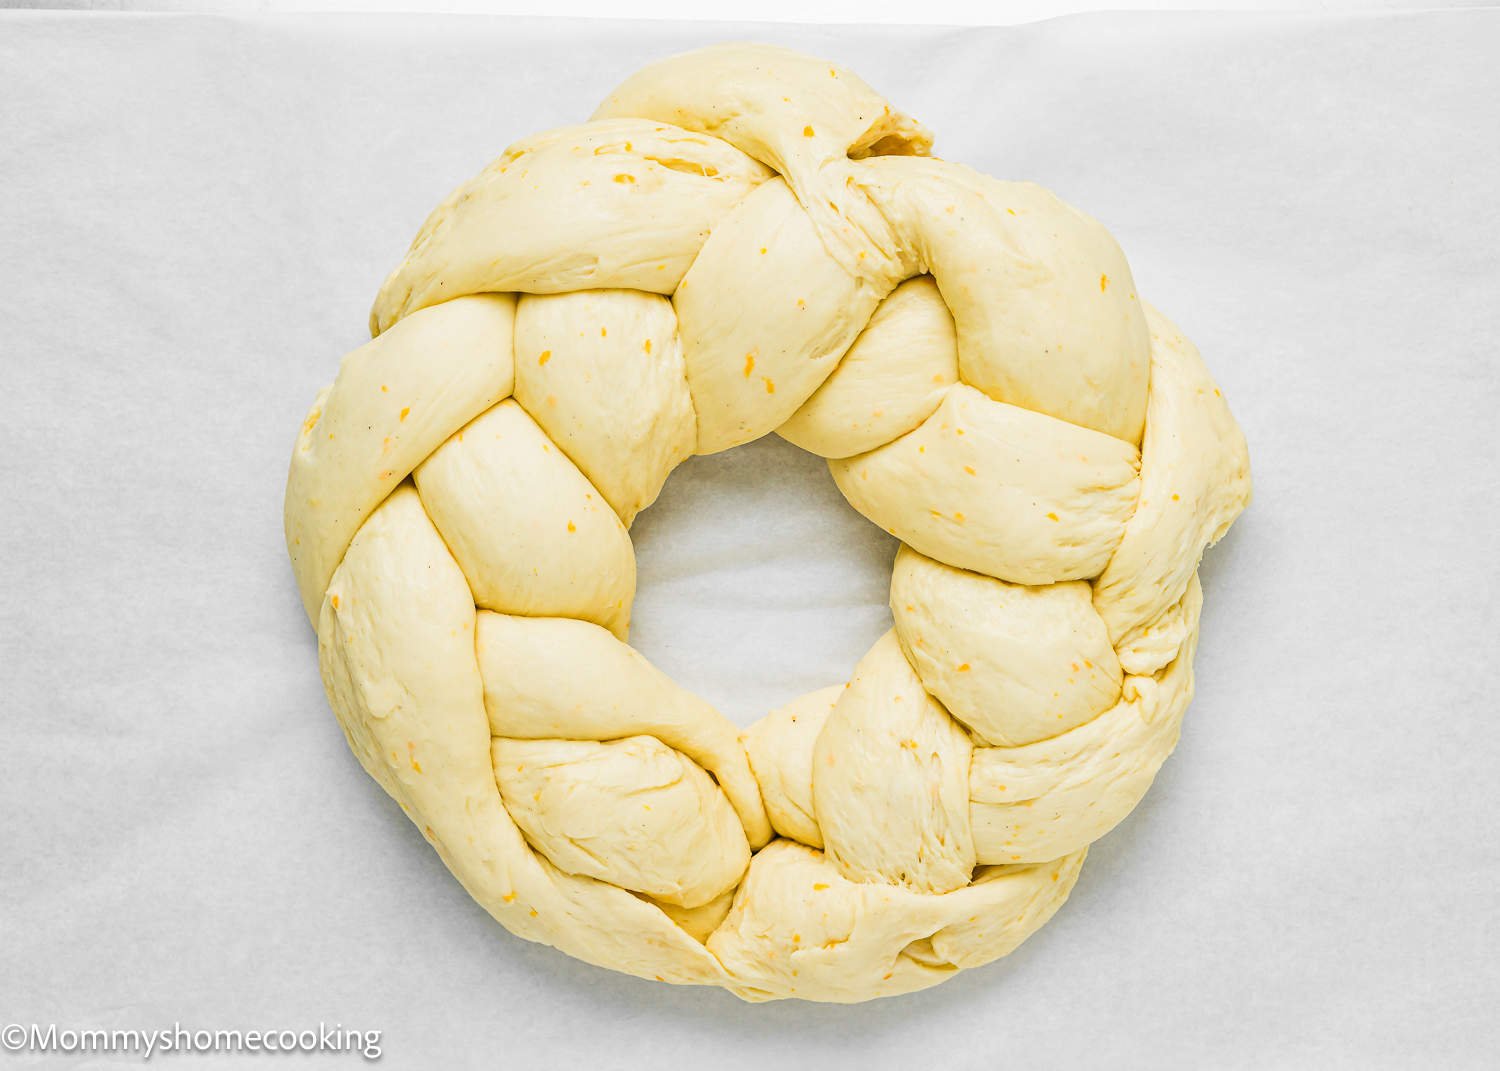
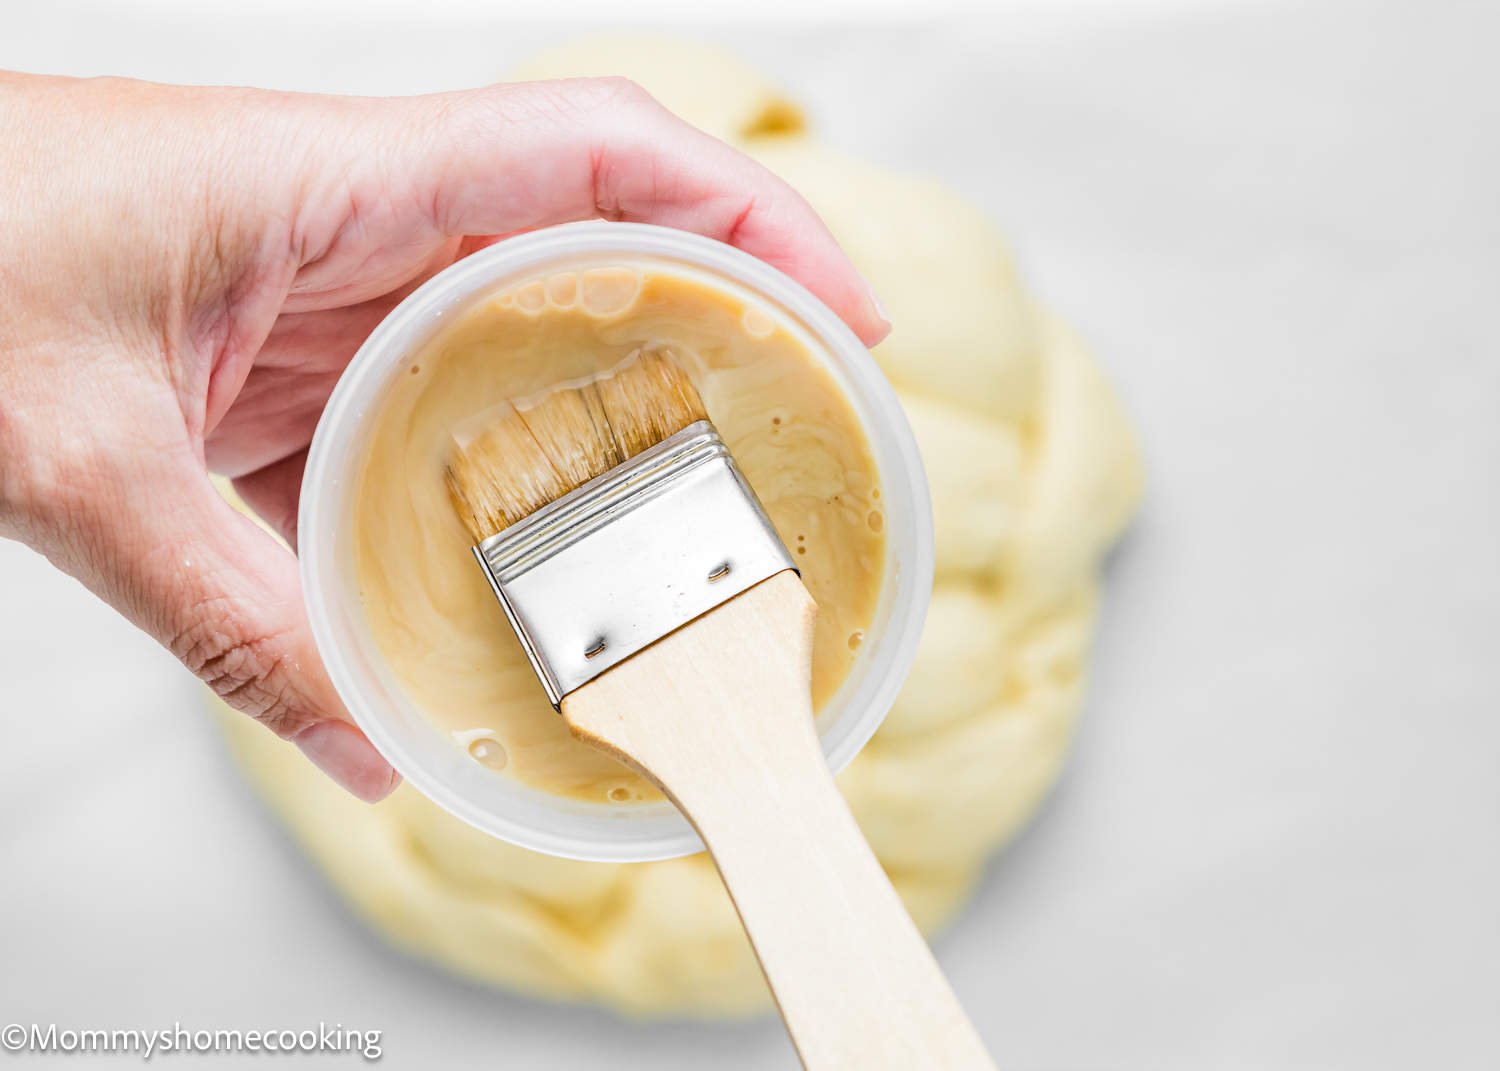
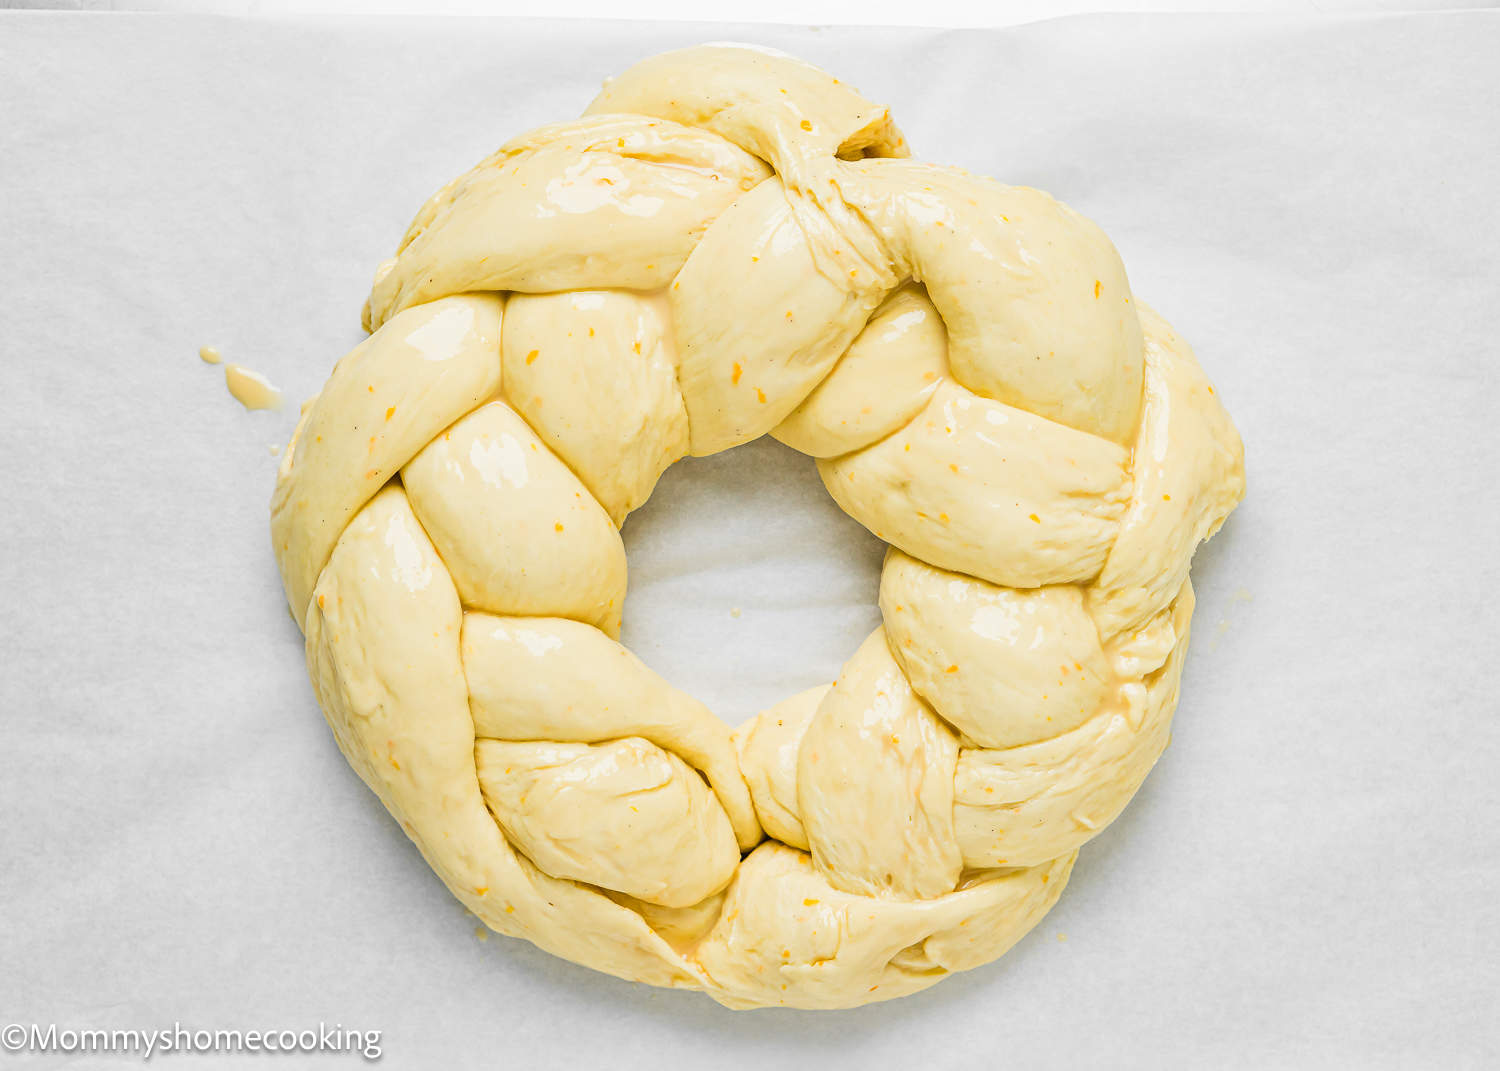
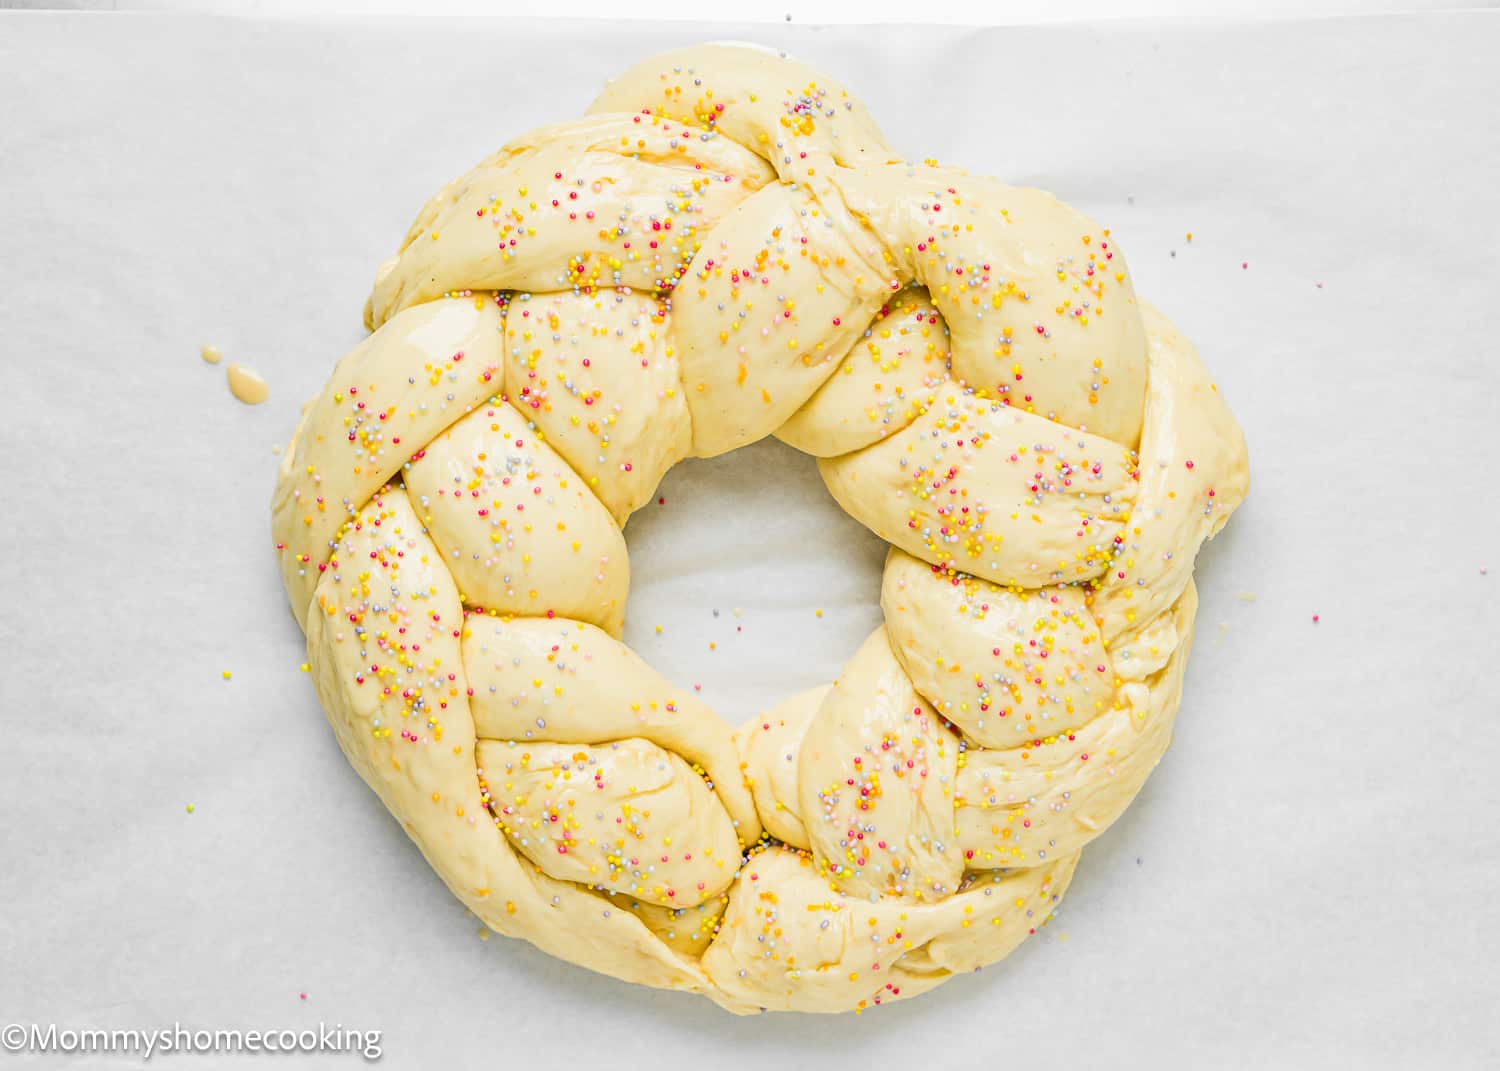
Loosely cover the baking sheet with plastic wrap or a dish towel and allow the dough to rise in a warm area until it doubles in size, 45 to 60 minutes. In a small bowl, mix evaporated milk and maple syrup. Brush the mixture all over the dough. Sprinkle the sprinkles on top, if desired.
Step 5 – Bake
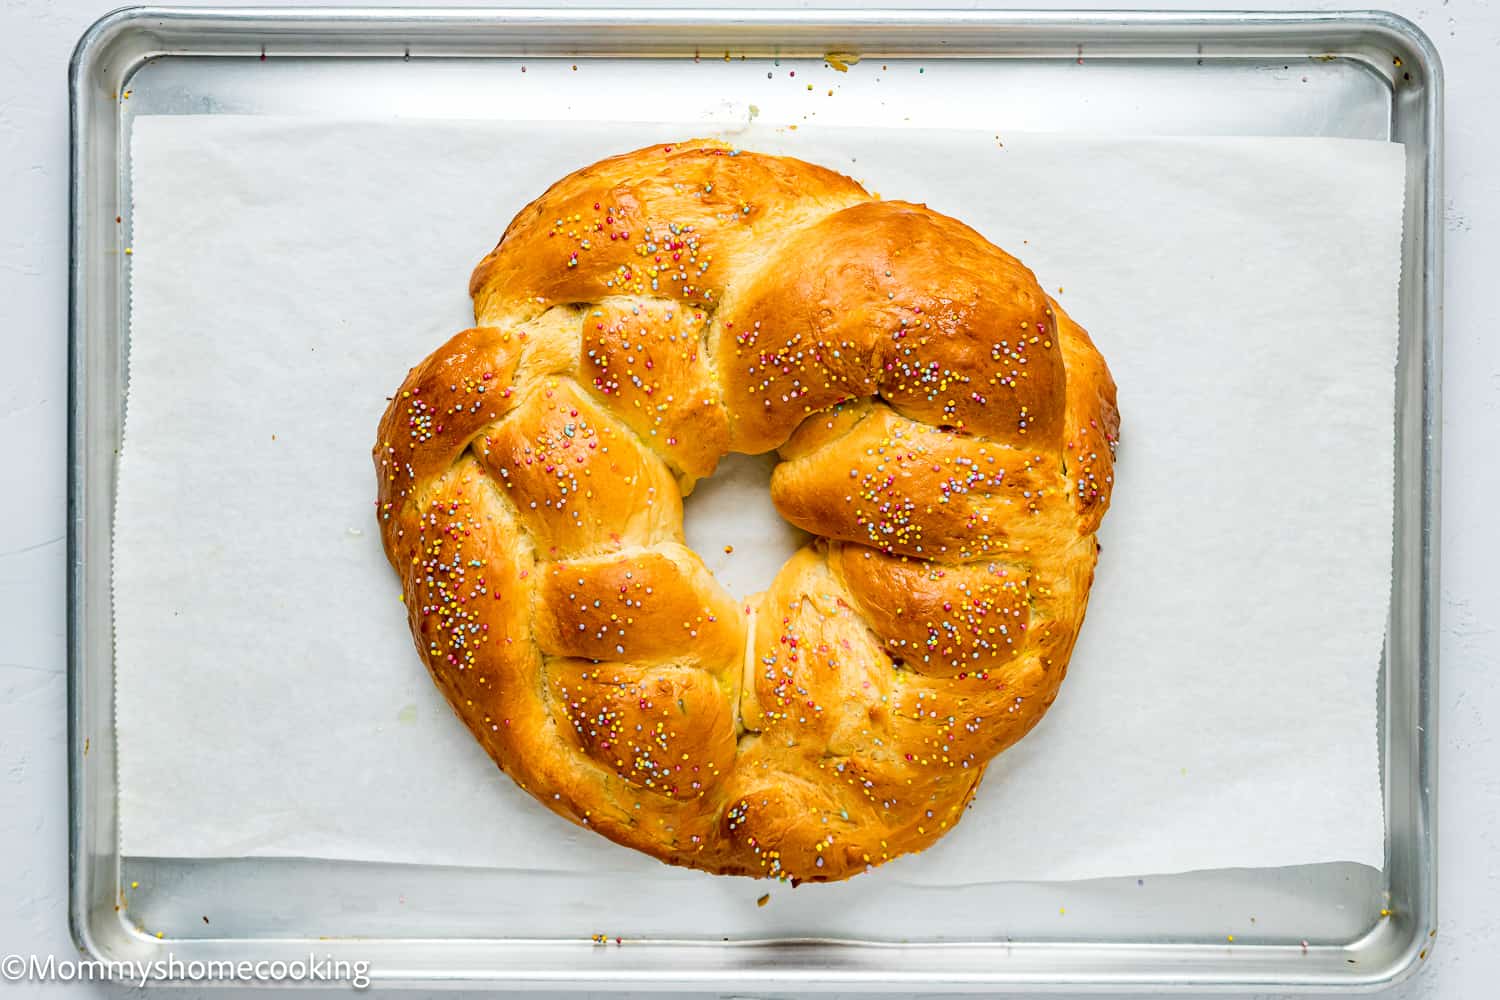
Bake for 30 to 35 minutes, or until golden brown. The bread is ready when the internal temperature reads 180º F / 88° C. As soon as the bread comes out of the oven, brush it with the melted butter to give it a shiny finish. Carefully transfer the bread on the parchment paper to a wire cooling rack. Let cool for at least 30 minutes. Serve warm or at room temperature.
Recipe Tips
- For the best rise, make sure your yeast is fresh and active. If unsure, proof it by dissolving it in warm milk with a pinch of sugar until it becomes frothy.
- Add the butter slowly! Adding it too fast will not “emulsify” the dough, resulting in an oily, broken dough. I recommend adding one tablespoon at a time and mixing for 2 minutes before adding the next.
- Knead the dough until it is smooth and elastic. This helps develop gluten, giving the bread its soft texture.
- Allow the dough to rise in a warm, draft-free environment. Cover it with a clean kitchen towel or plastic wrap to prevent it from drying out.
- Don’t skip the orange zest—it adds a delightful citrusy note that enhances the bread’s overall flavor.
- You can still make this recipe without a stand mixer. Kneading dough by hand may require a bit more time and effort than using a stand mixer. Be patient and knead the dough for about 10-15 minutes until it passes the windowpane test and becomes smooth, velvety, and slightly tacky.
Food Allergy Swaps
- Dairy-Free: You can substitute whole milk, evaporated milk, and butter with your favorite plant-based alternatives. Many brands are available in stores. I usually use Earth Balance Vegan Buttery Sticks. Check out my favorite dairy-free substitutes here.
- Gluten-Free: I haven’t tested this recipe with a gluten-free flour mix, but you can give it a try. My favorite GF blend for bread is Bob’s Red Mill Gluten Free Homemade Wonderful Bread Mix. Keep in mind that gluten-free doughs may require a shorter rise time than doughs made with regular flour. Also, gluten-free breads may bake at a slightly lower temperature and for a shorter amount of time than traditional breads. Start by baking the bread at the temperature specified in the recipe, but be prepared to adjust the baking time if necessary.
Variations & Additions
- Add a handful of raisins or dried cranberries to the dough for a fruity twist.
- For a richer flavor, you can sprinkle chopped nuts, such as almonds or pecans, on top of the bread before baking.
- Experiment with different shapes and braiding techniques to create a unique presentation for your Easter Sweet Bread.
- Add different flavorings, such as almond extract or cinnamon, for a unique twist.
Serving Suggestions
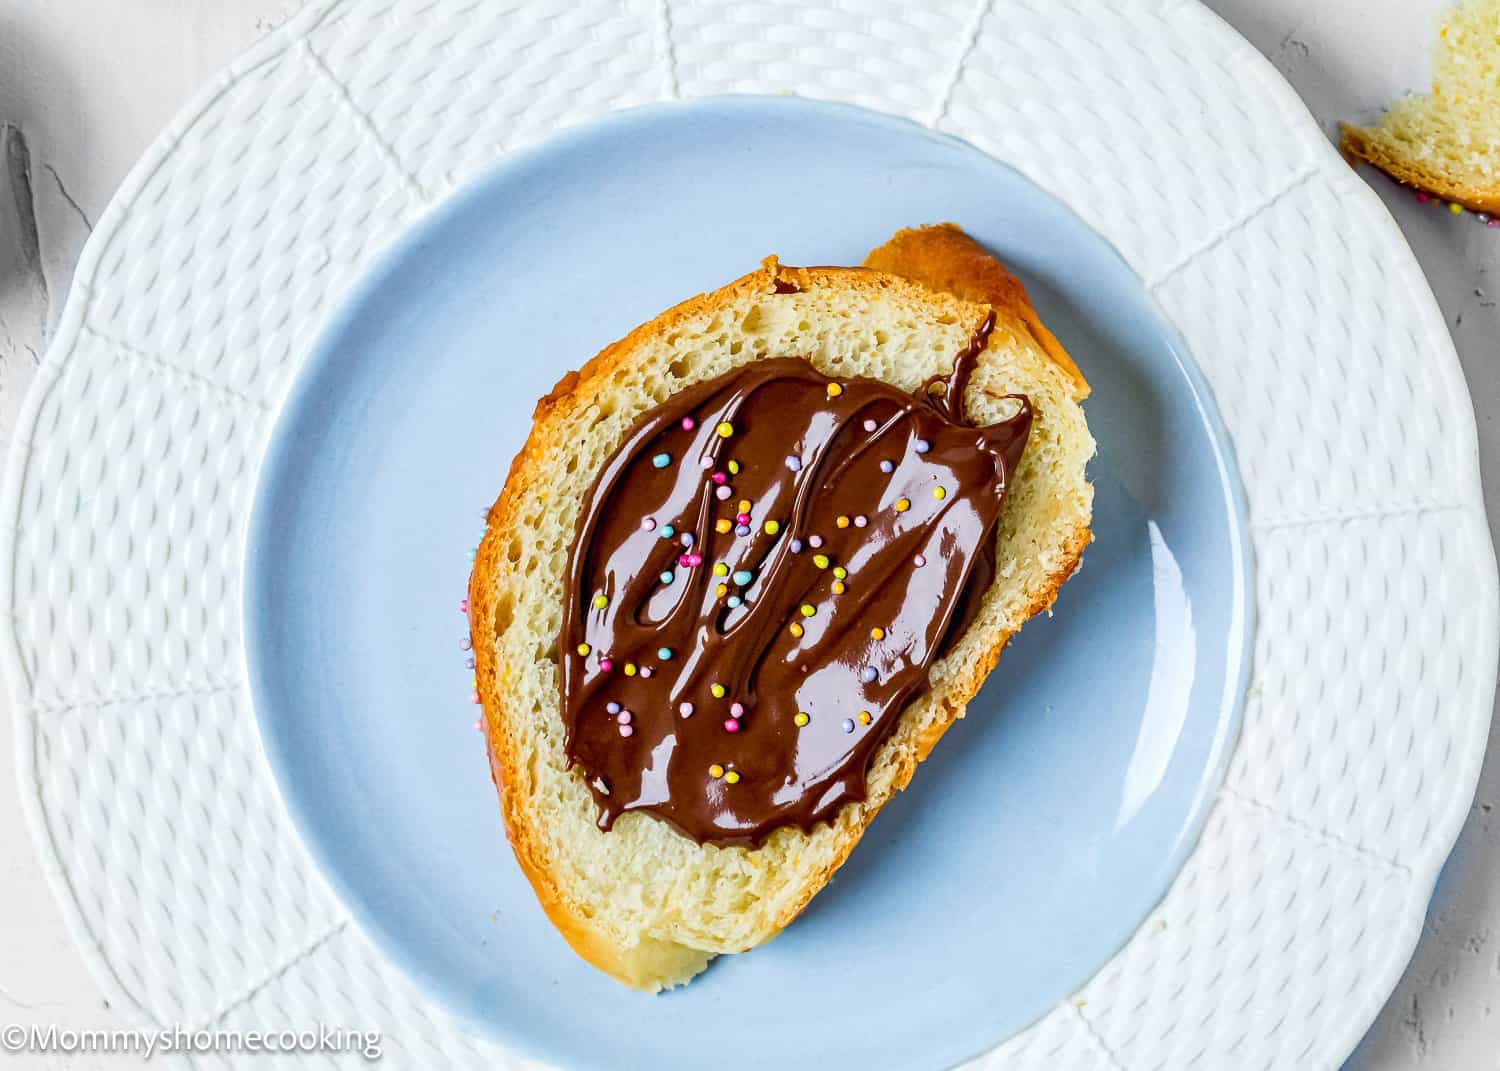
Serve slices of Easter Sweet Bread alongside your Easter meal for a delightful addition to the spread. Pair it with butter or jam for an extra indulgent treat, or smother it with your favorite chocolate spread.
Storing and Freezing Instructions
To store leftover Easter Sweet Bread, wrap it tightly in plastic wrap or aluminum foil and store it at room temperature for up to 3 days. Then, you can move it to the refrigerator for up to five days.
Alternatively, you can freeze individual slices or the whole loaf, wrapped tightly with plastic wrap in an airtight container for up to 3 months. Thaw overnight in the refrigerator before reheating in a toaster or oven.
Frequently Asked Questions
Yes, you can substitute active dry yeast for instant dry yeast in equal amounts. However, you may need to proof it in warm liquid before using it in the recipe.
Yes, you can prepare the dough ahead of time and refrigerate it overnight for a slow rise. Alternatively, you can bake the bread a day before and store it as directed above.
Of course! The sprinkles are optional and purely for decoration. Feel free to leave them out if you prefer a simpler appearance.
The windowpane test is one of the best ways to tell if you’ve sufficiently kneaded your bread dough. If properly kneaded, the dough should stretch into a thin membrane that you can see through without tearing or breaking. This means that the gluten is well-developed, and your dough is ready to rise.
Absolutely! While a stand mixer can make the process easier and more convenient, you can definitely make this Easter Sweet Bread recipe without one. Kneading dough by hand may require a bit more time and effort than using a stand mixer. Be patient and knead the dough for about 10-15 minutes until it passes the windowpane test and becomes smooth, velvety, and slightly tacky.
More Bread Recipes You’ll Love!
- Eggless Honey Whole Wheat Rolls
- Eggless Homemade Hawaiian Rolls
- Soft & Easy Eggless Dinner Rolls
- Eggless Easter Hot Cross Buns
- Browse more recipes…
❤️ Love what you see? JOIN my Private Baking Club. Also, SUBSCRIBE to Mommy’s Home Cooking, so you’ll never miss a recipe! And FOLLOW along on Instagram, Pinterest, and Facebook for more fun!
Recipe Card 📖

Easy Easter Bread
Equipment
Ingredients
- 4 cups (560 g) all-purpose flour plus additional for dusting
- ½ cup (100 g) granulated sugar
- 2 ¼ teaspoons (7 g) instant dry yeast (0.25-ounce / 1 packet)
- 1 ½ teaspoon (6 g) salt
- 1 cup (240 ml) whole milk
- ½ cup (100 ml) evaporated milk
- 1 teaspoon (5 ml) pure vanilla extract
- 1 tablespoon (7 g) orange Zest
- 6 tablespoons (84 g) unsalted butter, cubed and softened (plus 2 more tablespoons melted to brush on the baked bread)
- Multi-colored sprinkles optional
- Easter Chocolate Mini Eggs to decorate (optional)
Eggless “Egg” Wash:
- 1 tablespoon (15 ml) evaporated milk
- 1 tablespoon (15 ml) maple syrup
Instructions
Make the Bread Dough:
- Mix flour, sugar, yeast, and salt in the bowl of the stand mixer.
- Mix whole milk, evaporated milk, vanilla and orange zest in a bowl. Microwave for 1 minute to warm up, like lukewarm – about 100° F/ 38º C. This is essential to activate the yeast.
- Add warm evaporated milk mixture to the bowl with the flour mixture. Beat with a dough hook on low speed for 2 – 3 minutes until combined; scrape down the sides of the bowl with a rubber spatula. Increase mixer speed to medium, continue kneading until the dough comes together, about 3 more minutes
- Add the softened butter, with the mixer running, one tablespoon at a time, letting each piece incorporate before adding the next. The dough will be sticky after adding in the butter. Be sure to scrape the bowl as needed to make sure the dough is mixing correctly.
- After adding all the butter, keep mixing the dough for 10 minutes, or until the dough is smooth, velvety, screechy, and the dough passes the windowpane test. This can take anywhere from 10 minutes to 15 minutes, so be patient. NOTE: Make sure to knead the dough long enough, so your bread is light and fluffy and not dense or heavy. Heavy bread can be the result of not kneading the dough long enough.
First Rise:
- Roll the dough into a ball and place it in a lightly greased bowl. Cover and let it set in a warm place for 1 ½ – 2 hours, or until double in size.
Form the Ring:
- Line a large rimmed baking sheet with parchment paper.
- Once the dough has doubled in size, turn it out onto a floured surface and gently punch down the dough.
- Divide into 3 equal pieces, each about 373 g. Roll each piece to form a 1-inch-wide rope about 23 inches long.
- Place ropes side by side lengthwise on the prepared baking sheet. Pinch one of top ends together, then tightly braid ropes together. Bring ends together to create a ring and pinch the end together. Make sure the ends are securely joined together.
Second Rise:
- Loosely cover the baking sheet with plastic wrap or a dish towel and allow to rise in a warm area, until it doubles in size, 45 to 60 minutes.
- While the dough is rising, preheat your oven to 350º F (180º C) and place the oven rack in the lower half. If your bread is too close to the top of the oven it will get too brown.
Eggless Egg Wash:
- Mix evaporated milk and maple syrup in a small bowl. Brush the mixture all over the bread. Sprinkle the top with sprinkles, if desired.
Bake:
- Bake for 30 to 35 minutes, or until golden brown. The bread is ready, when the internal temperature read between 180º F / 88° C. As soon as the bread comes out of the oven, brush it with the melted butter to give it that shiny finish. Carefully transfer the bread on the parchment paper to a wire cooling rack. Let cool for at least 30 minutes. Serve warm or at room temperature.
- For the best rise, make sure your yeast is fresh and active. If unsure, proof it by dissolving it in warm milk with a pinch of sugar until it becomes frothy.
- Add the butter slowly! Adding it too fast will not “emulsify” the dough, resulting in an oily, broken dough. I recommend adding one tablespoon at a time and mixing for 2 minutes before adding the next.
- Knead the dough until it is smooth and elastic. This helps develop gluten, giving the bread its soft texture.
- Allow the dough to rise in a warm, draft-free environment. Cover it with a clean kitchen towel or plastic wrap to prevent it from drying out.
- Don’t skip the orange zest—it adds a delightful citrusy note that enhances the bread’s overall flavor.
- You can still make this recipe without a stand mixer. Kneading dough by hand may require a bit more time and effort than using a stand mixer. Be patient and knead the dough for about 10-15 minutes until it passes the windowpane test and becomes smooth, velvety, and slightly tacky.
- Dairy-Free: You can substitute the whole milk, evaporated milk and butter with your favorite plant-based alternatives. There are many brands available in stores. I usually use Earth Balance Vegan Buttery Sticks. Check out my favorite dairy-free substitutes here.
- Gluten-Free: I haven’t tested this recipe with a gluten-free flour mix; however you can give it a try. My favorite GF blend for bread is . Keep in mind that gluten-free doughs may require a shorter rise time compared to doughs made with regular flour. Also, gluten-free breads may bake at a slightly lower temperature and for a shorter amount of time than traditional breads. Start by baking the bread at the temperature specified in the recipe, but be prepared to adjust the baking time if necessary.
- Add a handful of raisins or dried cranberries to the dough for a fruity twist.
- For a richer flavor, you can sprinkle chopped nuts, such as almonds or pecans, on top of the bread before baking.
- Experiment with different shapes and braiding techniques to create a unique presentation for your Easter Sweet Bread.
- Add different flavorings such as almond extract or cinnamon for a unique twist.

Leave a Reply