

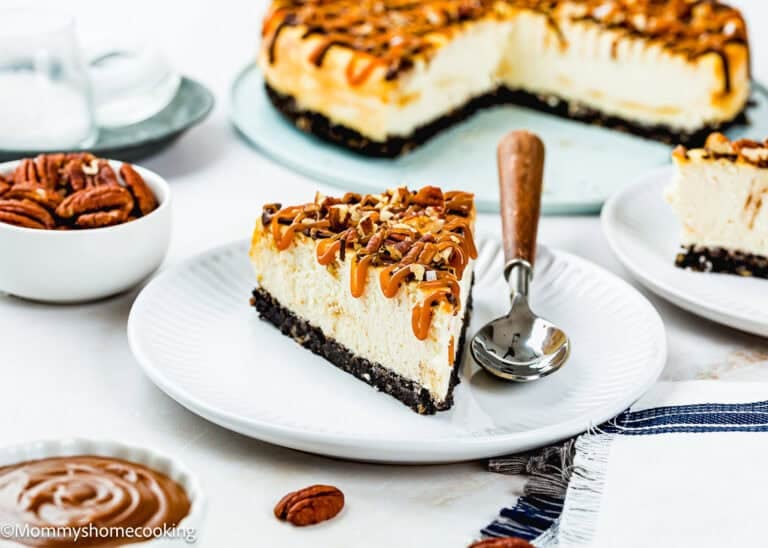
This Eggless Cheesecake is rich, ultra-creamy, and silky-smooth — a classic baked cheesecake made completely without eggs. Instead of eggs, a little cornstarch and whipped heavy cream set the filling, so it bakes up dense and velvety with no cracks and no sinking. I first developed it for my daughter’s birthday, and after years of testing, it’s still the one I trust every time. Egg allergy or just out of eggs — no one will ever guess.

Oriana’s Thoughts On The Recipe
I’ll be honest — I put off developing a cheesecake for a long time because it intimidated me, until my daughter asked for one for her birthday. That was all the push I needed, and after testing it again and again in my own kitchen, this is the eggless cheesecake I’m proudest of.
It’s luscious, rich, and smooth, with no sinking and no cracked center — cheesecake perfection, and completely egg-free. After 13+ years of egg-free baking, it’s still the recipe I reach for when I really want to impress. This cheesecake means business.
Here’s why you’re going to love it:
- Ultra-creamy and silky. It bakes up dense, smooth, and rich — just like the classic.
- No eggs needed. Cornstarch and whipped cream set the filling — no eggs, no replacers.
- Crack-free and no sinking. The water bath and slow cool keep the top flawless.
- Make-ahead friendly. It’s even better the next day — ideal for celebrations.
- Foolproof and classic. Tastes exactly like the cheesecake everyone knows and loves.
- Egg-free by design. Safe for egg allergies, and no one can tell the difference.

How This Eggless Cheesecake Sets Without Eggs
Traditional cheesecake relies on eggs to set the filling and give it structure. This version skips them entirely and lets cornstarch and whipped heavy cream do the work instead. The cornstarch thickens and stabilizes the filling as it bakes so it sets firm and sliceable, while the whipped cream folded in at the end keeps the texture light, creamy, and smooth. Sweetened condensed milk and sour cream add richness and that signature cheesecake tang. The result is a dense, velvety cheesecake that’s built egg-free from the start — no eggs, no egg replacers, and no one will guess.

Ingredients Notes & Substitutions
Please check the recipe card at the bottom of the post for exact quantities and detailed instructions (scroll down).
Crust:
- Graham crackers: You will need about 27 square sheets of graham crackers crushed. Check out my post about How to Make Easy Graham Cracker Crust.
- Butter
- Sugar: Regular white sugar, also known as caster sugar.
Filling:
- Heavy cream: Make sure it has at least 35% fat content.
- Cornstarch and Water: These will help the cheesecake to set.
- Cream cheese: Use the full-fat version.
- Sugar: Regular white sugar, also known as caster sugar.
- Sour cream: Use the full-fat version. Learn How to Make Sour Cream at Home.
- Sweetened condensed milk: Again, please use the full-fat version.
- Lemon juice: I recommend freshly squeezed lemon juice for a better taste.
- Pure vanilla extract: For optimal flavor, reach for pure vanilla instead of imitation. Even better, try homemade vanilla extract!
- Strawberry sauce for serving (optional)
Food Allergy Swaps
This recipe is naturally egg, nut, peanut, and sesame-free, making it suitable for most dietary needs. However, always check labels for hidden allergens.
- Dairy-Free: To make this recipe dairy-free, you can easily swap out the dairy ingredients for non-dairy alternatives.
- Butter: Substitute butter with dairy-free butter substitutes. Miyoko’s Creamery Organic Vegan Butter and Earth Balance Vegan Buttery Sticks are my favorite butter substitutes for baking.
- Cream Cheese: To substitute the cream cheese, I like to use Violife Just Like Cream Cheese Original.
- Sour Cream: Use your favorite dairy-free sour cream. I use and recommend Tofutti Better than Sour Cream.
- Heavy Cream: You can use a non-dairy cream, such as Silk, Country Crock Plant Cream, or Califia Farms.
- Sweetened condensed milk: My favorite dairy-free substitute is NATURES CHARM Sweetened Condensed Oatmilk.
- Gluten-Free: Graham Crackers: Use your favorite wheat-free graham cracker. I like Pamela’s gluten-free Graham Crackers, but they contain milk. Kinnikinnick S’moreables, Graham Style Cracker is another milk – and wheat-free alternative, but the label warns that it may contain eggs. Homefree Mini Ginger Snap Cookies are free of the 14 most common food allergens. So, if you are dealing with several allergies, make sure you find a safe alternative.
Step-by-Step Recipe Photo Tutorial
Please check the recipe card at the bottom of the post for exact quantities and detailed instructions (scroll down).
- Make the Crust
- Make the Filling
- Prepare the Pan
- Pour the Filling into the Prepared Pan
- Prepare the Water Bath
- Bake
- Chill


Tips & Tricks to Make The Best Eggless Cheesecake
Plan ahead! Cheesecake is one of those desserts you have to plan in advance. It takes a long time to bake and a long time to chill and set.
Make sure all your ingredients are at room temperature. Also, measure the ingredients correctly. I highly recommend using a kitchen scale.
Preheat the oven at least 15 minutes before starting to give it plenty of time to reach the ideal baking temperature.
Leaky pans are a cheesecake’s arch-nemesis. After many years of cheesecake making, I have concluded that most springform pans leak, so to avoid water leaks, I like to wrap the springform pan with a double layer of heavy-duty foil and then a slow cooker liner. To do so, I place the springform pan in the middle of the slow cooker liner, grab all that excess baggage, wind it up, and tie the end with a knot, covering the underside and coming all the way to the top.
Avoid overbaking the cheesecake, or it will crack. The center of your cheesecake should still wobble when you remove it from the oven; it will continue to cook as it cools on the counter.
Know your oven! Ovens are all different, so baking times are always approximate. Oven thermostats are sometimes inaccurate, and that will affect baking time, so keep an eye on things.
To prevent cracks during cooling, it’s important to loosen the cheesecake from the sides of the pan after baking. First, cool the cheesecake on a wire rack for 15 minutes. Then, carefully run a knife between the cheesecake and the inside of the pan. Don’t remove the sides of the pan yet.
Allow the cheesecake to chill for at least 6 hours in the refrigerator before attempting to cut.
Do you want to cut the perfect cheesecake slice? Use a thin knife that has been dipped in hot water and then wiped dry. Repeat this step before every single cut.
Why Did My Cheesecake Crack?
Cracks come down to four things, and all of them are easy to avoid.
- Overbaking is the biggest culprit — pull the cheesecake while the center still wobbles, because it keeps setting as it cools.
- Overmixing beats too much air into the filling, so mix on low speed and stop the moment everything is combined.
- Skipping the water bath dries the top out and browns the edges; the hot water bath bakes it gently and evenly.
- And cooling too fast makes it sink and split, so I turn off the oven and leave the cheesecake inside for 40 minutes before bringing it to room temperature. Do those four things, and you’ll get a smooth, crack-free top every time.

Toppings & What to Serve With
This eggless cheesecake is a blank canvas — dress it up for the occasion:
- Easy Strawberry Sauce — the classic glossy berry topping, and my go-to.
- Fresh berries + a dusting of powdered sugar for something simple and pretty.
- A drizzle of chocolate or caramel for a richer, more decadent finish.
- Craving a flavor twist? Try my Eggless Chocolate Cheesecake, Eggless Lemon Cheesecake, or the easier Best No-Bake Strawberry Cheesecake.
Storing & Freezing Instructions
Store:
You can store your Eggless Cheesecake covered and in the refrigerator for up to five days.
Freeze:
Eggless Cheesecake can be frozen for up to three months.
- First, cool the cheesecake on the counter before freezing—you can skip cooling it in the refrigerator.
- Next, remove the outer rim of the springform pan (leave the base).
- Then wrap the cheesecake and the bottom of the pan with a few layers of plastic wrap, then a final layer of aluminum foil. Don’t freeze your cheesecake with any toppings!
When you’re ready to eat your cheesecake, thaw it overnight in the refrigerator. Add your toppings before serving a delicious Eggless Cheesecake.

Frequently Asked Questions
You can certainly do so, but it’s very important that you adjust the baking time accordingly.
You will notice that the edges are just barely puffed, but the filling is pale—you’re not looking for golden brown. Meaning that the top of the cheesecake should no longer look glossy and wet but overall have a more matte appearance on top. Also, the outer part of the cheesecake has to look set, and the center of the cheesecake has to still be a little jiggly, but not look too liquidy.
It’s highly recommended. You can skip it, but you risk overbaking, browned edges, and a less silky texture. The water bath bakes the cheesecake gently and evenly, which is the secret to that smooth, crack-free top.
Almost always overbaking, overmixing, skipping the water bath, or cooling too quickly. Pull it while the center still wobbles, mix on low just until combined, bake in a water bath, and let it cool slowly in the turned-off oven. That combination keeps the top smooth and crack-free.
It likely needs more time — either a little more bake time (the edges should be set and slightly puffed while the center jiggles) or, more often, a longer chill. The cornstarch sets as the cheesecake cools, so it needs at least 6 hours in the fridge, and overnight is even better.
Yes — a springform pan lets you release the cheesecake cleanly without flipping it. Just wrap the base well in heavy-duty foil (and a slow cooker liner, if you have one) to keep water from seeping in during the water bath.
This is the perfect make-ahead dessert. It needs at least 6 hours to chill and is actually better the next day, so I recommend making it a day before you plan to serve it.
Yes, in a pinch, a store-bought graham crust works. A homemade graham cracker crust gives the best flavor and a crispier base, but do what fits your day.
At least 6 hours in the refrigerator, and overnight is best. Don’t rush this step — it’s what lets the cheesecake fully set and slice cleanly.
Correct — no eggs needed. Cornstarch and whipped heavy cream set and structure the filling, so it bakes up creamy and firm and tastes just like a classic cheesecake.


Recipe Card

Best Eggless Cheesecake


Video
Important
• For best results, I highly recommend using a kitchen scale to measure the ingredients.
Ingredients
Crust:
- 1 ¾ cups (150 g) graham cracker crumbs (about 27 square sheets of Graham Crackers)
- 1/3 cup (75 g) unsalted butter, melted
- ¼ cup (50 g) granulated sugar
Filling:
- ½ cup (120 ml) heavy cream (I use full fat)
- 3 tablespoons (30 g) cornstarch
- 3 tablespoons (45 ml) water
- 24 oz (678 g) full-fat cream cheese, softened (3 pkg 8oz. each)
- 1/2 cup (100 g) granulated sugar
- 1/2 cup (120 g) sour cream
- 1 can (14 oz – 397 g) sweetened condensed milk
- 1 tablespoon (15 ml) lemon juice
- 2 teaspoons (10 ml) pure vanilla extract
- Strawberry sauce for serving (optional)
Instructions
- Preheat oven to 350º F (180º C).
Crust:
- Lightly grease a 9-inch round springform pan and line it with parchment paper.
- In a medium mixing bowl, combine graham crumbs, butter, and sugar with a fork until evenly moistened.
- Pour the crumb mixture into the springform pan and press the crumbs down into the base and up the sides. Tip: Use the bottom of a measuring cup or glass to press down the crumbs evenly. Bake crust at 350º F (180º C) until set and fragrant, about 8 to 10 minutes. Remove to a wire rack to cool for at least 30 minutes before filling. Note: If you are short of time, you can just refrigerate the unbaked crust until you make the filling. I have done it both ways, and it works fine. Baking the crust ensures that you have a crispier bottom, though.


Filling:
- In a medium bowl, whip cream with an electric mixer until stiff peaks form, about 2 – 3 minutes. Set aside.
- Mix cornstarch and water in a small bowl until smooth. Set aside.
- Place the cream cheese in the bowl of an electric mixer, beat on low speed for 2-3 minutes until smooth and free of any lumps. Add sugar and sour cream and continue mixing until incorporated. Gradually add sweetened condensed milk and beat until creamy for 1-2 minutes. Add lemon juice, vanilla extract, and cornstarch mixture; beat until well incorporated. Turn off the mixer.
- Add whipped heavy cream and gently fold in using a spatula. Set aside.

Prepare the Pan:
- Place the springform pan (with the cooled crust) inside a cheesecake protector . Then place it inside a larger baking pan. Alternatively, you can wrap the outside of the springform pan with two layers of heavy-duty foil to prevent water from seeping in. This is to keep the water from seeping into the cheesecake.
- Pour the cheesecake mixture over the crust; tap gently to remove any air bubbles.

Water Bath:
- Place the cheesecake into a large roasting pan and pour hot water in (avoiding the cheesecake, of course) until it’s about halfway up the sides of the cheesecake pan.
- Bake at 350º F (180º C) for 40 minutes or until the edges are just barely puffed, but the filling is pale—you're not looking for golden brown.
- Turn off the oven and leave the door closed for 40 more minutes (leave the cheesecake inside the oven). The cheesecake will continue to cook, but will slowly begin to cool as well.
- After 40 minutes, remove the cheesecake from the oven. The cheesecake center should still wobble when you remove it; it will continue to cook as it cools on the counter. Next, remove the cheesecake from the water bath and its foil wrapping or cheesecake protector. Let it cool at room temperature. Then refrigerate for at least 6 hours, or overnight (better).
- Loosen the cheesecake from the sides of the pan by running a thin metal spatula around the inside rim. Unmold and transfer to a cake plate.


- First, cool the cheesecake on the counter before freezing—you can skip cooling it in the refrigerator.
- Next, remove the outer rim of the springform pan (leave the base).
- Then wrap the cheesecake and the bottom of the pan with a few plastic wrap layers, then a final layer of aluminum foil. Don’t freeze your cheesecake with any toppings!
- Plan ahead! Cheesecake is one of those desserts you have to plan in advance. It takes a long time to chill and set.
- Measure the ingredients correctly. I highly recommend using a kitchen scale.
- Preheat the oven at least 15 minutes before getting started to give it plenty of time to reach the ideal recipe temperature.
- Leaky pans are a cheesecake’s arch-nemesis. After many years of cheesecake making, I have concluded that most springform pans leak, so to avoid water leaks, I like to wrap the springform pan with a double layer of heavy-duty foil and then a slow cooker liner. To do so, I place the springform pan in the middle of the slow cooker liner, grab all that excess baggage, wind it up, and tie the end with a knot, covering the underside and coming all the way to the top.
- Ovens are all different, so baking times are always approximate. Oven thermostats are sometimes inaccurate, and that will affect baking time, so keep an eye on things.
- Avoid overcooking the cheesecake, or it will crack. The center of your cheesecake should still wobble when you remove it from the oven; it will continue to cook as it cools on the counter.
- To prevent cracks during cooling, it’s important to loosen the cheesecake from the sides of the pan after baking. First, cool the cheesecake on a wire rack for 15 minutes. Then, carefully run a knife between the cheesecake and the inside of the pan. Don’t remove the sides of the pan yet.
- Allow the cheesecake to chill for at least 6 hours in the refrigerator before attempting to cut it. For a very clean cut, use a warm knife (the best way to warm a knife is to run it under hot water and then dry it off just before cutting) and wipe the knife clean between cuts.
Nutrition
Nutrition information provided is an estimate and will vary based on cooking methods and brands of ingredients used.
Eggless Baking Frequently Asked Questions
You’ve asked, and I’ve answered! Read on for a handful of answers to the most frequently asked questions about eggless baking.
More Eggless Cheesecake Recipes You’ll Love!
- Eggless Red Velvet Cheesecake
- Best No-Bake Strawberry Cheesecake
- Eggless Chocolate Cheesecake
- Eggless Lemon Cheesecake
- Eggless Turtle Cheesecake
- Eggless Raspberry Cheesecake
- Eggless Pumpkin Cheesecake
- Browse more recipes…
Recipe Changelog:
- Originally posted in April 2018.
- Update: The post was edited in July 2021 to add more helpful information, with no changes to the recipe.
- Update: The post was updated again in July 2026 to add more helpful information, with no changes to the recipe.





I love this recipe so much but I was wondering if I wanted to make this cheesecake coffee flavored, how much espresso powder I should add?
Hello John! I recommend using coffee bakery emulsion. It’s my favorite way to do it since it gives you a rich coffee flavor without changing the texture of the filling. Add it to the batter a little at a time and taste as you go. For just a hint of flavor, I recommend 1/2 to 1 teaspoon. If you’d rather use espresso powder, start with 1 to 2 tablespoons dissolved in the heavy cream so it blends in smoothly with no gritty specks, then add more if you want it stronger. Let me know how it turns out! xo