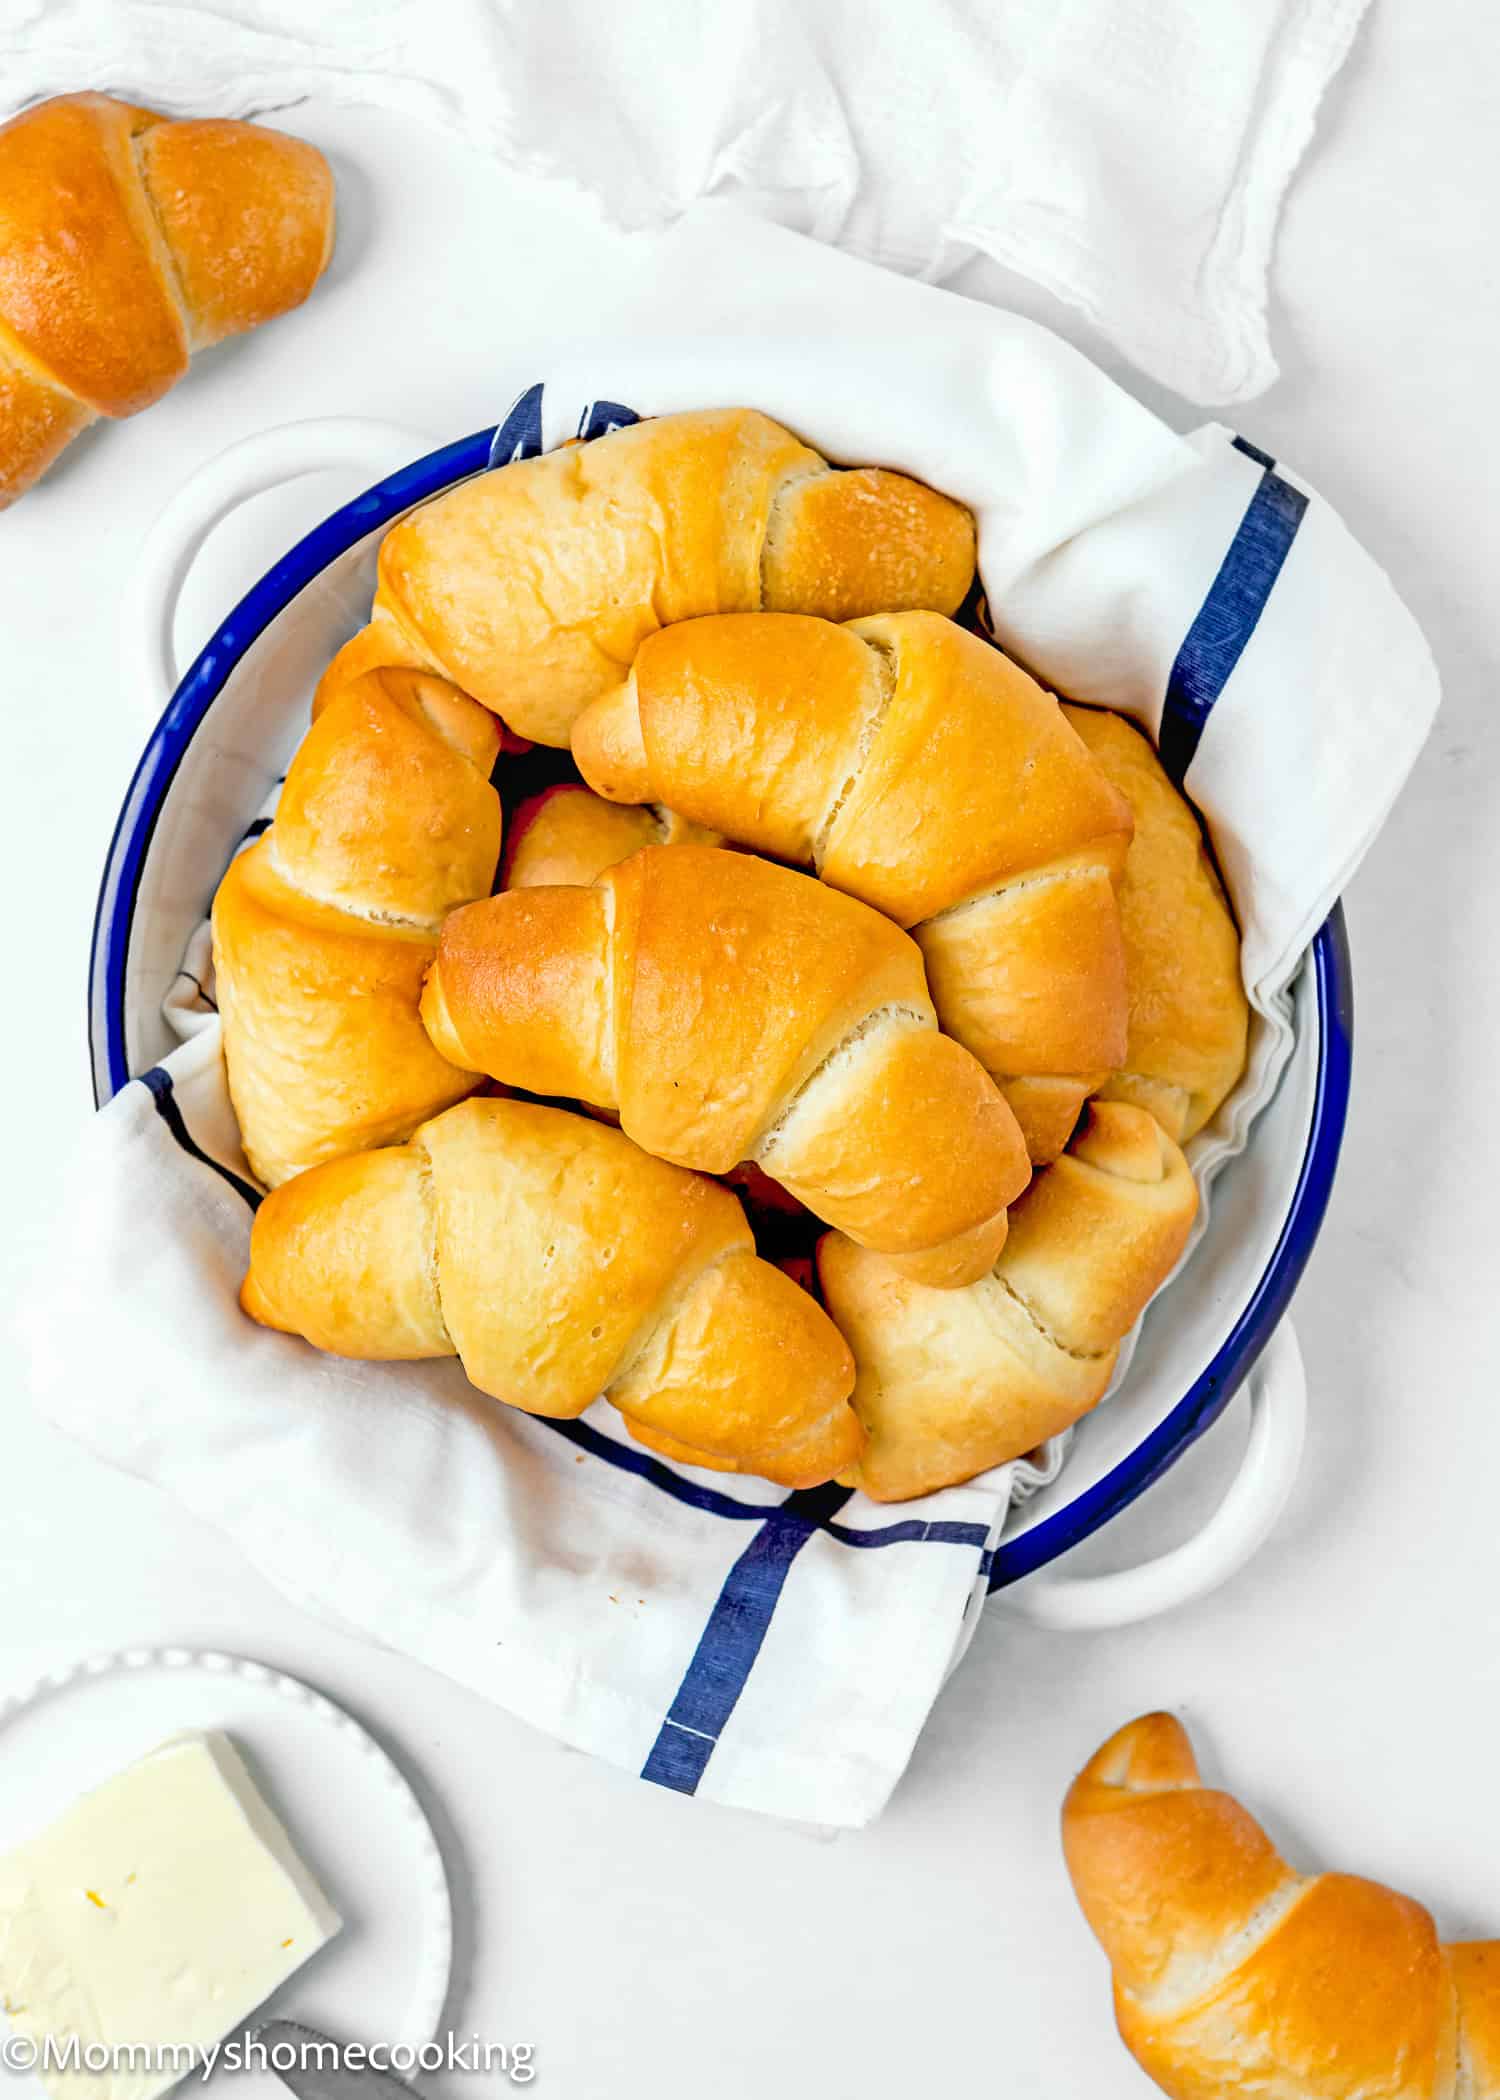
These Homemade Eggless Crescents Rolls are fluffy, light, buttery, and lightly sweet! Skip the can and make these from scratch to level up your dinner game. They’re easy to make with simple ingredients and way better than store-bought ones.

From Scratch with Love: Your New Favorite Eggless Crescent Rolls!
This Homemade Eggless Crescent Rolls recipe is a winner in every sense of the word. It’s easy, it’s egg-free, it’s light and fluffy, it’s buttery and lightly sweet, and it’s homemade with love.
Why To Make Crescents from Scratch When I Can Pop a Can?
Now, I know what you’re thinking. Why bother making homemade when you can pop open a can of pre-made crescent rolls? Homemade is always better – that’s my mantra; sure, you can easily grab a can off the shelf, pop it open, and have crescent rolls ready in a snap. And hey, I’ve been there, too, reaching for that convenient option when time is tight. But let me tell you why homemade takes the cake, especially for families navigating food allergies.
When you’re dealing with food allergies, every ingredient matters. That’s why making things from scratch brings me an incredible sense of peace of mind. I know exactly what’s going into each batch of dough – no hidden surprises or mystery additives. It’s all about control, baby!
So, while those store-bought crescent rolls might seem tempting, there’s nothing quite like the satisfaction of knowing that what you’re serving up is safe and wholesome. Homemade isn’t just about taste – it’s about trust. And when it comes to feeding your family, that’s worth its weight in gold.
But wait, it gets better. These crescent rolls are not just safe and wholesome. Oh no, they’re buttery, they’re lightly sweet, and they’re downright irresistible.
So, let’s get baking!
What To Love About This Recipe
- Easy to make: With just a few simple steps, you can whip up a batch of these crescent rolls in no time.
- Made with just a few simple ingredients: Everything you need is likely already in your pantry.
- Egg-Free: Perfect for those with egg allergies or dietary restrictions, these crescent rolls are completely egg-free without sacrificing flavor or texture.
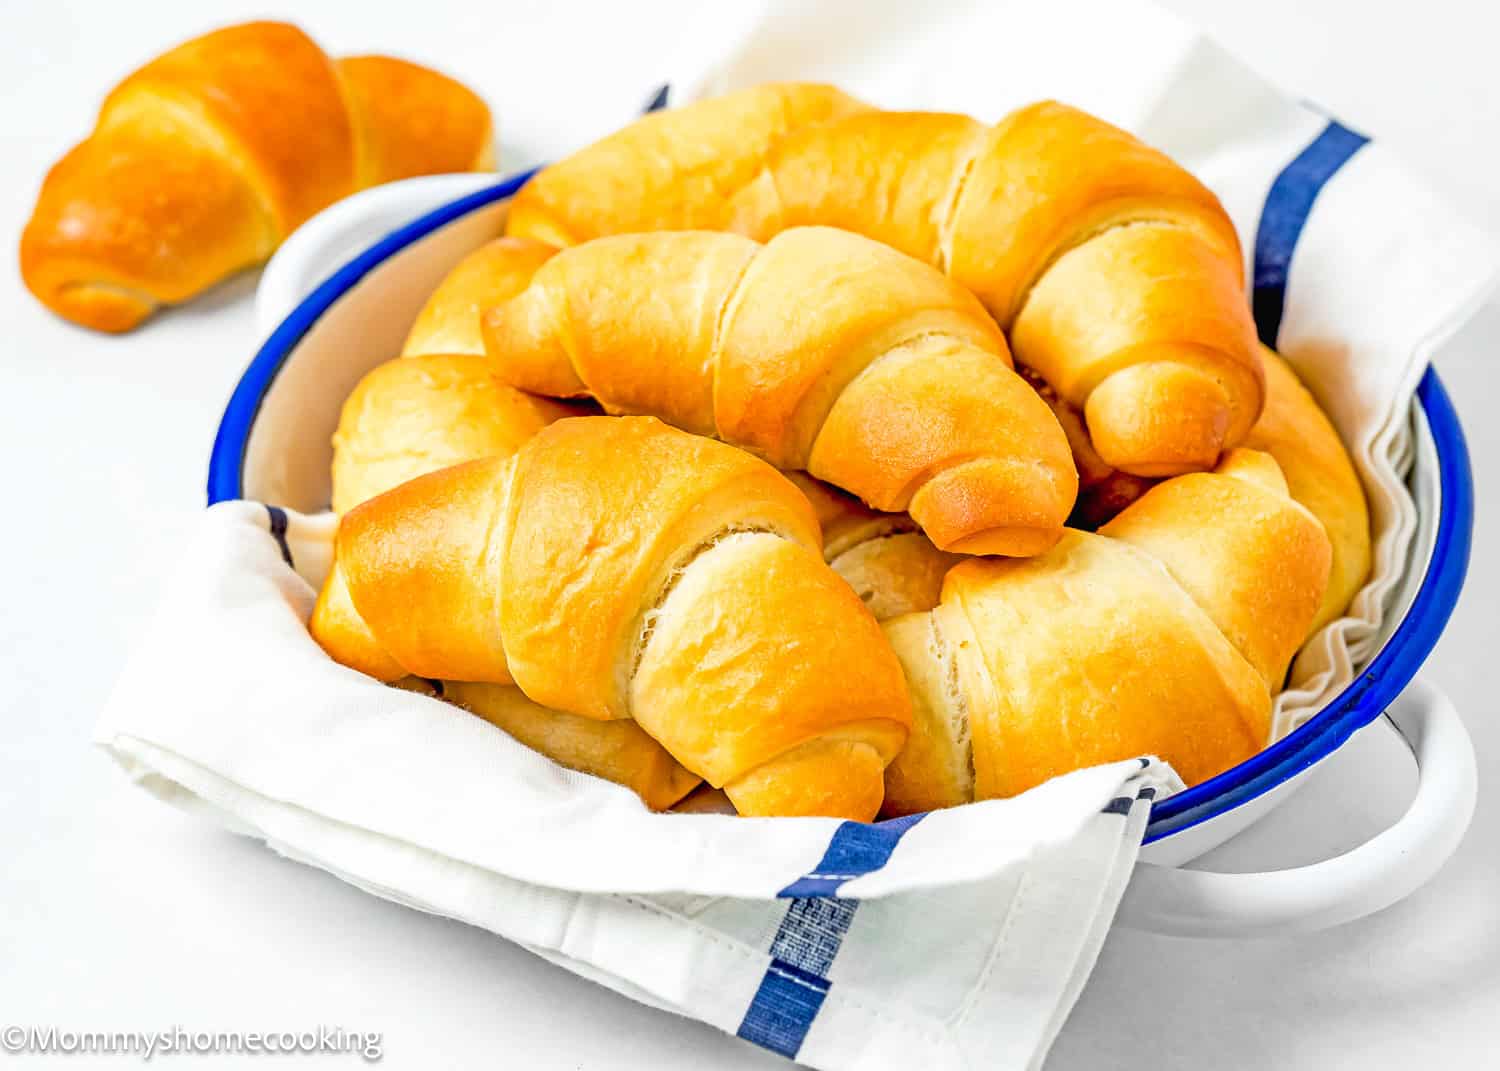
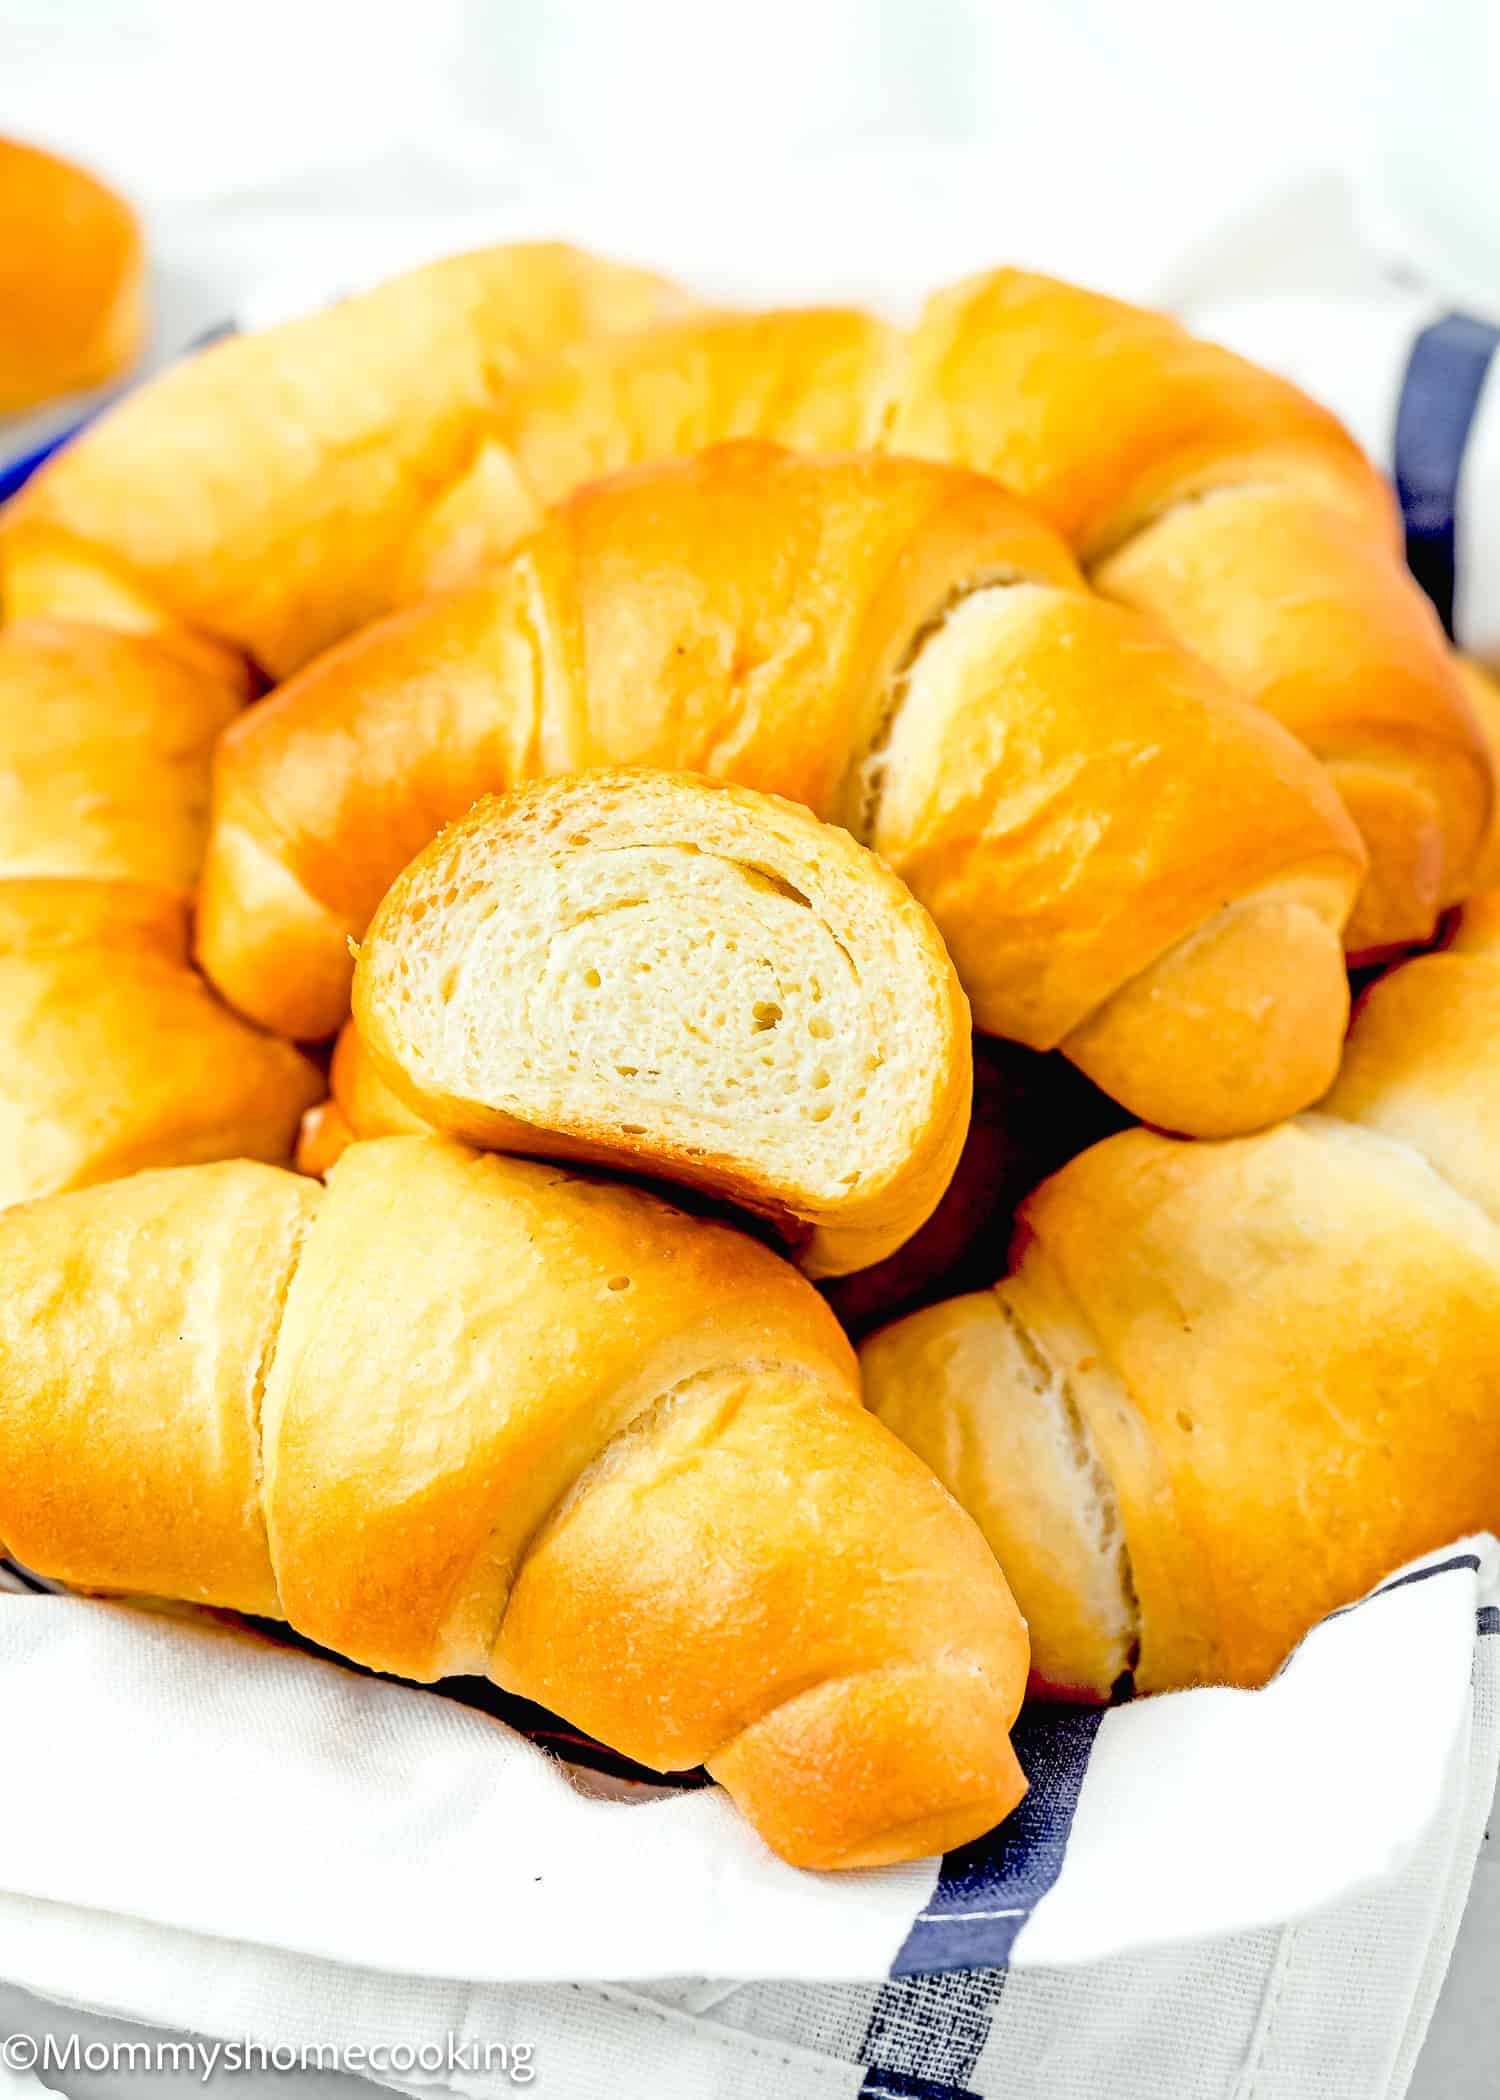
- Light and fluffy: Bite into these crescent rolls, and you’ll be greeted with an utterly irresistible cloud-like softness. Each bite melts in your mouth, leaving you craving more.
- Buttery and lightly sweet: Thanks to the combination of butter and a touch of sugar, these crescent rolls boast a rich, buttery flavor with just a hint of sweetness. They’re the perfect complement to any meal or snack.
- Homemade is always better: While store-bought crescent rolls offer convenience, there’s something truly special about homemade. Not only do you have full control over the ingredients and flavors, but it’s also a rewarding experience that’s perfect for bonding with loved ones in the kitchen.
Ingredients You’ll Need, Substitutions & Notes
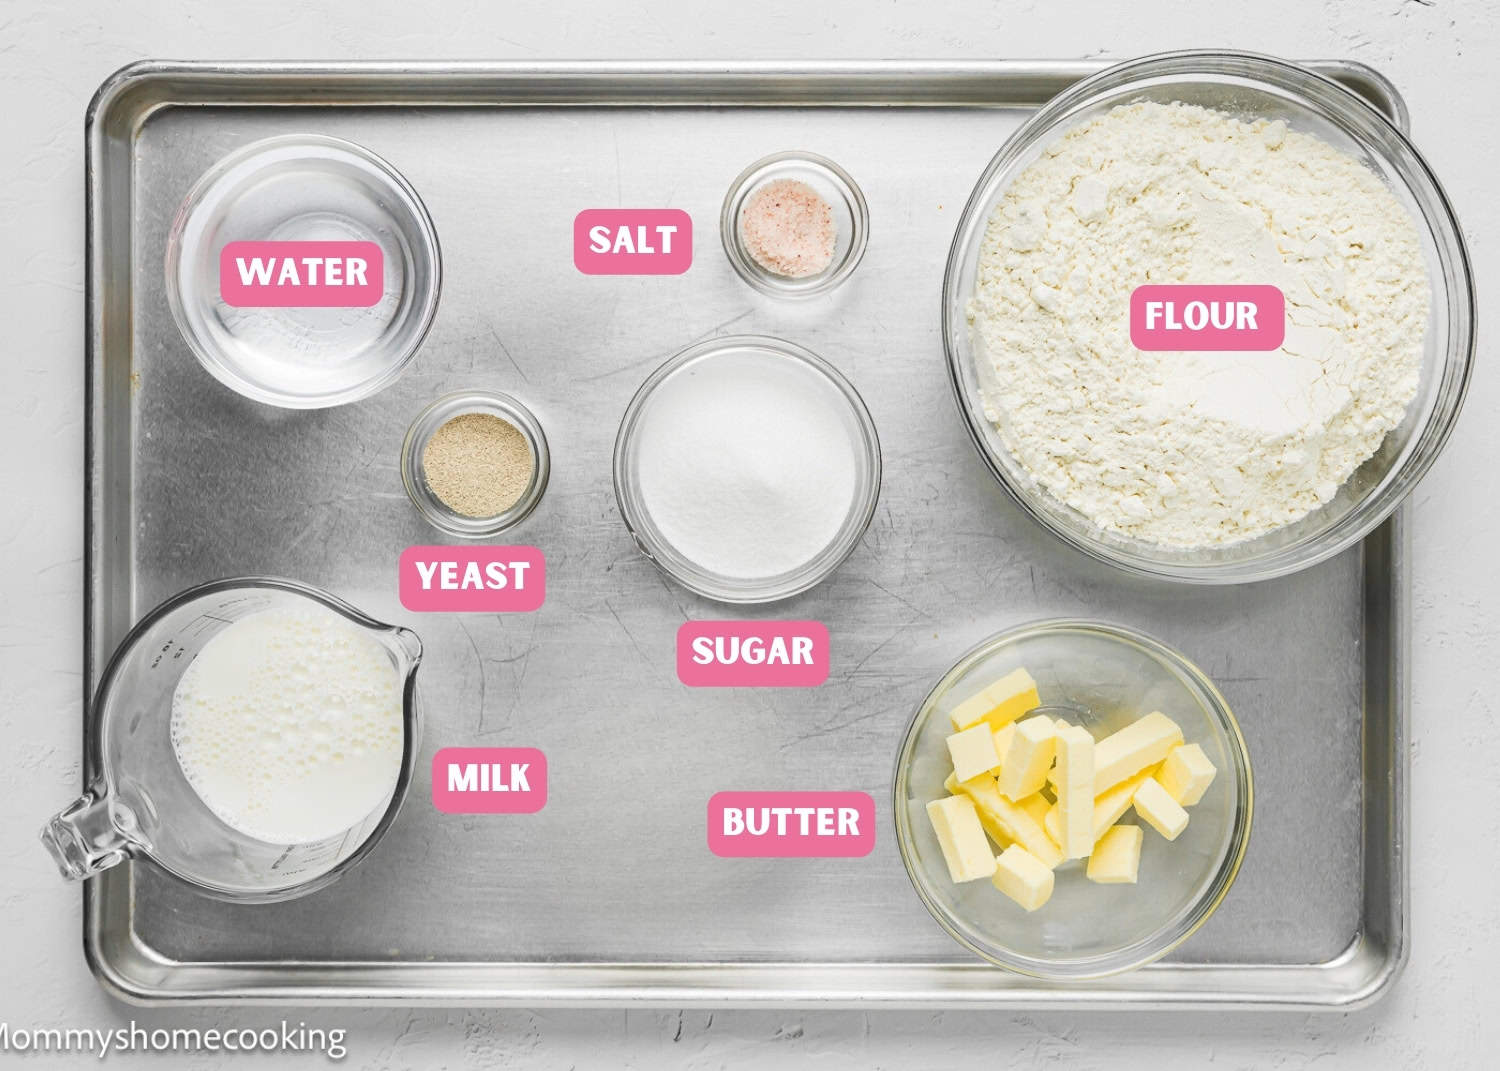
Please check the recipe card at the bottom of the post for exact quantities and detailed instructions (scroll down).
- All-purpose flour: The main component of the dough, providing structure and texture. Make sure to measure accurately. In my opinion, a kitchen scale is the best way to measure your ingredients. You can also use bread flour.
- Granulated sugar: Adds a touch of sweetness to the rolls, balancing out the flavors.
- Salt: Enhances the flavor of the dough and helps regulate yeast activity. I prefer kosher or sea salt. If you only have table salt handy, I recommend reducing the amount to half
- Instant yeast: Leavens the dough, causing it to rise and become light and airy. I recommend using instant yeast since it doesn’t need to be activated; just mix it with the dry ingredients. You can substitute active dry yeast for instant dry yeast in equal amounts. However, you may need to proof it in warm liquid before using it in the recipe.
- Water: Hydrates the dough and activates the yeast.
- Milk: Adds richness and tenderness to the rolls, resulting in a softer texture. Dairy or non-dairy will work.
- Unsalted butter: Provides flavor and richness to the dough, as well as creating layers for that classic crescent roll flakiness. I prefer to use unsalted butter, but if you only have salted butter handy, you can use it. In this case, skip the salt called in the recipe.
- Heavy cream or half-and-half (for the tops – optional): Gives the rolls a golden brown finish and adds a touch of richness to the flavor.
Process Overview: How To Make Homemade Crescent Rolls Step-by-Step
Please check the recipe card at the bottom of the post for exact quantities and detailed instructions (scroll down).
Step 1 – Make the Dough
- Mix flour, sugar, sugar, salt, and yeast in the bowl of the stand mixer.
- Mix water and milk in a bowl or measuring cup. Microwave for 1 minute to warm up, like lukewarm – about 100° F/ 38º C. This is essential to activate the yeast.
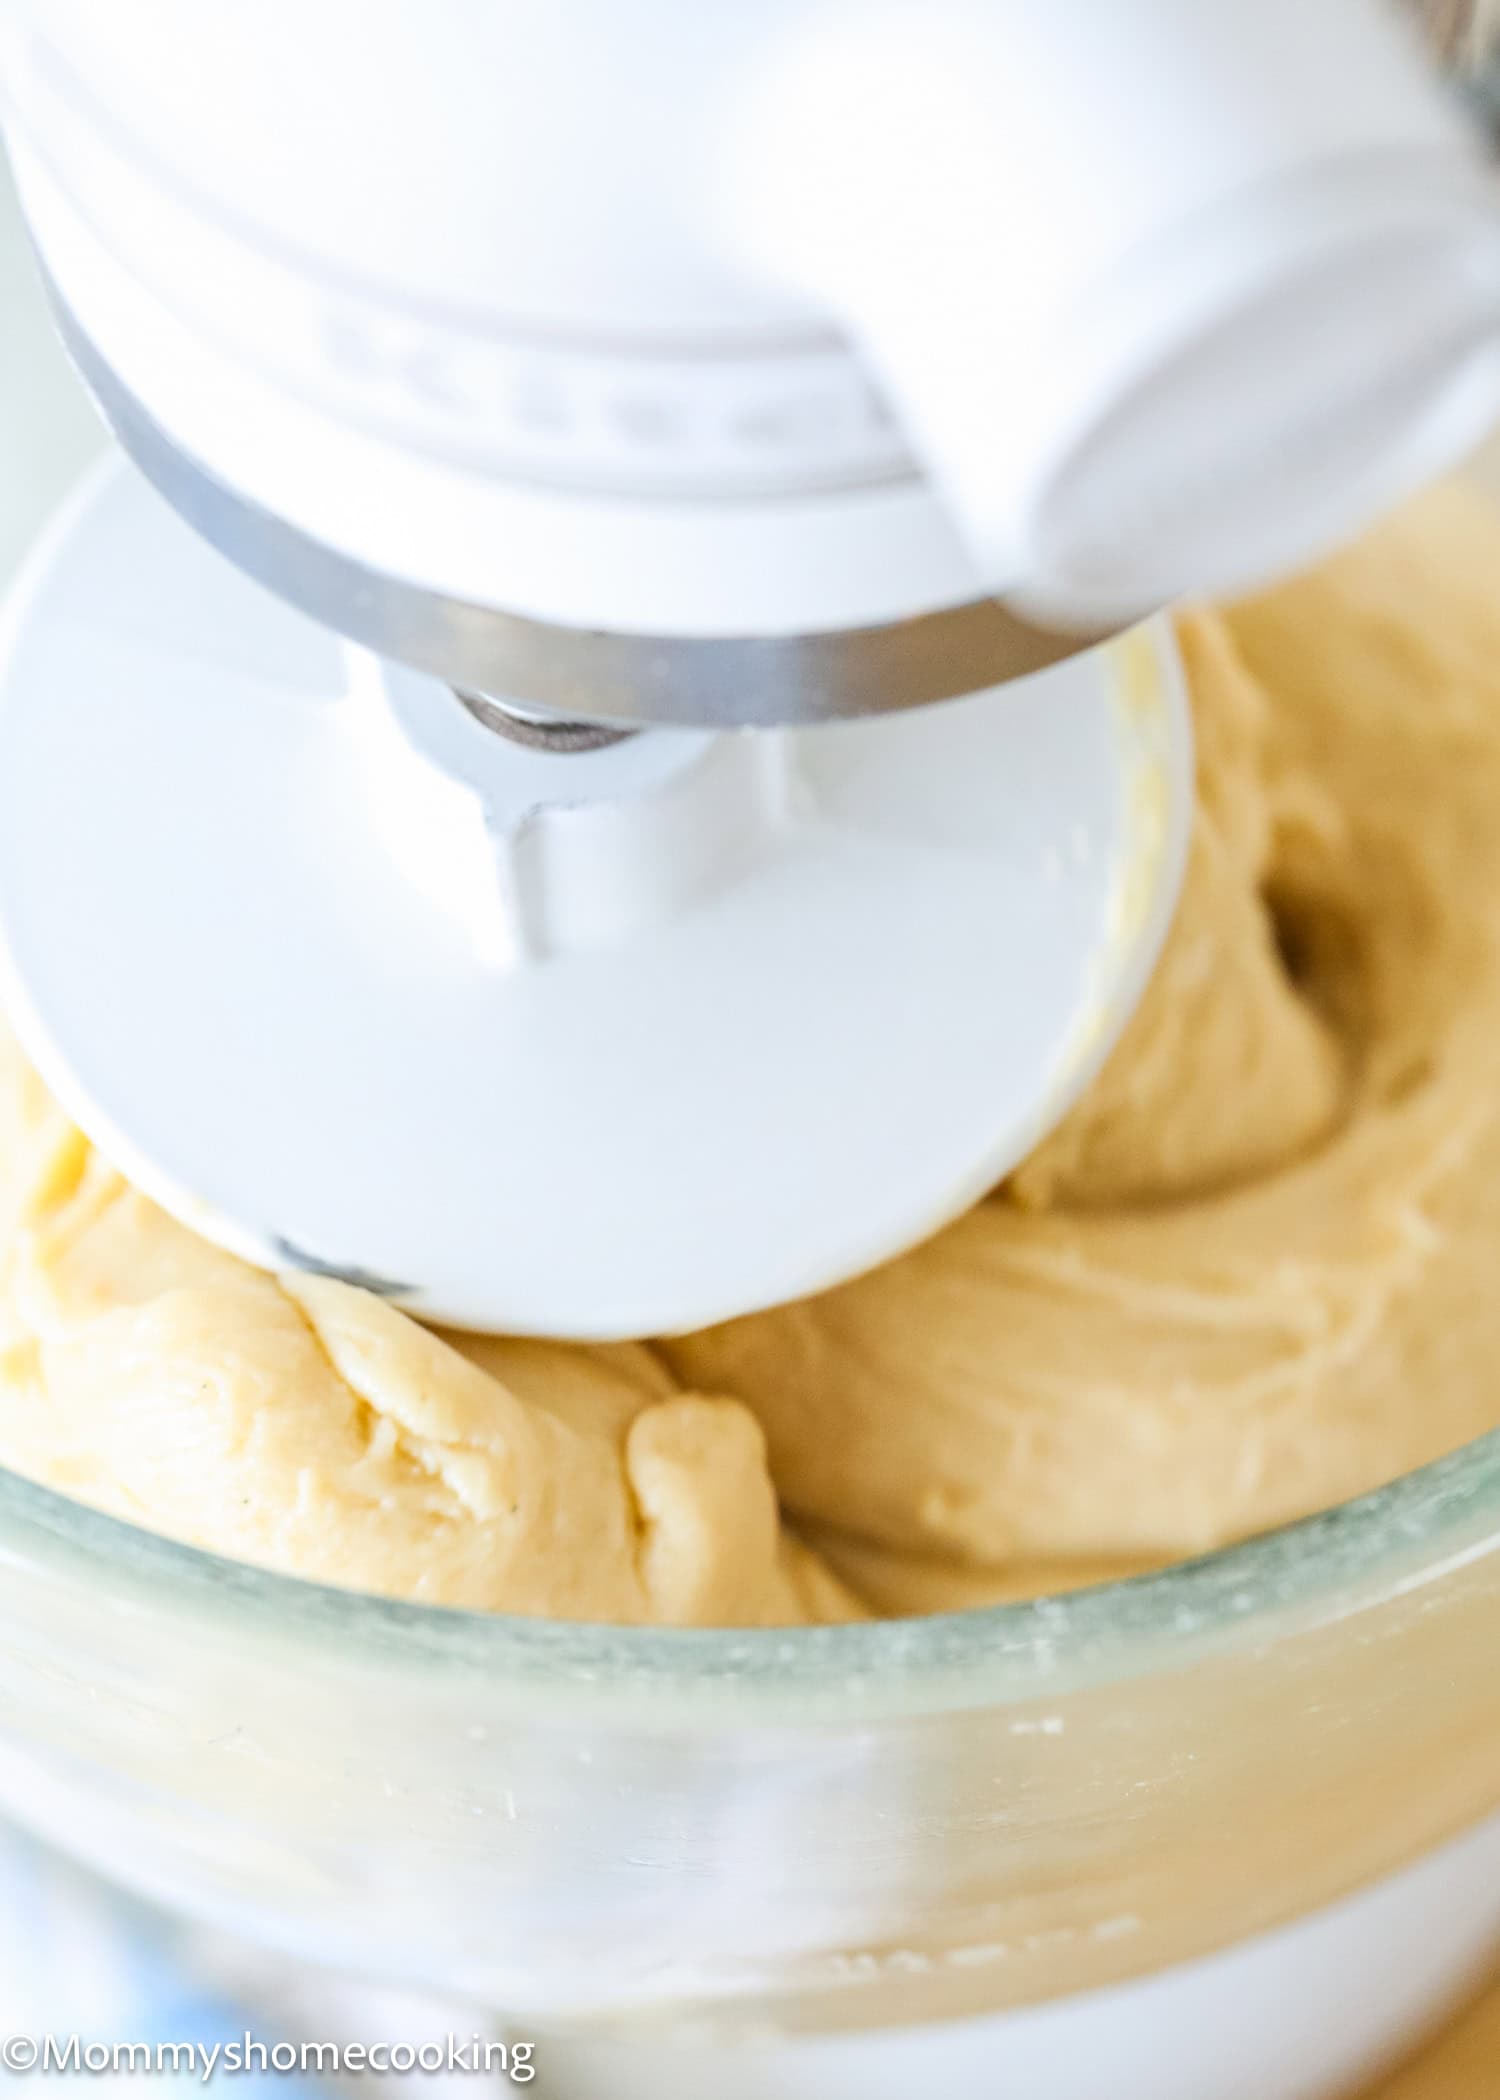
- Add warm milk/water mixture to the bowl with the flour mixture. Beat with a dough hook on low speed for 2 – 3 minutes until combined; scrape down the sides of the bowl with a rubber spatula. Increase mixer speed to medium, continue kneading until the dough comes together, about 3 more minutes
- Add the softened butter, with the mixer running, one tablespoon at a time, letting each piece incorporate before adding the next. The dough will be sticky after adding in the butter. Be sure to scrape the bowl as needed to make sure the dough is mixing correctly.
- After adding all the butter, keep mixing the dough for 10 minutes, or until it is smooth, velvety, and screechy and passes the windowpane test. This can take anywhere from 10 to 15 minutes, so be patient. Note: Make sure to knead the dough long enough so your rolls are light and fluffy and not dense or heavy. Heavy rolls can result from not kneading the dough long enough.
Step 2 – First Rise
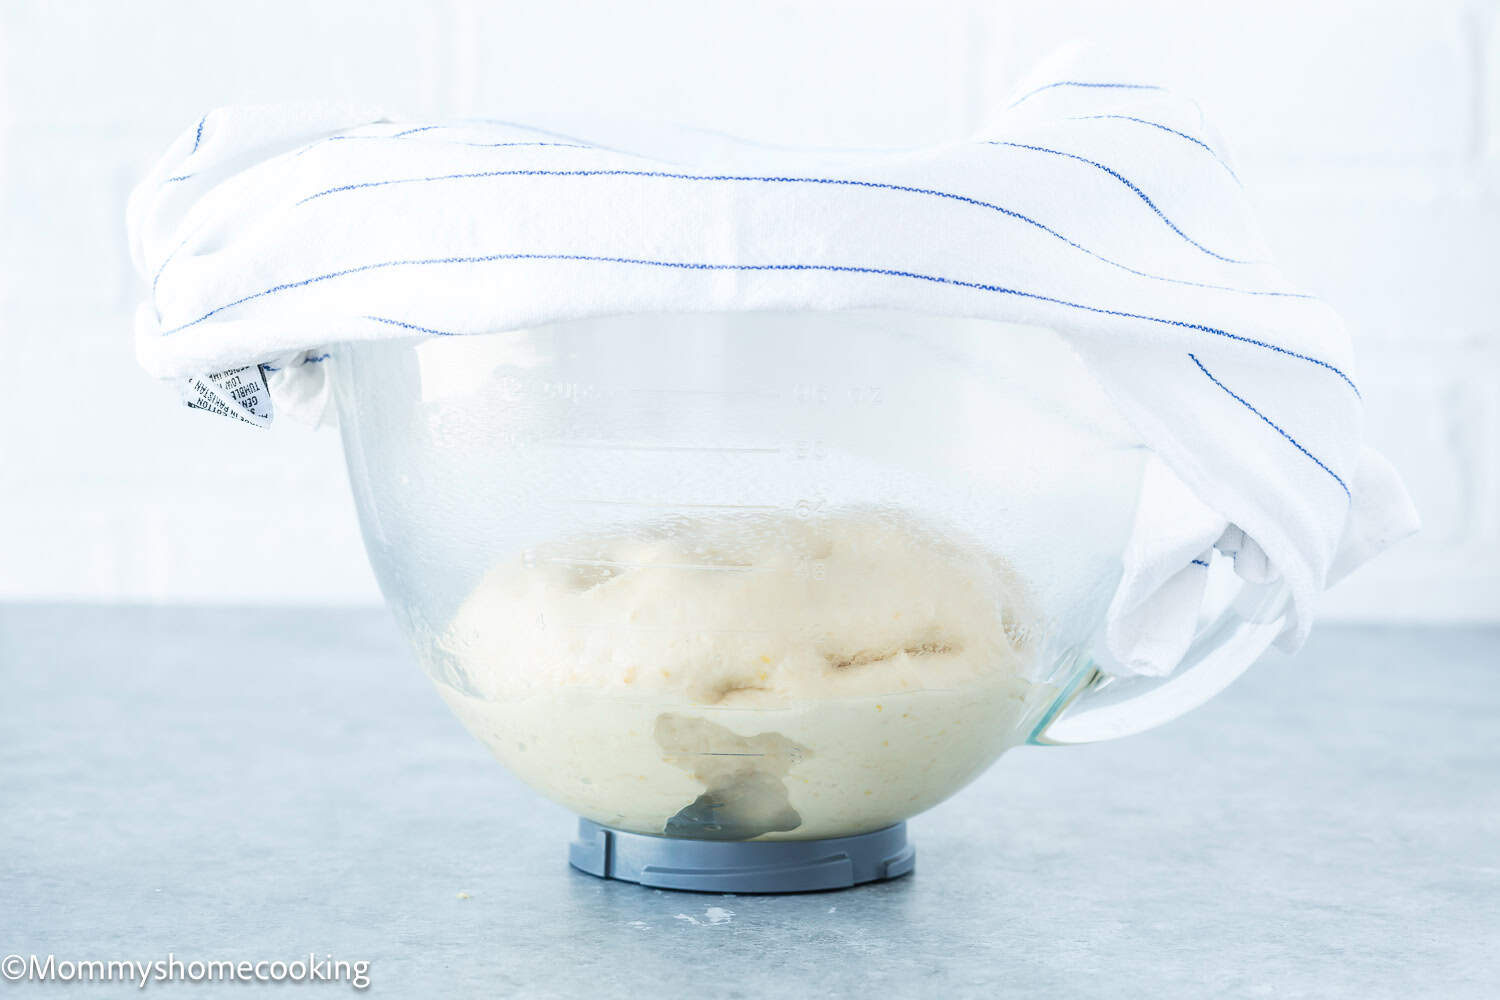
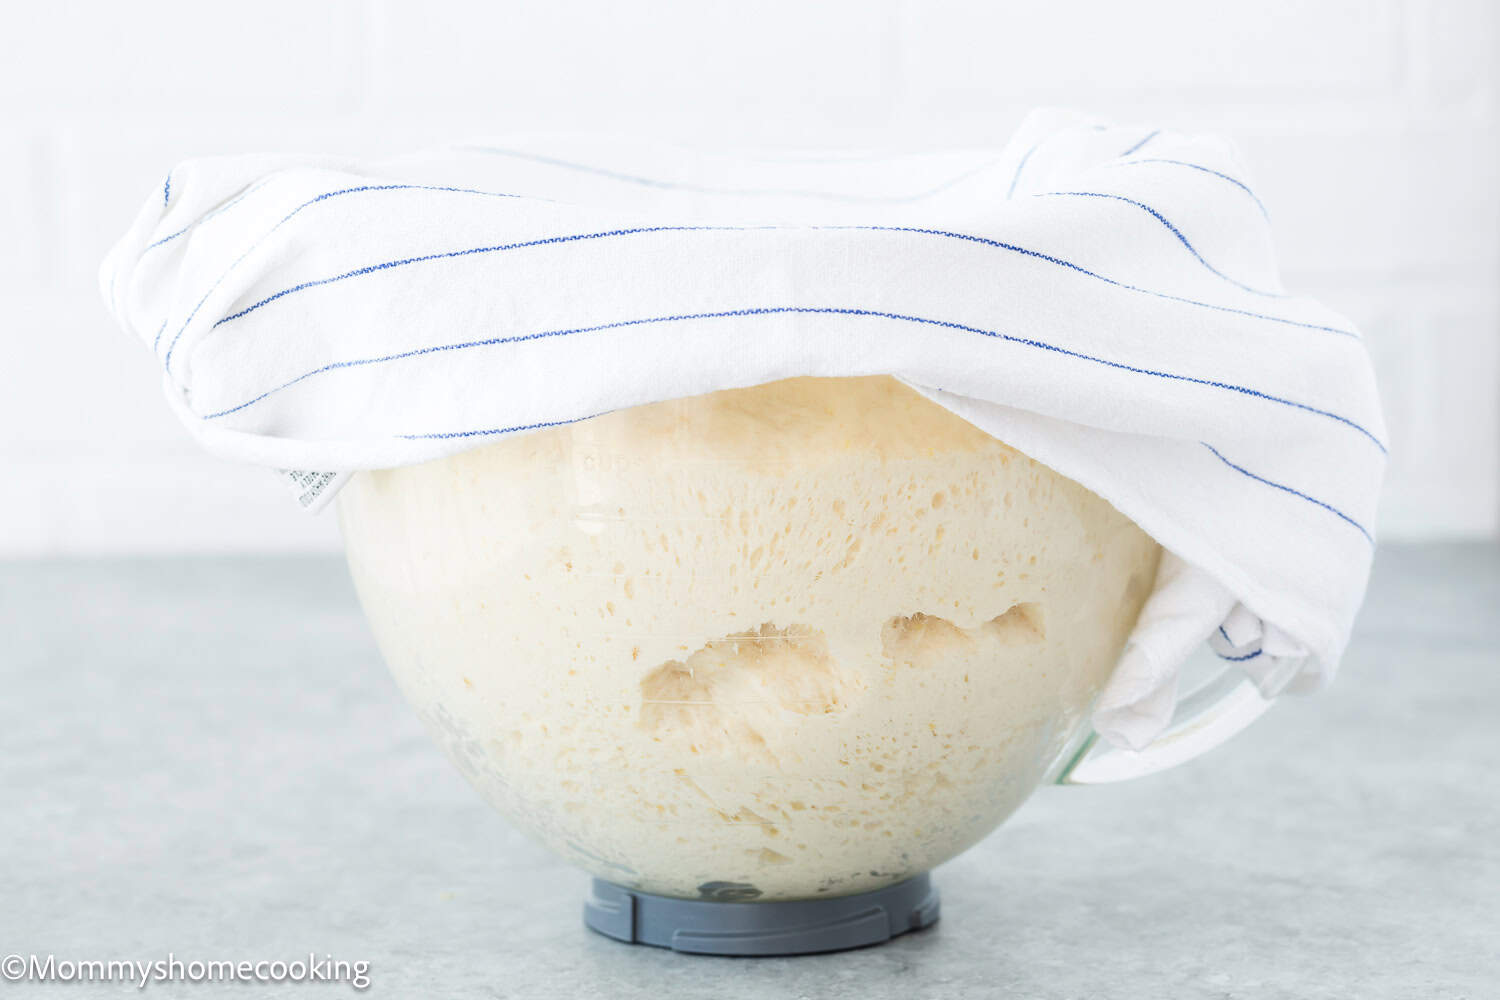
Roll the dough into a ball and place it in a lightly greased bowl. Cover and let it set in a warm place for 1 ½ – 2 hours, or until double in size. Note: Alternately, you can rise the dough in the refrigerator overnight. If you do this, the second rise will take longer, about 1 – 2 hours, because the dough will the cold.
Step 3 – Form the Crescents
Line two large baking sheets with parchment paper. Set aside.
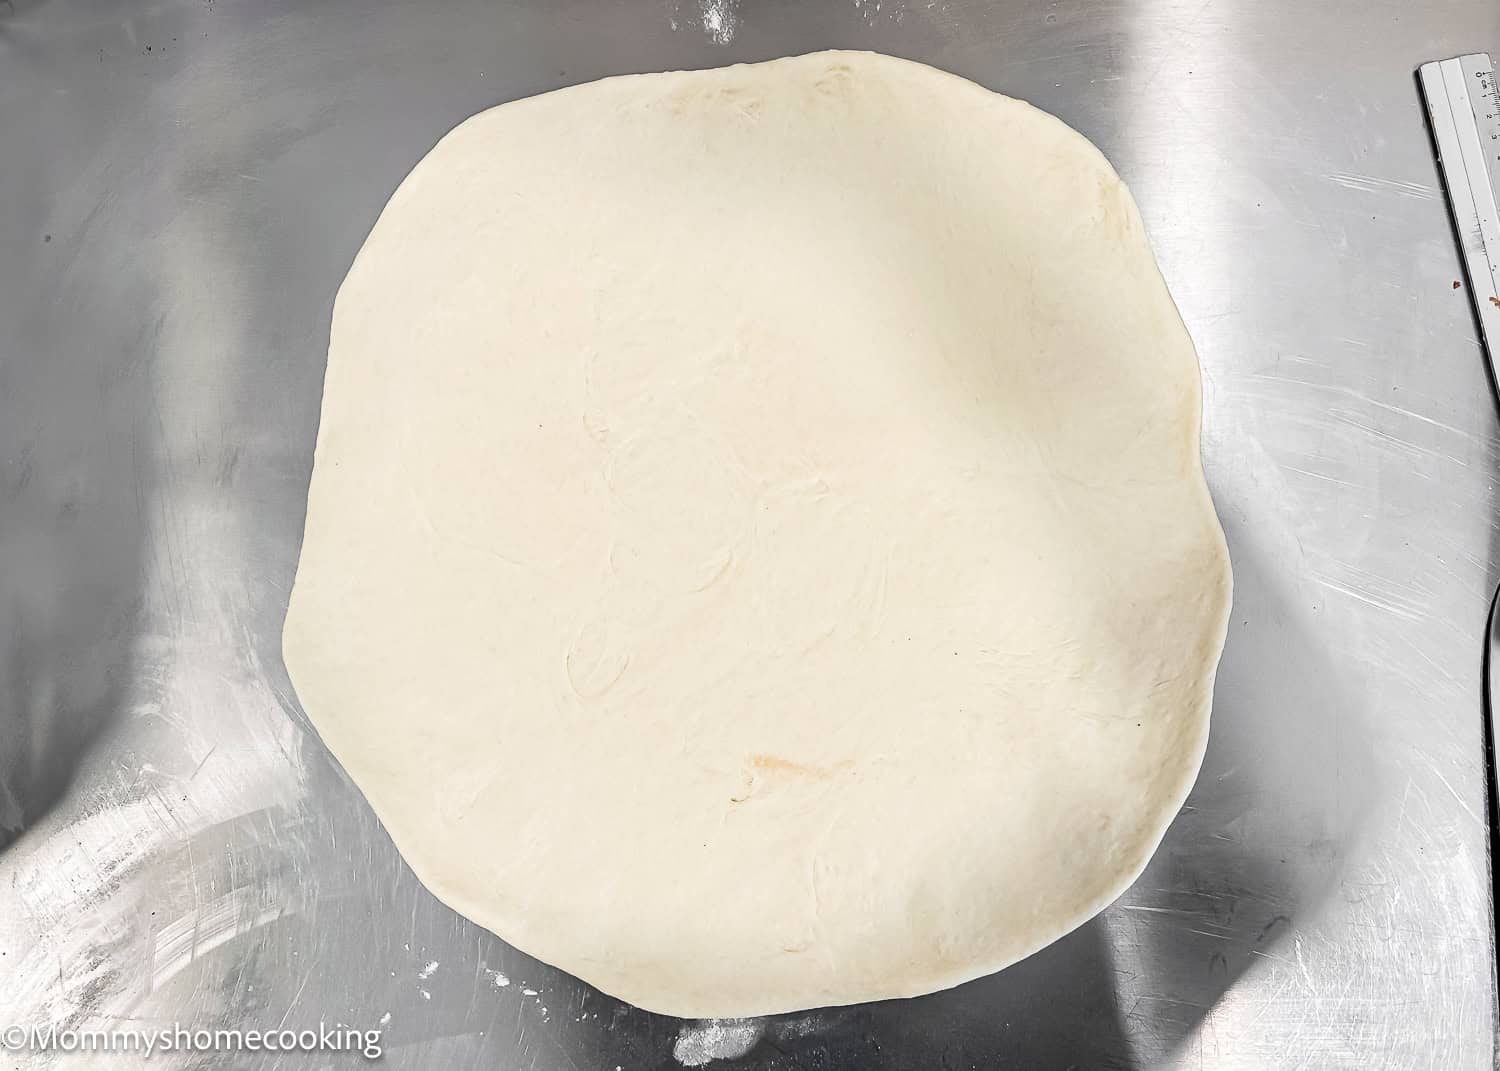
Scrape the dough out onto a well-floured surface and dust the top with a bit more flour. Press the dough out into a large circle. Roll the circle to 22 – 23 inch diameter (55 – 56 cm) with a rolling pin. Make sure the dough is smooth and evenly thick all around.
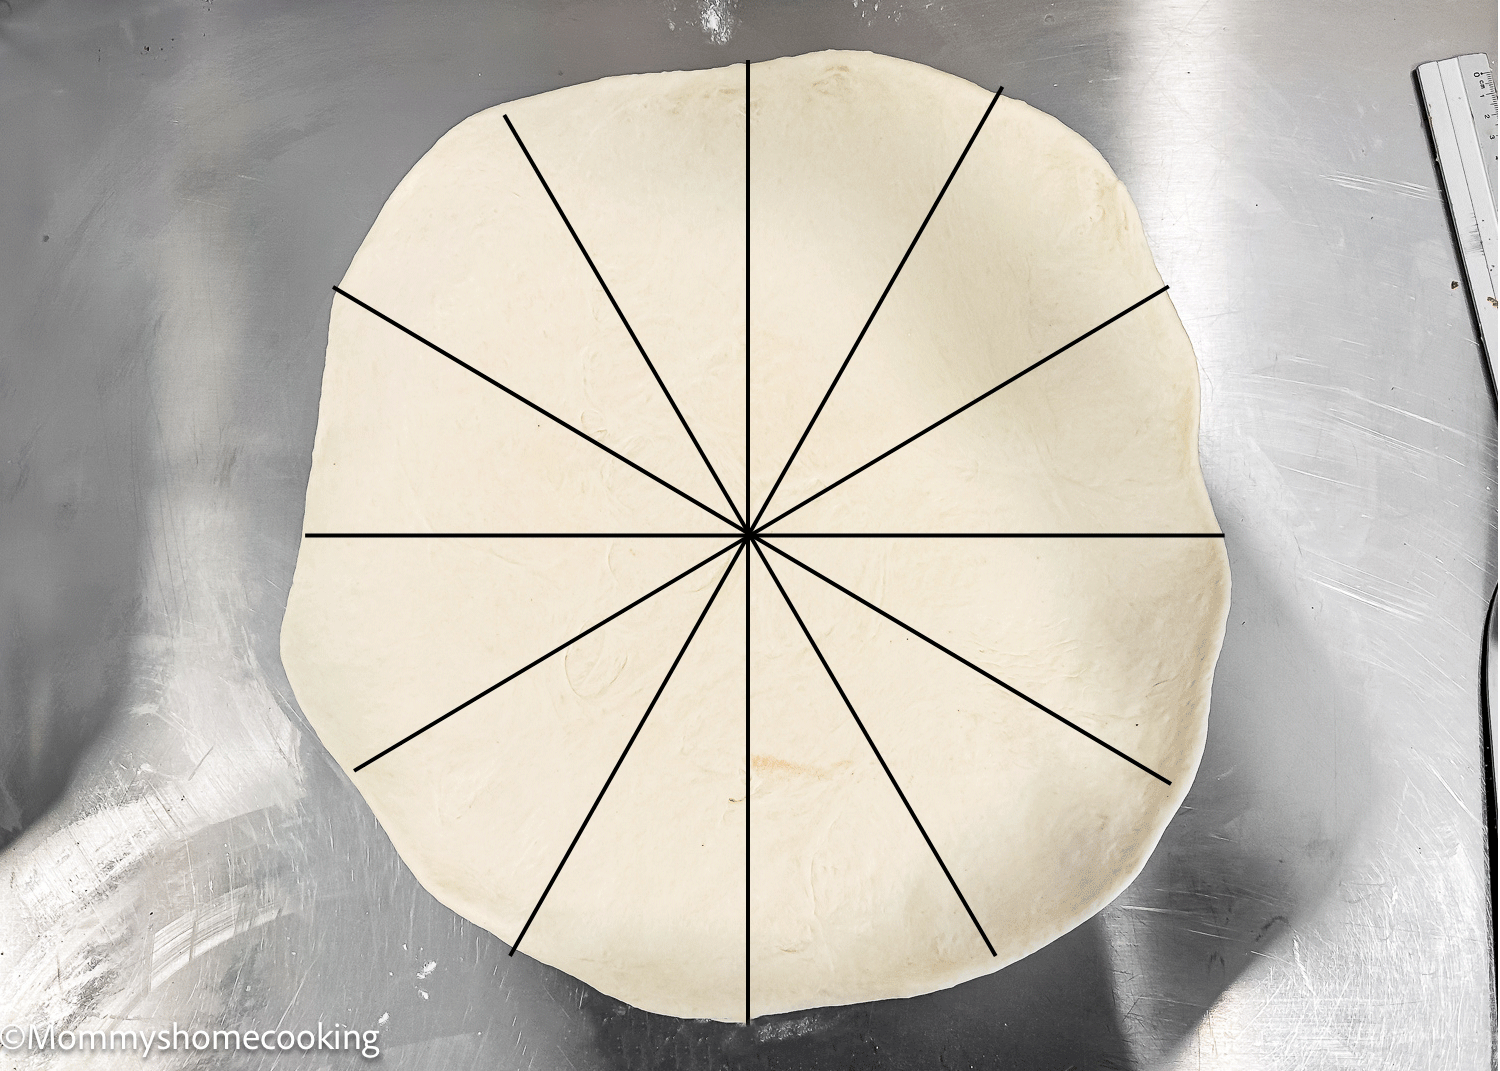
Cut the dough circle into wedges with a pizza cutter or floured knife by first dividing it into quarters, then dividing each quarter into three.
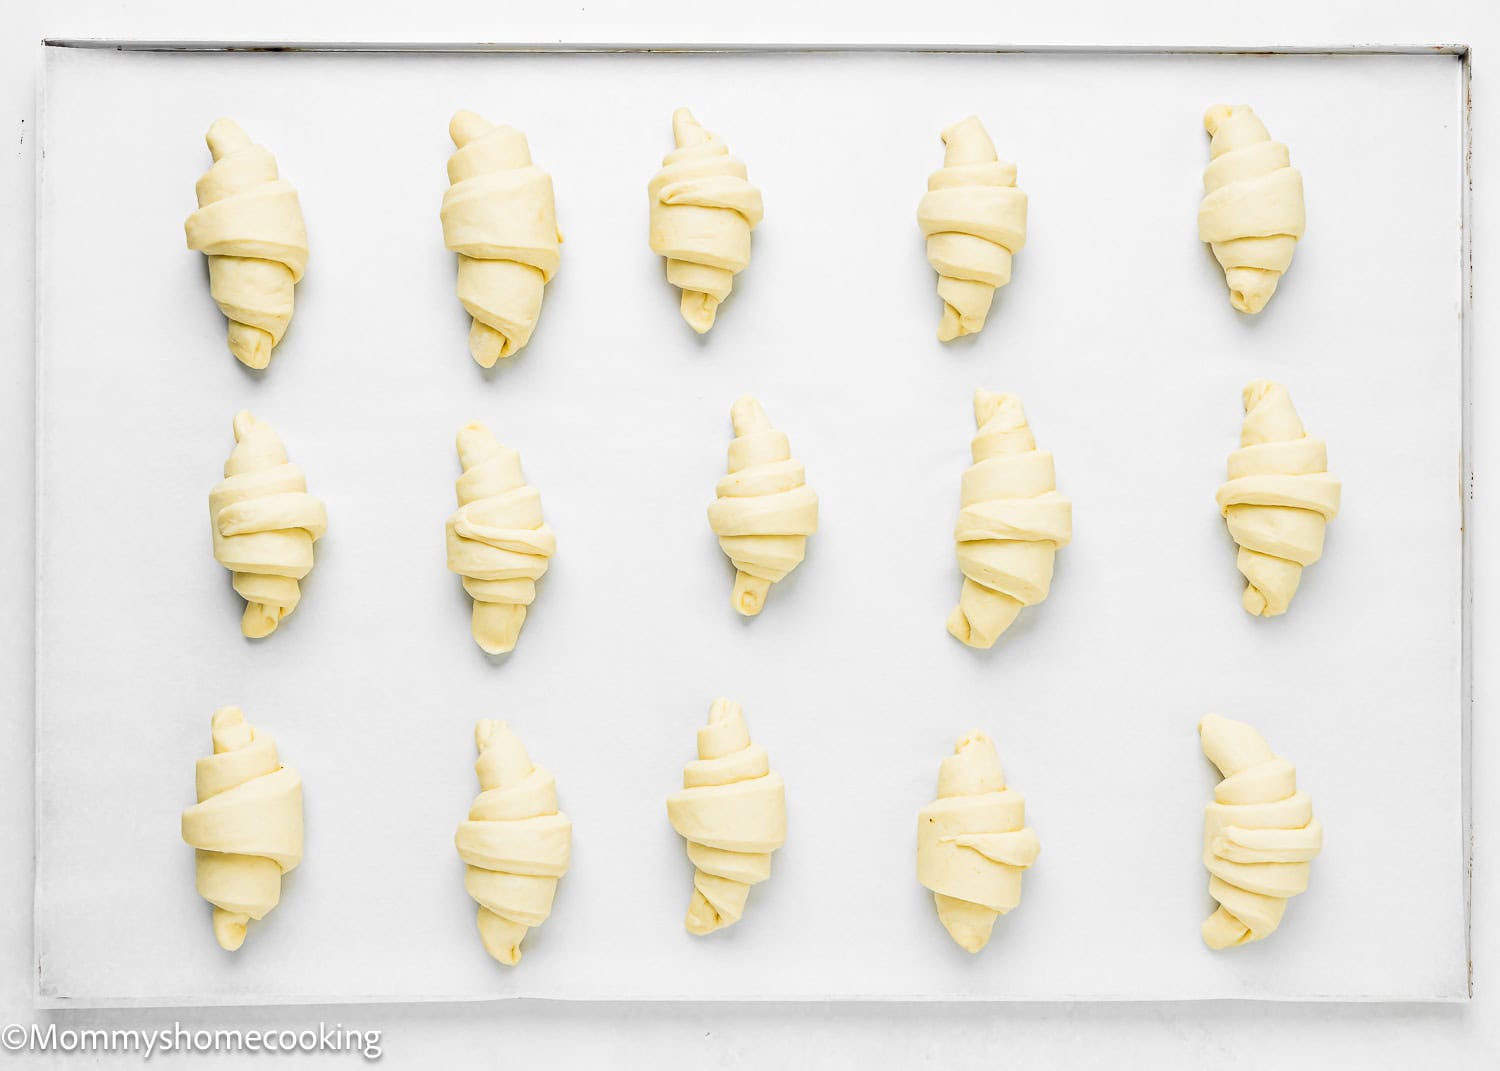
Roll each wedge of dough, starting with the widest end, into a crescent roll shape before transferring them a few inches apart onto the baking trays lined with parchment paper. Loosely cover and let it set puff up for 30 -45 minutes.



Step 4 – Bake
While the crescents are rising, preheat the oven to 350º F (180º C).
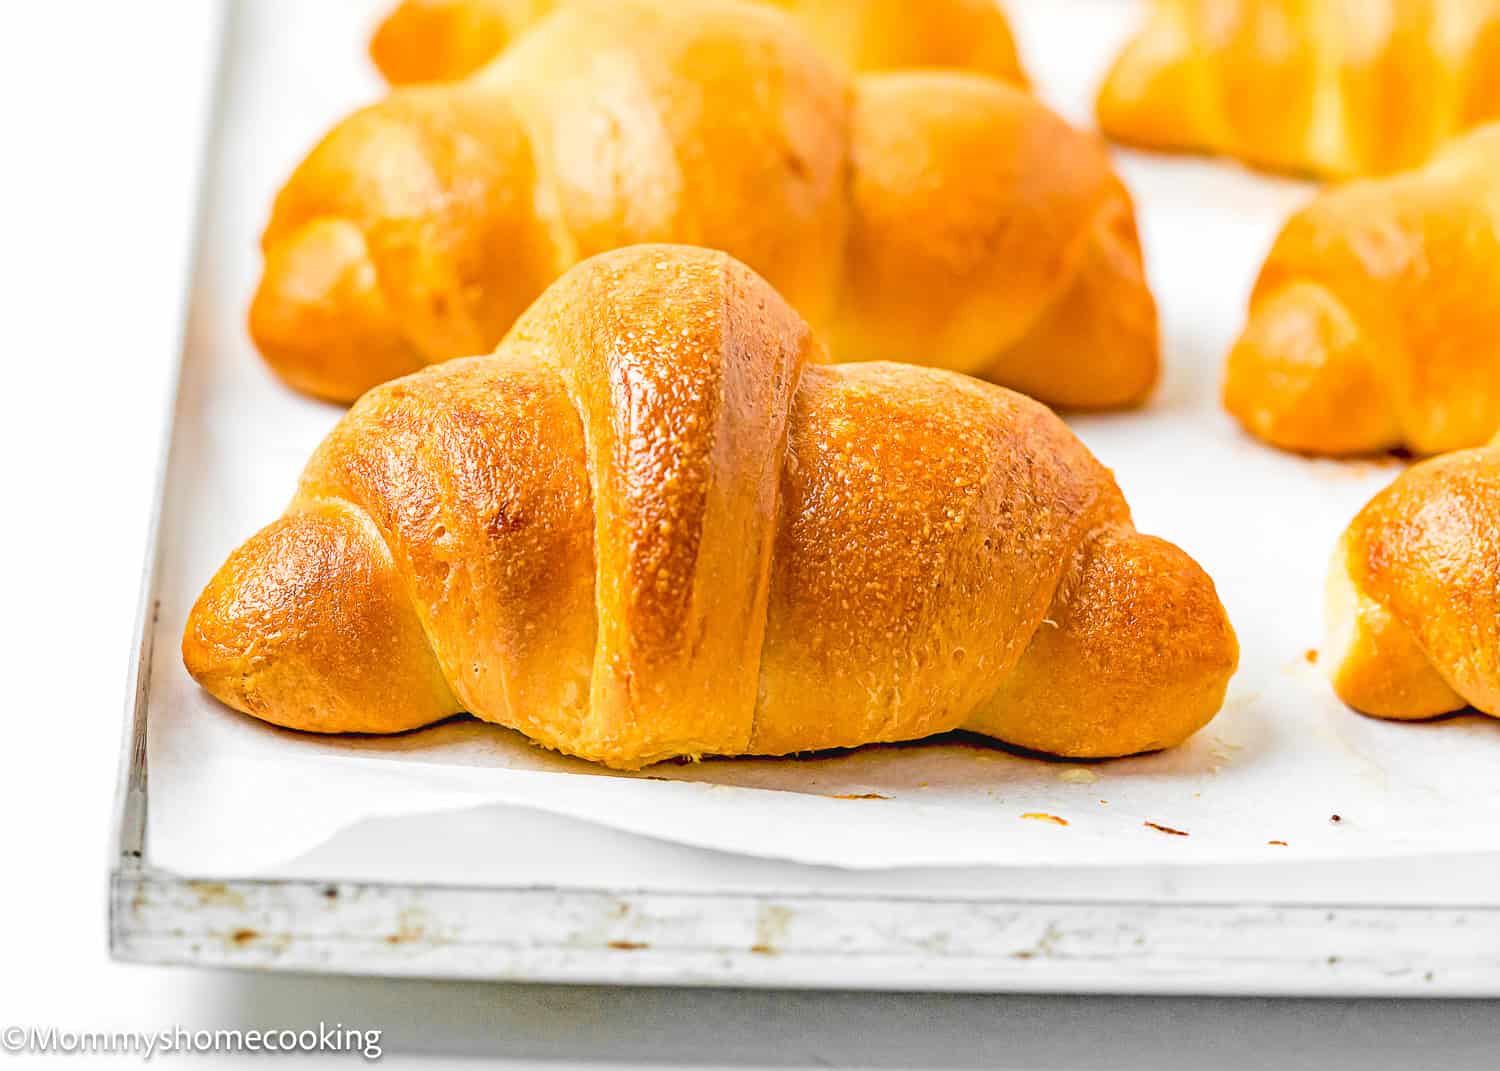
Uncover the crescents and brush the top of each roll with half and half or heavy cream. Bake for 20 – 25 minutes, until the crescents are puffed and golden. Optional step: When they come out of the oven, brush them with melted butter to add flavor and moisture to the crescent’s crust. Transfer to a cooling rack or enjoy warm.
Recipe Tips
- Yeast. If using active yeast, you need to activate it. To do so, mix warmed water and milk (bath temperature), yeast, and 1 tablespoon of sugar in a small and stir. Cover with a paper towel and let it sit until bubbly, about 5 – 8 minutes. If using instant yeast, you don’t need to activate it. In that case, add to the flour in step 1.
- Make sure your liquids are not too hot. It must be slightly warm to the touch but not steaming, about 105-115º F. Anything hotter is likely to kill the yeast, which means the cinnamon rolls will not rise. EXTRA TIP: Dip your finger in the milk — it should feel warm, like warm bath water, but not HOT. If you warmed it up too much, wait a few minutes until it cools down enough to touch.
- Knead long enough. The windowpane test is one of the best ways to tell if you’ve sufficiently kneaded your bread dough. If properly kneaded, the dough should stretch, without tearing or breaking, into a thin membrane that you can see through. It means the gluten is well-developed, and your dough is ready to rise.
- Rise time may vary depending on the temperature of your kitchen! The warmer the temperature, the faster the dough will rise.
Food Allergy Swaps
- Dairy-Free: To make this recipe dairy-free, you can easily swap the dairy ingredients for non-dairy alternatives. Instead of butter, use vegan butter. Instead of milk, use non-dairy milk like soy or oat milk. There are many brands available in stores. I usually use Earth Balance Vegan Buttery Sticks. Check out my favorite dairy-free substitutes here.
- Gluten-Free: I haven’t tested this recipe with a gluten-free flour mix, but you can give it a try. My favorite GF blend for bread is Bob’s Red Mill Gluten Free Homemade Wonderful Bread Mix. Keep in mind that gluten-free doughs may require a shorter rise time than doughs made with regular flour. Also, gluten-free breads may bake at a slightly lower temperature and for a shorter amount of time than traditional breads. Start by baking the rolls at the temperature specified in the recipe, but be prepared to adjust the baking time if necessary.
Variations & Additions
- Savory & Herby – Brush the unbaked rolls with melted butter seasoned with dried herbs, garlic powder, and parmesan cheese.
- Cinnamon Sugar Rolls – Butter the rolls and sprinkle them with cinnamon sugar straight out of the oven so it sticks.
- Add fillings – Feel free to get creative with your crescent rolls by adding fillings such as cheese, herbs, or even Nutella for a sweet twist. Sprinkle or spread your desired fillings over the rolled-out dough before shaping the crescents.
Serving Suggestions
These Homemade Eggless Crescent Rolls are perfect for serving alongside soups, salads or as a standalone snack. Pair them with your favorite spreads or dips for an extra indulgent treat. Or serve them for breakfast or brunch with butter and jam.
Storing and Freezing Instructions
Store: These rolls are delicious straight from the oven slathered with butter. However, if you have leftover crescent rolls, allow them to cool completely, then place them in an airtight container at room temperature for up to two days. Reheat them in the oven or toaster oven until heated through.
To freeze baked rolls: you can freeze the rolls for up to three months. Wrap them tightly in plastic wrap and aluminum foil before freezing. To reheat, thaw the rolls at room temperature, then warm them in the oven or toaster oven until heated through.
To freeze unbaked rolls: Make them through the rolling, cutting, and shaping steps. Line a baking sheet with waxed or parchment paper and place them on it. Freeze for about 30 minutes (or until they’re firm). Then, transfer the frozen crescent rolls to a ziplock freezer bag. Unbaked rolls can typically be frozen for up to 1 month. When you’re ready to bake, thaw the rolls in the refrigerator overnight, then let them rise until puffy, about 2 hours, before baking according to the recipe instructions. Please keep in mind that yeast may lose some of its potency over time, especially if frozen for extended periods. Using the frozen unbaked rolls within 2 weeks of freezing is a good idea to ensure the best results.
Frequently Asked Questions
Yes! You can prepare the dough up to the point of shaping the rolls, then cover and refrigerate the shaped rolls overnight. Let them come to room temperature and rise before baking.
Yes, you can freeze the shaped rolls before baking. Place them on a baking sheet lined with parchment paper and freeze until firm. Once frozen, you can transfer them to a freezer bag for long-term storage. When ready to bake, thaw the rolls in the refrigerator overnight before proceeding with the recipe.
While the sugar adds flavor and helps activate the yeast, you can reduce or omit it if desired. Keep in mind that the texture and flavor of the rolls will vary.
More Bread Roll Recipes You’ll Love!
- To Die For Easy Strawberry Rolls (Egg-Free)
- Eggless Homemade Hawaiian Rolls
- Eggless Honey Whole Wheat Rolls
- Soft & Easy Eggless Dinner Rolls
- Easy Eggless Cinnamon Rolls
- Browse more recipes…
❤️ Love what you see? JOIN my Private Baking Club. Also, SUBSCRIBE to Mommy’s Home Cooking, so you’ll never miss a recipe! And FOLLOW along on Instagram, Pinterest, and Facebook for more fun!
Recipe Card 📖

Homemade Eggless Crescents Rolls
Equipment
Ingredients
- 2 ¼ cups (315 g) all purpose-flour
- 3 tablespoons (36 g) granulated sugar
- ¾ teaspoon (3 g) salt
- 1 ¼ teaspoon (3.8 g) instant yeast
- ¼ cup + 2 tablespoons 90 ml water
- ¼ cup + 2 tablespoons 90 ml milk
- 4 tablespoons (56 g) unsalted butter, softened (plus 2 more tablespoons to brus on the tops after baking – Optional)
- 2 tablespoons (30 ml) heavy cream or half-and-half for the tops)
Instructions
Make the Crescent Rolls Dough:
- Mix flour, sugar, sugar, salt, and yeast in the bowl of the stand mixer.
- Mix water and milk in a bowl or measuring cup. Microwave for 1 minute to warm up, like lukewarm – about 100° F/ 38º C. This is essential to activate the yeast.
- Add warm milk/water mixture to the bowl with the flour mixture. Beat with a dough hook on low speed for 2 – 3 minutes until combined; scrape down the sides of the bowl with a rubber spatula. Increase mixer speed to medium, continue kneading until the dough comes together, about 3 more minutes
- Add the softened butter, with the mixer running, one tablespoon at a time, letting each piece incorporate before adding the next. The dough will be sticky after adding in the butter. Be sure to scrape the bowl as needed to make sure the dough is mixing correctly.
- After adding all the butter, keep mixing the dough for 10 minutes, or until the dough is smooth, velvety, screechy, and the dough passes the windowpane test. This can take anywhere from 10 minutes to 15 minutes, so be patient. Note: Make sure to knead the dough long enough, so your crescent rolls are light and fluffy and not dense or heavy. Heavy crescent rolls can be the result of not kneading the dough long enough.
First Rise:
- Roll the dough into a ball and place it in a lightly greased bowl. Cover and let it set in a warm place for 1 ½ – 2 hours, or until double in size. Note: Alternately, you can rise the dough in the refrigerator overnight. If you do this, the second rise will take longer, about 1 – 2 hours, because the dough will the cold.
Form the Crescents:
- Line two large baking sheets with parchment paper. Set aside.
- Scrape the dough out onto a well-floured surface and dust the top with a bit more flour. Press the dough out into a large circle. Roll the circle to 22 – 23 inch diameter (55 – 56 cm) with a rolling pin. Make sure the dough is smooth and evenly thick all around.
- Cut the dough circle into wedges with a pizza cutter or floured knife by first dividing it into quarters, then dividing each quarter into three.
- Roll each wedge of dough, starting with the widest end into a crescent roll shape before transferring them a few inches apart onto the baking trays lined with parchment paper. Loosely cover and let it set puff up for 30 -45 minutes.
Bake:
- While the crescents are rising, preheat the oven to 350º F (180º C).
- Uncover the crescents and brush the top of each roll with half and half or heavy cream. Bake for 20 – 25 minutes, until the crescents are puffed and golden. Optional step: As soon as they come out of the oven, brush them with melted butter for extra layer flavor and moisture to the crescent's crust.
- Transfer to a cooling rack or enjoy warm.
- Dairy-Free: To make this recipe dairy-free, you can easily swap the dairy ingredients for non-dairy alternatives. Instead of butter, use vegan butter. Instead of milk, use non-dairy milk like soy or oat milk. There are many brands available in stores. I usually use Earth Balance Vegan Buttery Sticks. Check out my favorite dairy-free substitutes here.
- Gluten-Free: I haven’t tested this recipe with a gluten-free flour mix, but you can give it a try. My favorite GF blend for bread is Bob’s Red Mill Gluten Free Homemade Wonderful Bread Mix. Keep in mind that gluten-free doughs may require a shorter rise time than doughs made with regular flour. Also, gluten-free breads may bake at a slightly lower temperature and for a shorter amount of time than traditional breads. Start by baking the rolls at the temperature specified in the recipe, but be prepared to adjust the baking time if necessary.
- Savory & Herby – Brush the unbaked rolls with melted butter seasoned with dried herbs, garlic powder and parmesan cheese.
- Cinnamon Sugar Rolls – Brust the rolls with melted butter, and them sprinkle them with cinnamon sugar straight out of the oven so it sticks.
- Add fillings – Feel free to get creative with your crescent rolls by adding fillings such as cheese, herbs, or even Nutella for a sweet twist. Simply sprinkle or spread your desired fillings over the rolled-out dough before shaping the crescents.

Leave a Reply