
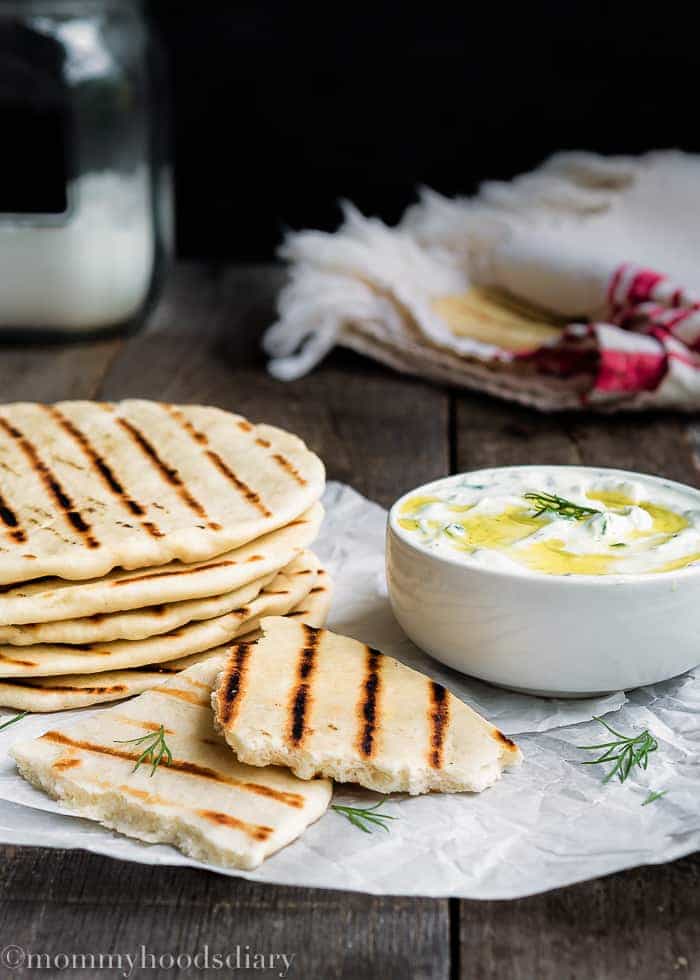
This homemade flatbread is soft, super easy to make, and delicious! Perfect for pizzas, wraps, or sandwiches. Can be made ahead.
Happy Monday guys! Do you feel like the fall is here? Around here is a little bit difficult to tell. Sometimes is hot, sometimes is cooler. The only fall sign is that the trees are changing color already and the days are shorter. Most mornings are chilly and the kids ask for a sweater when they are leaving for school. By the way, having the kids back in school is great! They are having a terrific time meeting their new teachers and classmates. I can’t believe Matthew will be a kindergartener next year. Time goes way too fast.
In other family news, we are counting down the days to welcome our baby grandson. A few days ago we threw a beautiful “Milkaholic” baby shower for the parents-to-be. We had a blast sharing with family and friends. The joy and happiness we are feeling, as the arrival gets closer are inexplicable. Our family is growing!
Okay… the recipe! I am very excited to share today’s recipe since it is something that I really enjoy, mostly because of its versatility. I am talking about, Homemade Flatbread. Seriously, who doesn’t love flatbread? You can make all sorts of things with flatbread. They are perfect for a quick fix such as an easy pizza, a wrap, or even a sandwich.
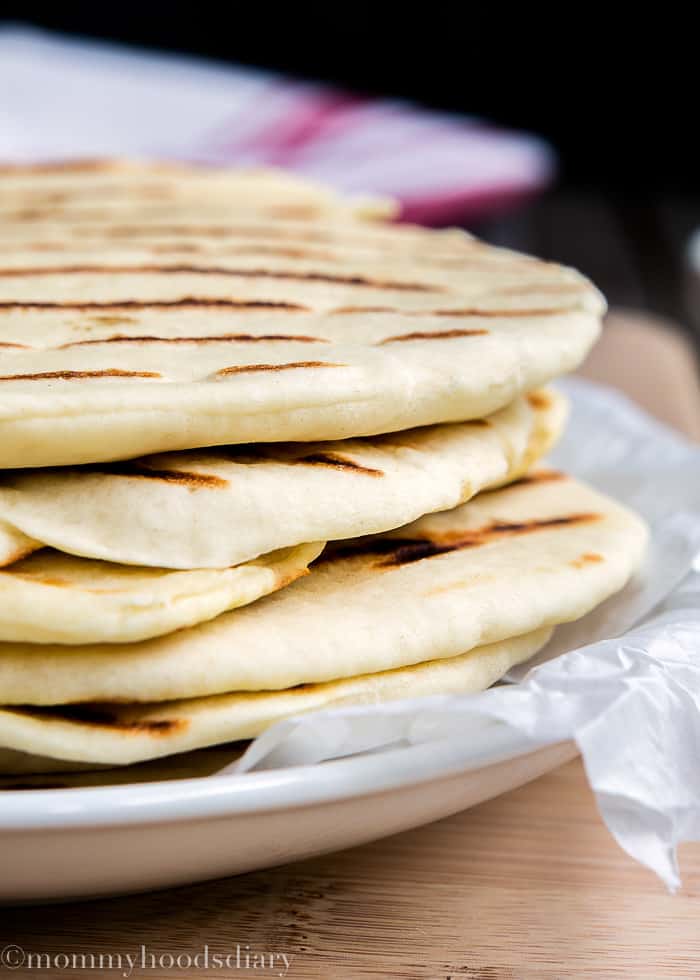
I fell in love with this recipe the first time I saw it in Donna Hay magazine. I have made it several times and I have made a few tweaks. The wonderful thing about this recipe is that you can make the dough one day in advance and refrigerated it until you are ready to use it. You can also freeze cook flatbread in a Ziploc bag and then defrost and reheat whenever you want.
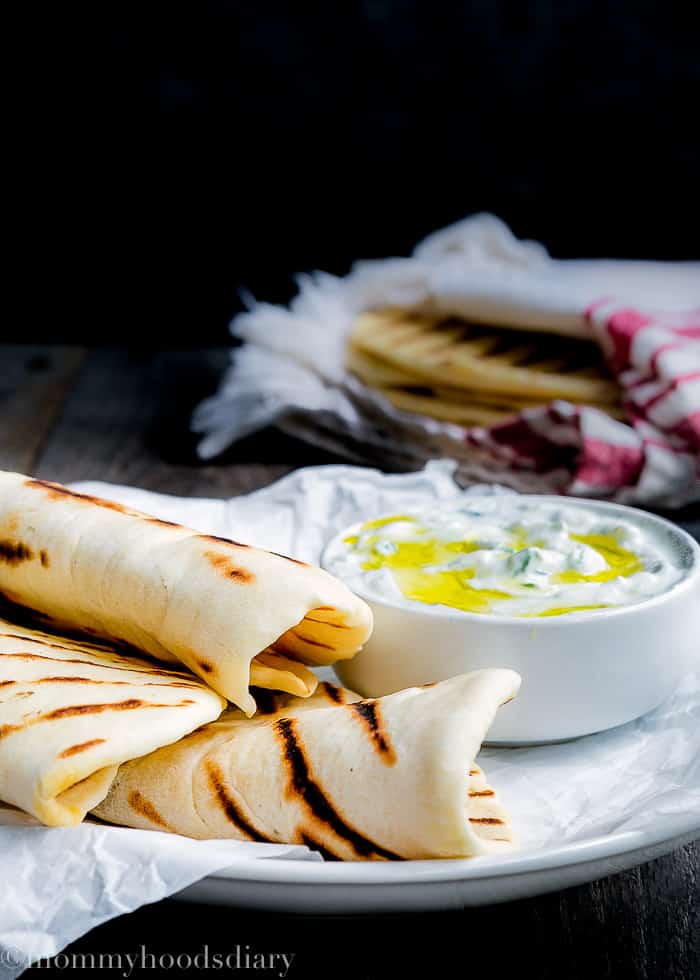
I made this with the only purpose to make falafel sandwiches. Lately, my husband and I are kind of obsessed with falafels. We go to a local restaurant where they make it and it’s delicious. But you know what I always say… Nothing beats homemade!! So stay tuned, I will be posting my personal falafel recipe soon.
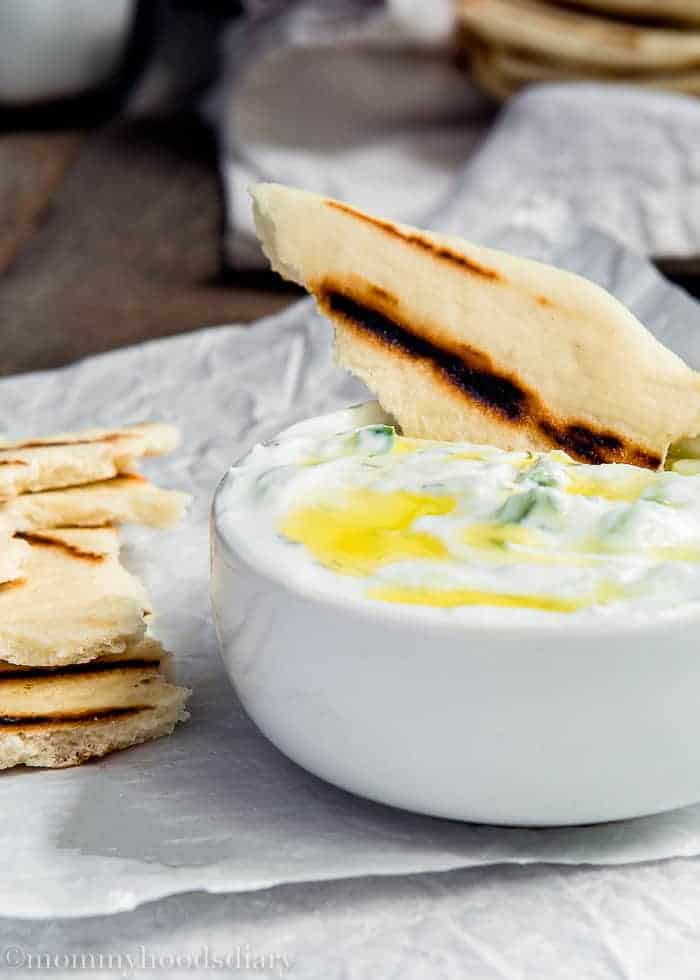
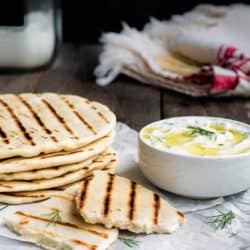
Omg…They tasted so good we couldn’t stop eating them with Tzatziki sauce!!
Have a great week, and ¡Buen Provecho!
Homemade Flatbread
Ingredients
- 2 1/2 cup 00 flour superfine flour or bread flour
- 1 1/4 teaspoon Kosher salt 1 teaspoon regular salt
- 2/3 cup milk warm (110º)
- 1/3 cup water
- 1 teaspoon sugar
- 2 teaspoon dry yeast
- 1 tablespoon olive oil
Instructions
- Place flour and salt in the stand mixer bowl fitted with the hood attachment. Mix to combine.
- Place milk, water, sugar and yeast in a small bowl; stir to combine. Set aside for 5 minutes, or until the surface looks foamy. Add oil stir to incorporate.
- Turn on the stand mixture on low speed and slowly add yeast mixture to the flour mixture. Knead for 5 minutes, or until smooth. Place bought in a large, lightly oiled bowl. Cover with a damp kitchen towel and let it rest for 40-45 minutes, or until double in size.
- Punch the air out the dough (If the dough is resistent knead by hand for 3 – 4 minutes and add 1 or 2 teaspoon of water). Divide in 8 equal pieces. Put the pieces of dough back to the bowl, cover and set aside for 10 minutes.
- Preheat a grilled pan over medium heat.
- Roll out each piece of dough on a lightly oil surface to 6 inches round.
- Cook flatbread, in batches, for 1 – 2 minutes each side, or until they puff slightly. To keep them warm place them in a clean kitcken towel and cover until ready to serve.
