
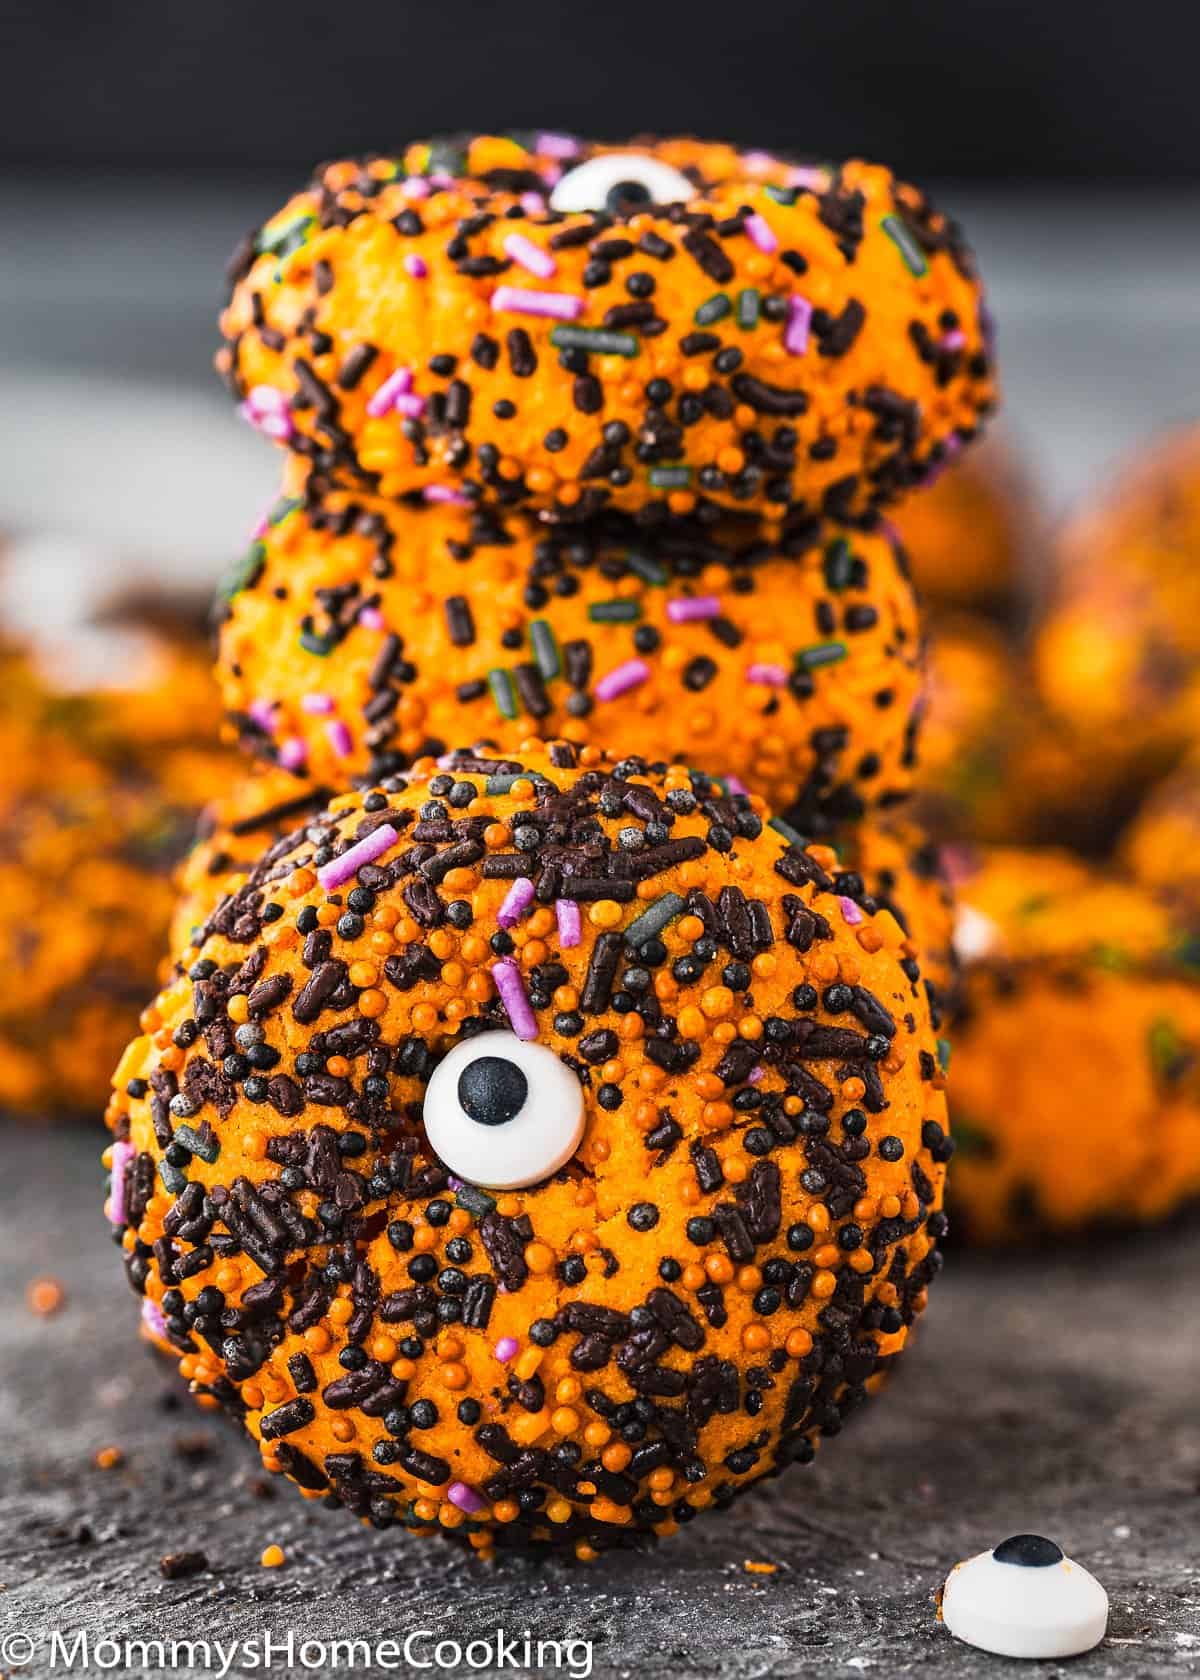
These Easy Eggless Halloween Soft Sugar Cookies are perfect to delight your children and get in the spooky Halloween spirit all at once. They are rich, buttery, and easy to make. The recipe includes step-by-step photos and lots of tips.
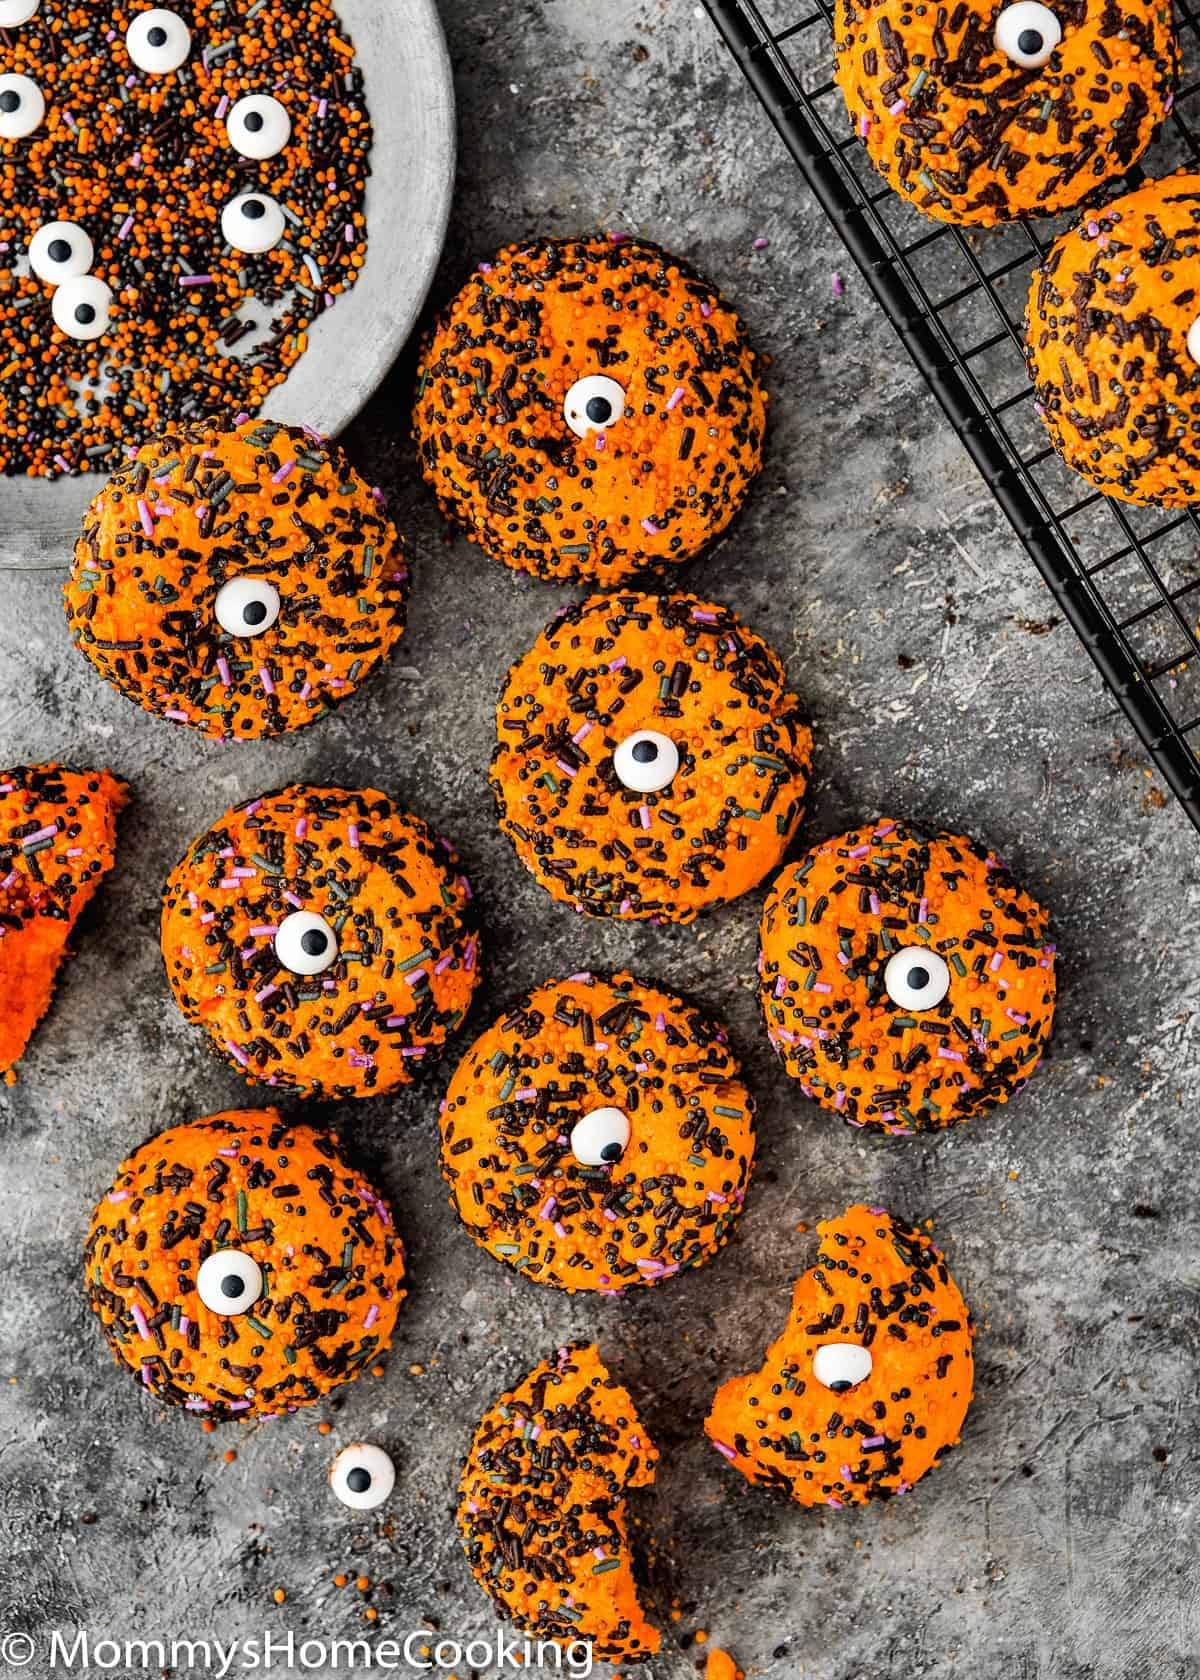
These Easy Eggless Halloween Soft Sugar Cookies are the easiest and most fun way to satisfy your sweet tooth and get in the Halloween spirit.
They are:
- Easy to make,
- with the simple ingredients,
- rich, buttery,
- and totally irresistible!
Oh, and they also just so happen to be utterly adorable and super fun to make!
So let’s unleash our Halloween inspiration! Get your children in the kitchen to bake a batch of these eggless scary cookies.
Ingredients You’ll Need
Please check the recipe card at the bottom of the post for exact quantities and detailed instructions (scroll down).
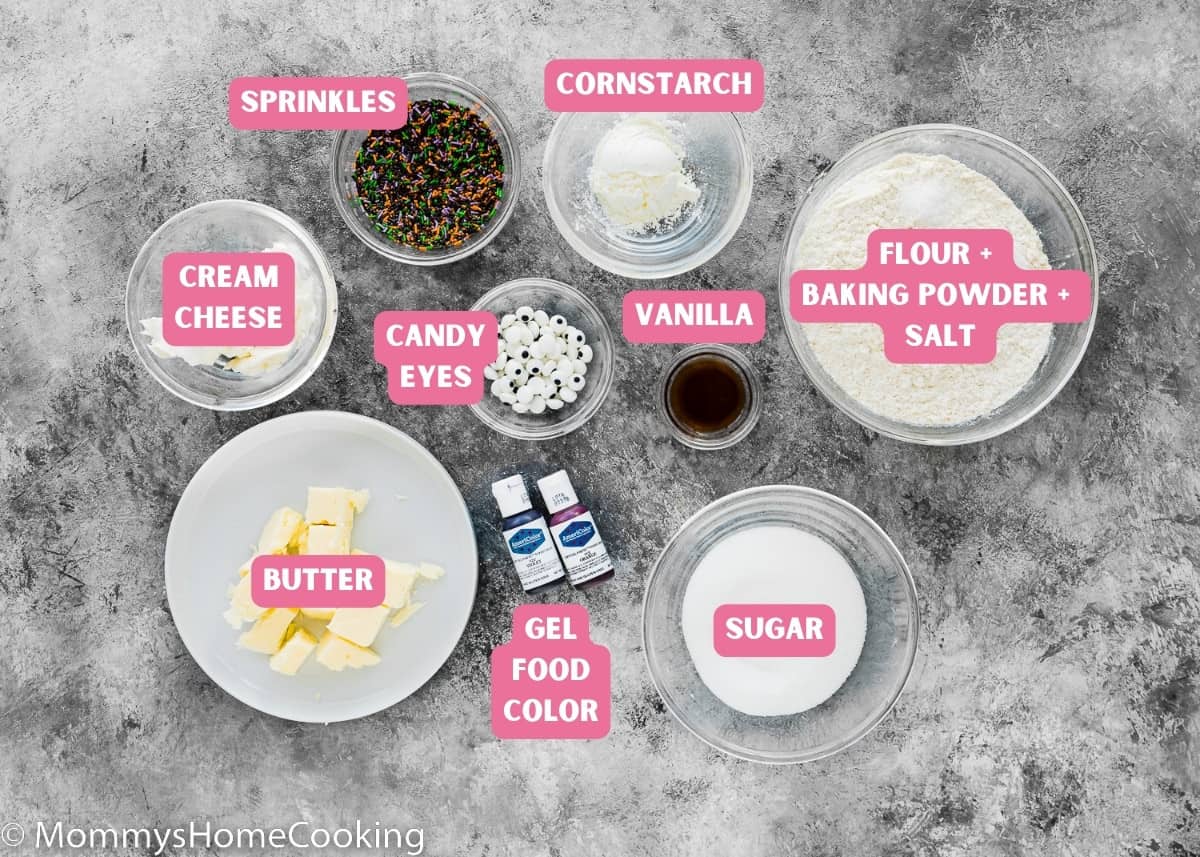
Ingredients Notes & Substitutions
- Flour: Standard all-purpose flour works best here; skip the cake flour, bread flour, and wheat flour. All-purpose flour provides the bulk of the structure in this recipe. Make sure to measure your flour accurately; a kitchen scale is the best way, in my opinion.
- Cornstarch: You can substitute for potato starch 1:1.
- Baking powder: Make sure it is not expired or too old. To avoid a chemical aftertaste, make sure your baking powder is labeled aluminum free. I usually use the Clabber Girl brand, and though the ingredients state aluminum, I’ve never noticed an aluminum aftertaste.
- Salt: I prefer kosher or sea salt. If you only have table salt handy, I recommend reducing the amount to half.
- Butter: I use unsalted butter, but if you only have salted butter handy, you can use it. In this case, skip the salt called in the recipe.
- Sugar: Regular white granulated sugar o caster sugar. I do not recommend reducing the amount of sugar or changing the type of sugar, as it will change the texture of the cookies.
- Cream cheese: Make sure you use the full-fat version that comes in blocks.
- Vanilla extract: For optimal flavor, reach for pure vanilla instead of imitation. Even better, try homemade vanilla extract!
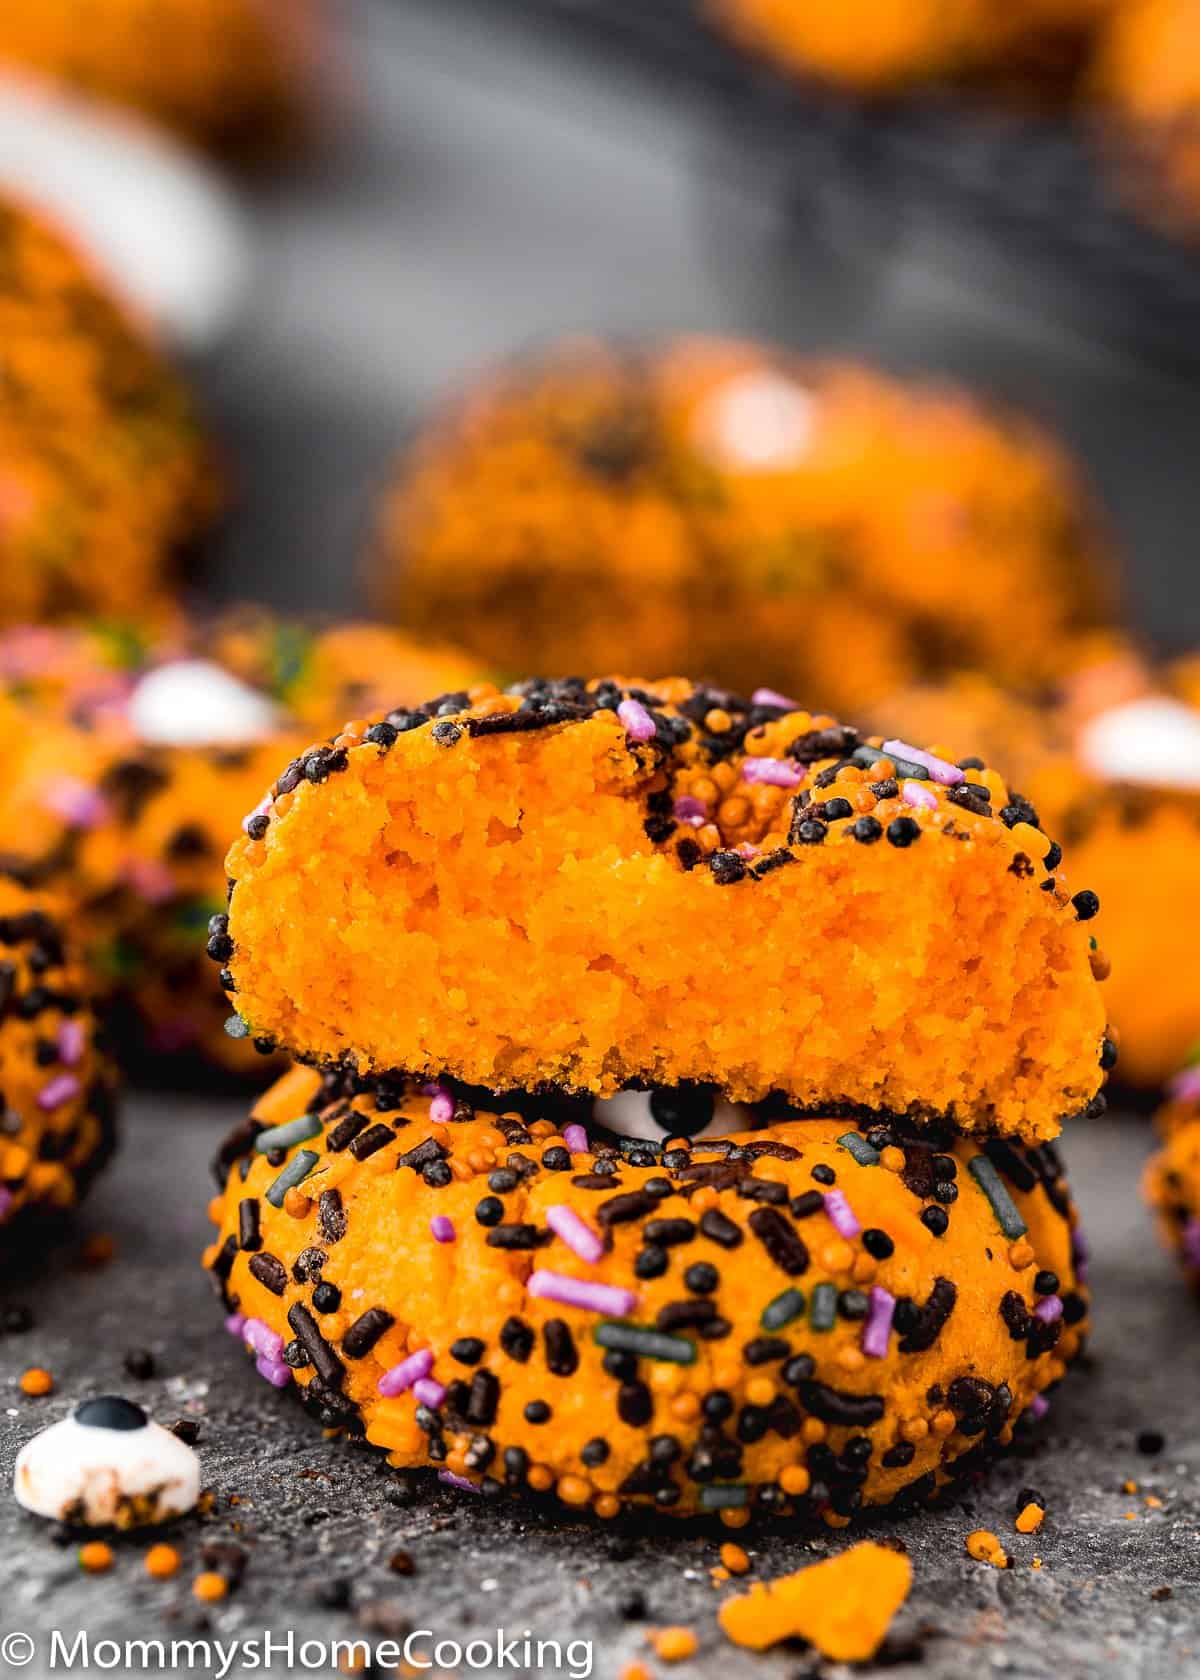
- Soft gel paste food color: I used orange soft gel paste food color, but you can use any other color you prefer. The amount of food coloring will depend on the concentration of the food coloring you are using. I recommend using gel or paste food colors since they are highly concentrated, and you’ll end up using less.
- Halloween sprinkles: I used this mix of Halloween jimmies.
- Candy eyes (optional): I used these candy eyeballs.
Please check the recipe card at the bottom of the post for exact quantities and detailed instructions (scroll down).
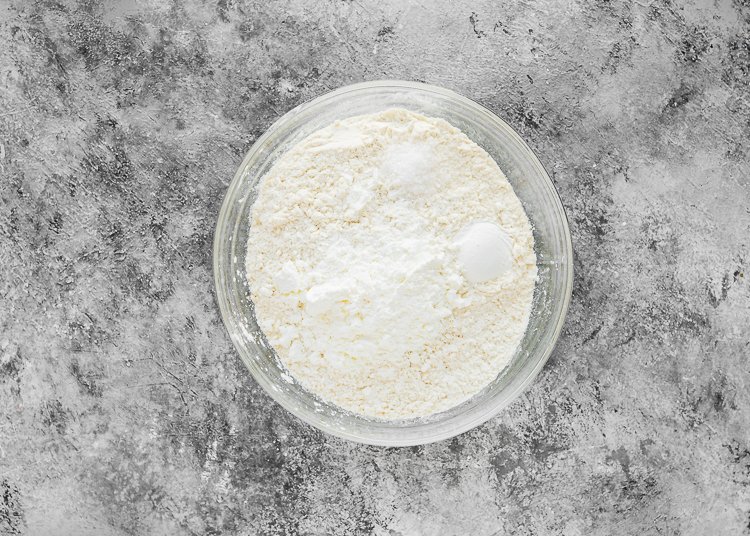
Step 1 – Mix Dry Ingredients
Mix flour, cornstarch, baking powder, and salt in a medium bowl.
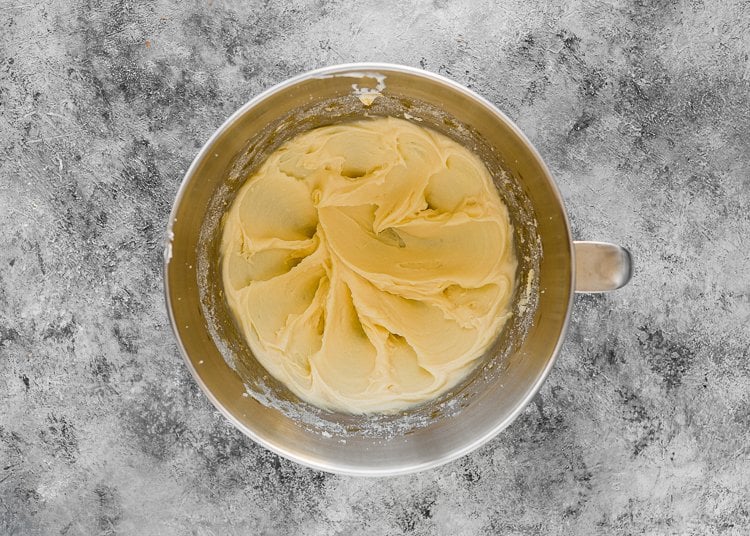
Step 2 – Cream butter & Sugar
Then cream your butter and sugar until pale in color. Make sure the butter is softened. That’s the key to making your cookies fluffy. Then add cream cheese and vanilla.
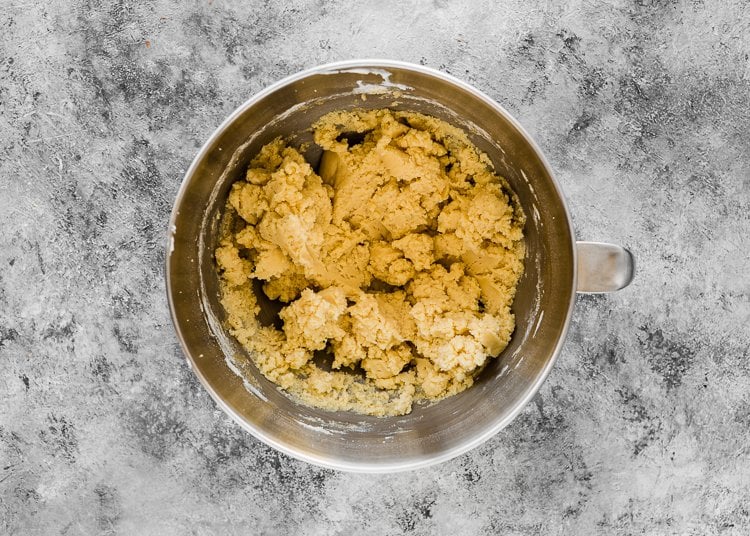
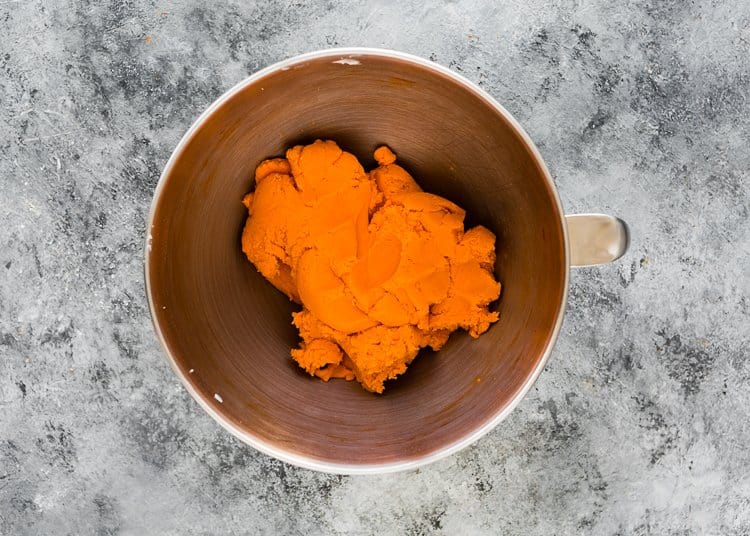
Step 3 – Add in the Dry Ingredients
Add the flour, baking powder, and salt mixture. Mix until just combined. Then add food coloring, if using, and mix until well incorporated. Do not overmix.
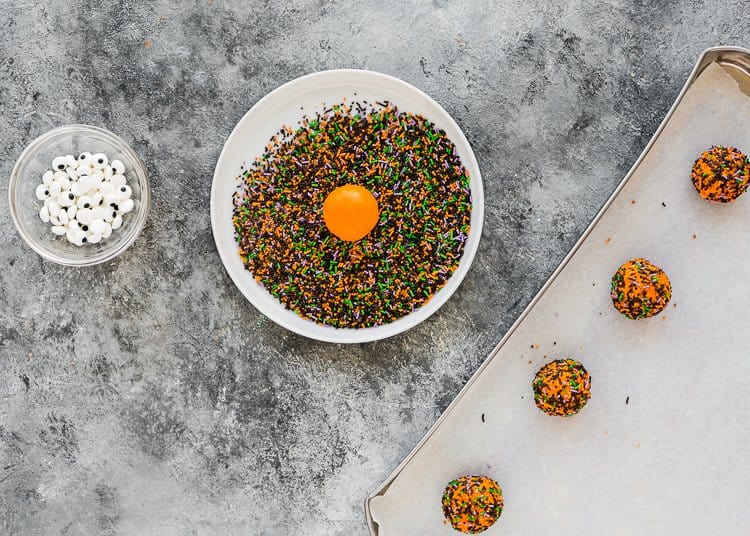
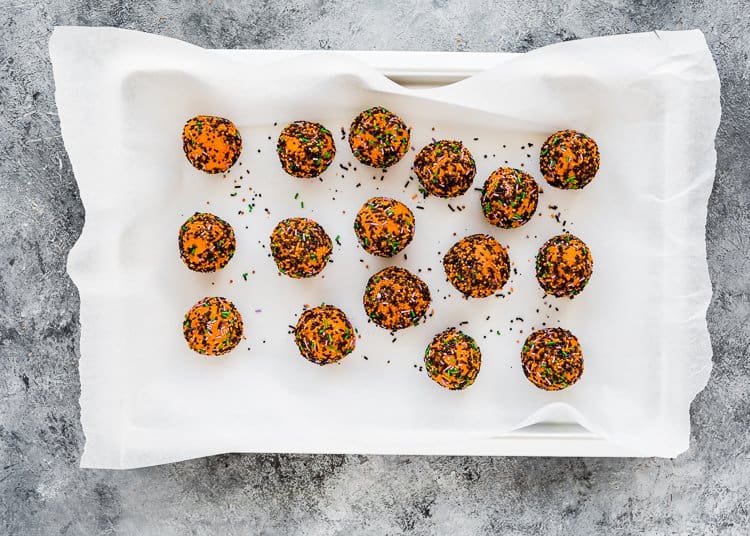
Step 4 – Form the Cookies
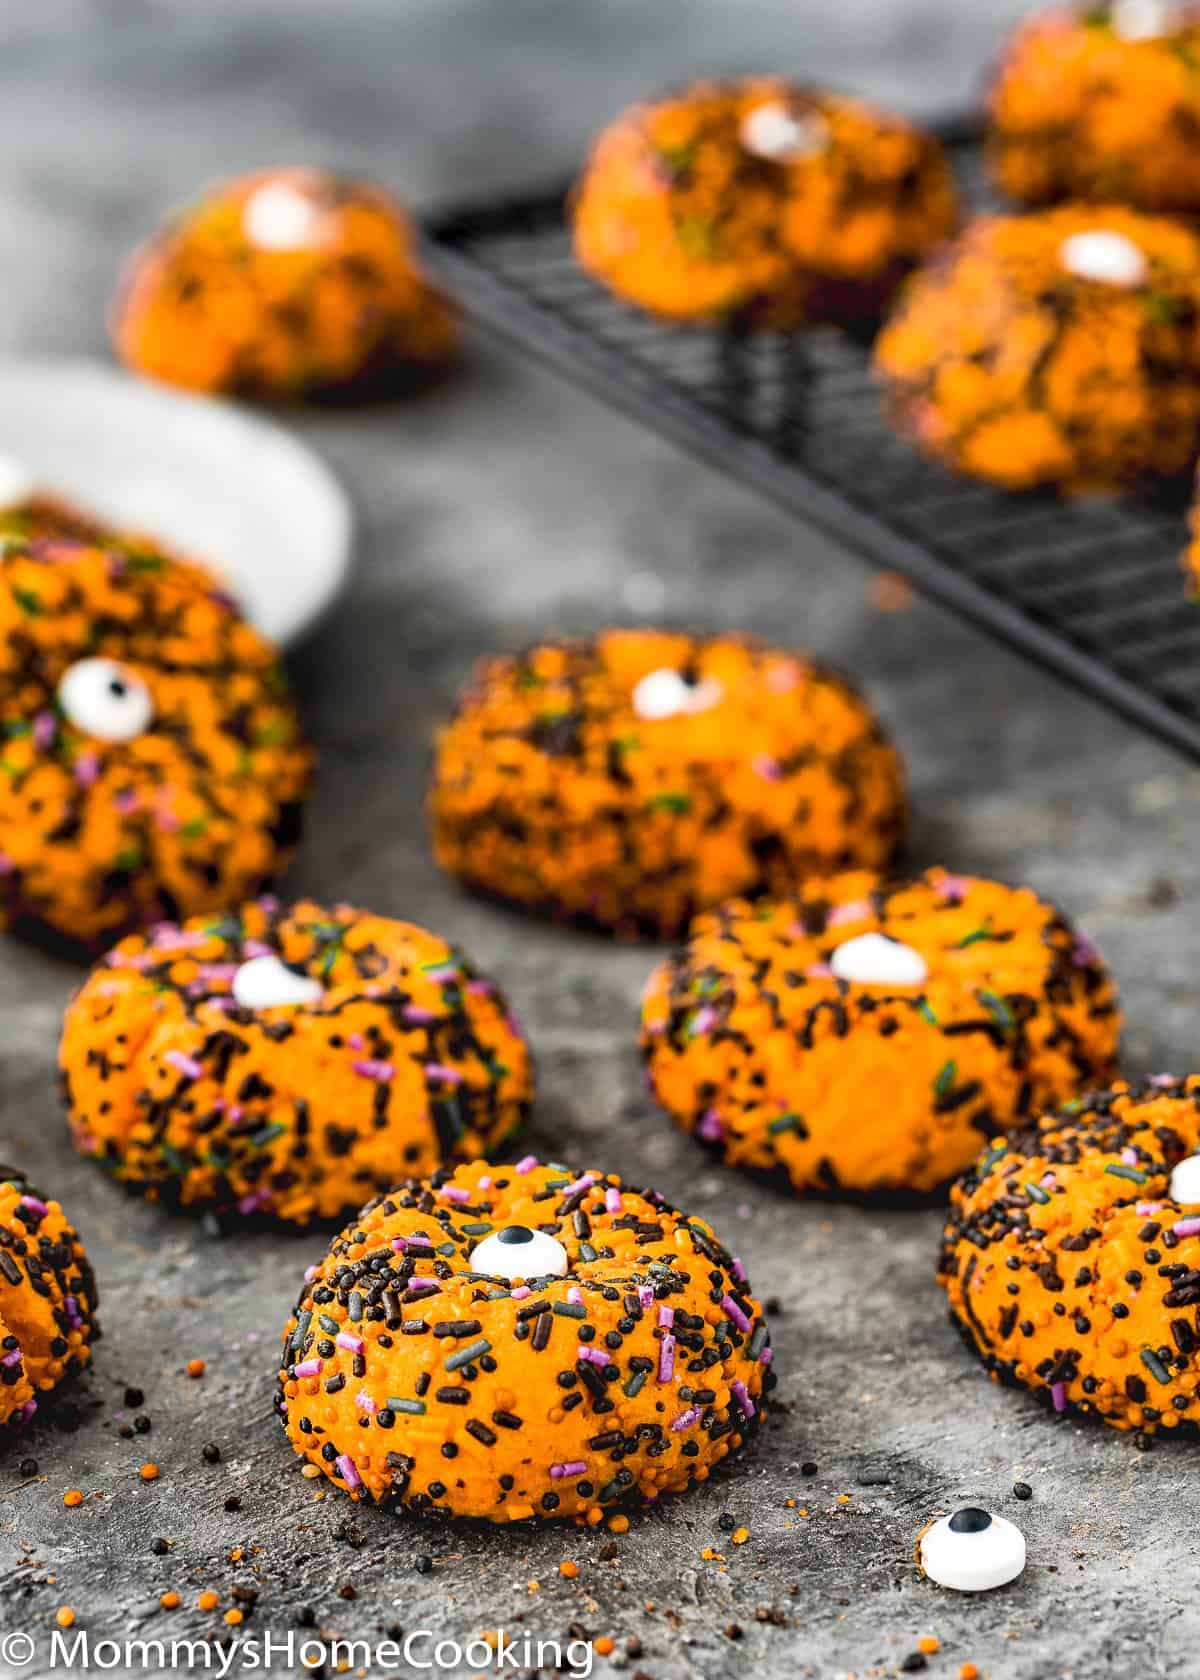
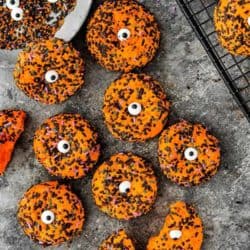
Form cookie dough into balls and roll them in Halloween sprinkles until completely covered.
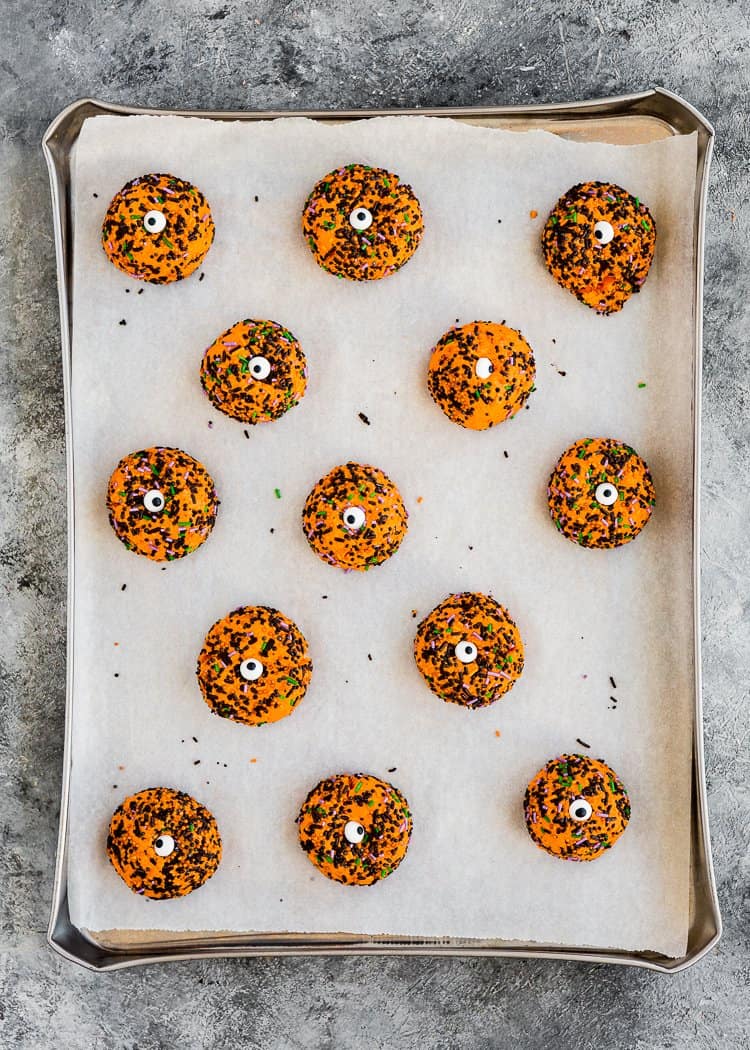
Step 5 – Bake!
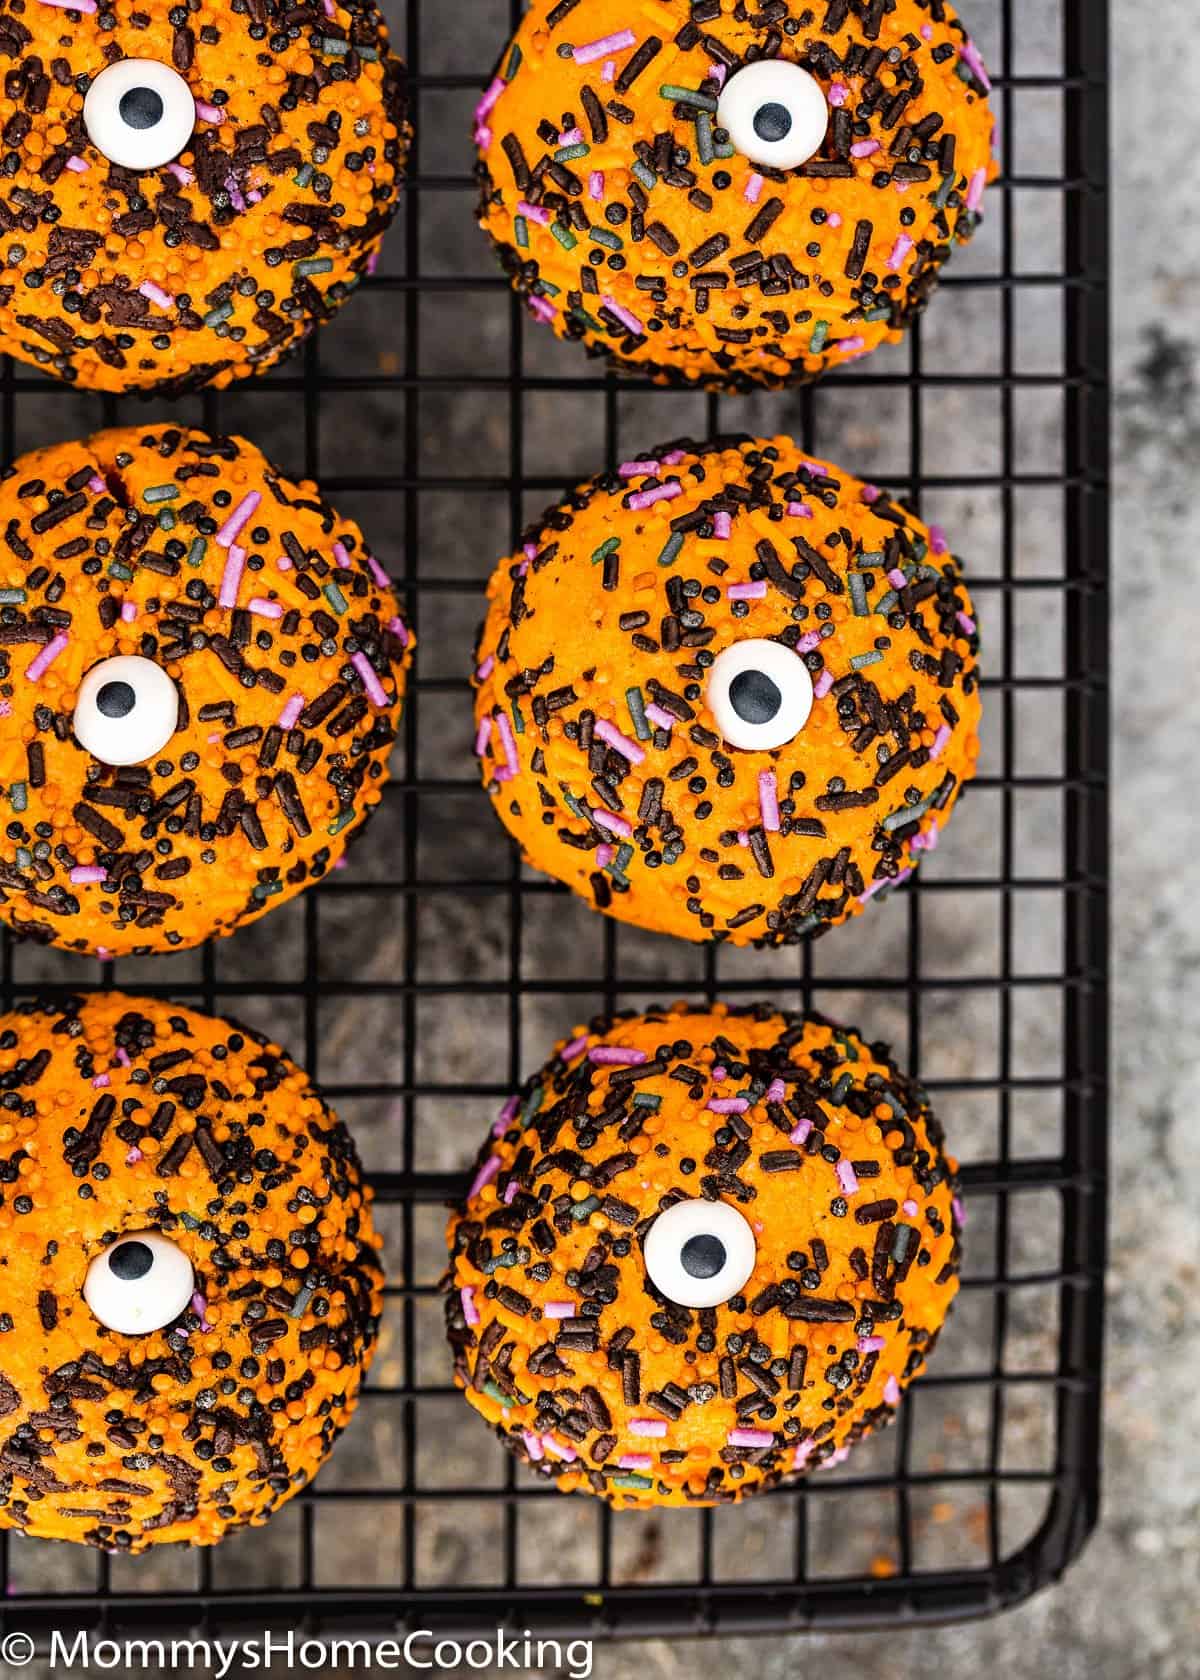
If desired, press 1 or 2 candy eyes into the freshly baked cookies.
Measure the ingredients correctly! A kitchen scale is always the best option, in my opinion, but if you don’t have a kitchen scale, be sure to use a measuring cup made for dry ingredients (NOT a liquid measuring cup) and a liquid measuring cup for liquid ingredients. Also, do NOT dip a measuring cup directly into the flour bin, or you can compact it and get up to 25% more flour; instead, use a spoon to scoop the flour into the measuring cup, and then use a knife (straight-edged) to level the flour across the measuring cup.
Don’t overmix your cookie dough, or you will end up with dense cookies.
For evenly sized cookies (better for baking), use a small spring-loaded ice cream scoop to spoon out the dough.
Bake the cookies until they are JUST golden around the outside. The cookies might still look a little raw in the center, but once they cool, they will be perfect. Let the cookies cool on the baking sheets for just a few minutes, around 2. If you leave the cookies on the baking sheets for too long, they will continue cooking, and they will be hard.
Adapt This Recipe to Other Food Allergies
This recipe is egg-free and nut-free, but you can certainly adapt it to other food allergies.
Gluten-Free
Substitute all-purpose flour for 1-to-1 Gluten-Free flour mix. My favorite brand is Better Batter Original All Purpose Flour Blend. Cup4Cup will also work fine, but the texture will be slightly different.
Dairy-Free
Use your favorite plant-based, dairy-free, or vegan butter and cream cheese. My favorite dairy-free butter brands for baking are:
Storing & Freezing Instructions
Store
Store cookies in an airtight container for up to 5 days at room temperature.
Freeze
You can freeze this cookie dough for up to 3 months. Just roll them into balls, and freeze. When ready to use, allow to thaw overnight in the refrigerator, then bake as directed.
If you want to bake the frozen cookie dough, just let them over the counter until you preheat the oven, then place the balls on a baking sheet and bake for couple extra minutes longer than the recipe directs.
Frequently Asked Questions
About 24 cookies (1 1/2 tablespoon each).
Absolutely! Use any color your heart desires.
Yes, you can. Make the dough and rolls the cookies as instructed in the recipe. Then refrigerate the dough balls for up to 3 days. When ready to bake them, place the cookies over the counter until you preheat the oven, then place the balls on a baking sheet and bake for couple extra minutes longer than the recipe directs.
❤️ Love what you see? JOIN my Private Baking Club. Also, SUBSCRIBE to Mommy’s Home Cooking, so you’ll never miss a recipe! And FOLLOW along on Instagram, Pinterest, and Facebook for more fun!
Recipe Card 📖
Easy Eggless Halloween Soft Sugar Cookies
Equipment
Ingredients
- 2 cups (280 g) all-purpose flour
- 2 tablespoons (20 g) cornstarch
- 2 teaspoons (8 g) baking powder
- 1/2 teaspoon salt
- ¾ cup (174 g) unsalted butter
- ¾ cup (150 g) granulated sugar
- 3 oz (85 g) cream cheese, softened
- 2 teaspoons (10 ml) pure vanilla extract
- 3 – 4 drops of orange soft gel paste food color (or any other color you prefer)
- ½ cup Halloween sprinkles
- Candy eyeballs (optional)
Instructions
- Preheat your oven to 350°F (180° C). Line a cookie sheet with parchment paper and set it aside. The number of batches will depend on how large/small you want your cookies.
- Combine the flour, cornstarch, baking powder, and salt in a medium-sized bowl and set aside.
- Cream the butter and sugar together in a large bowl with an electric mixer on medium speed until light in color and fluffy, about 3 minutes. Add cream cheese and vanilla and mix until well combined.
- Add the flour mixture to the butter mixture and mix until the dough comes together and is combined.
- Add 3 – 4 drops of your chosen food coloring, is using, and mix until well incorporated. Do not overmix.
- Form cookie dough into balls, about 1 ½ tablespoon each. For evenly sized cookies, I like to use a small spring-loaded ice cream scoop to spoon out the dough.
- Roll cookie dough balls in Halloween sprinkles until completely covered. These cookies don't spread much, so I recommend slightly flattening cookies with your fingers. At this point, you can bake the cookies right away or refrigerate them for up to 3 days.
- Bake for 10 -12 minutes, until very lightly colored on top and around the edges. If desired, press 1 or 2 candy eyeballs into the freshly baked cookies. Allow to cool on the baking sheet for 5 minutes, then transfer to a wire rack to cool completely.
- Make sure the butter is softened but not too soft.
- Measure the ingredients properly! A kitchen scale is always the best option, in my opinion, but if you don’t have a kitchen scale, be sure to use a measuring cup made for dry ingredients (NOT a liquid measuring cup) and a liquid measuring cup for liquid ingredients. Also, do NOT dip a measuring cup directly into the flour bin, or you can compact it and get up to 25% more flour; instead, use a spoon to scoop the flour into the measuring cup and then use a knife (straight-edged) to level the flour across the measuring cup.
- Don’t over-mix your cookie dough, or you will end up with a dense cookie.
- If you have time, chill the dough balls for 30 minutes before baking; this gives the dough a chance to firm up a little and allows them to bake much better.
- For evenly sized cookies (better for baking), use a small spring-loaded ice cream scoop to spoon out the dough.
- Bake the cookies until they are JUST golden (set) around the outside. The cookies might still look a little raw in the center, but once they cool, they will be perfect. Let the cookies cool on the baking sheets for just around 2 -3 minutes. If you leave the cookies on the baking sheets for too long, they will continue cooking, and they will be hard.
Nutrition
Eggless Baking Frequently Asked Questions
You’ve asked, and I’ve answered! Read on for a handful of answers to the most frequently asked questions about eggless baking.
This recipe was originally published on October 2020. The recipe remains the same, but more notes, tips, photos, and information have been added to the post in September 2022 with the hope of making it as helpful as possible!
