

This Eggless Oven-Fried Chicken has all the crispy, golden crunch of classic fried chicken — but it’s baked in the oven, made completely without eggs, and skips the greasy mess entirely. The secret is a buttermilk soak and a crushed cornflake-and-breadcrumb crust that bakes up shatteringly crisp. It’s the lighter fried-chicken fix my family asks for on repeat, and it’s easy enough for any weeknight.
Want it in the air fryer? → Air Fryer Chicken Tenders. Want Dairy-Free? → Dairy-Free Baked Chicken Tenders

Oriana’s Thoughts On The Recipe

You’re in for a treat! These Eggless Oven Fried Chicken Tenders are golden, crunchy, and so juicy you’ll swear they came straight from the fryer—but surprise, they’re baked! This recipe is my go-to when I want that classic fried chicken experience without the fuss. No eggs, no hot oil, just deliciously tender chicken with a crave-worthy crust.
Why You’ll Want to Try My Recipe
- Crispy Without Frying: These tenders bake up with a beautifully golden, crunchy coating—no frying necessary!
- Easy & Straightforward: The recipe is simple to follow and doesn’t require any fancy equipment or ingredients.
- Family Favorite: My kids ask for these on repeat—they’re picky-eater approved!
- Allergy-Friendly: No eggs here, so it’s perfect for families like mine who need to keep meals egg-free.
- Lighter Option: You still get that satisfying crisp and flavor, but without all the oil and grease.
- Meal Prep Friendly: These reheat well, making them a great option for lunches and quick dinners.

How do you make oven-fried chicken crispy without frying?
Three things do the work: a buttermilk soak to keep the chicken juicy and help the coating grip, a crunchy crust of crushed cornflakes and seasoned breadcrumbs, and a hot 450°F oven. Spray the coated chicken well with oil and bake on a lightly oiled pan (or a wire rack), flipping halfway, so both sides crisp up. You get that golden, craveable crunch — no frying, no eggs, and far less oil
Is oven-fried chicken healthier than deep-fried?
Yes — because it’s baked instead of submerged in oil, oven-fried chicken has significantly less fat and fewer calories than traditional fried chicken, while still giving you that crispy crust. It’s the reason this has been my go-to “skinny” fried-chicken swap for years.

Ingredients You’ll Need
Amounts are included in the printable recipe below (scroll down). You’ll need:
- Chicken breast: I use boneless and skinless chicken breasts.
- Buttermilk: Don’t have any? Here’s how to make your own buttermilk.
- Cornflakes
- Seasoned breadcrumbs: You can buy seasoned breadcrumbs or add your own seasoning of choice to plain breadcrumbs.
- Seasoning: I use garlic powder, black pepper, paprika, and ground cayenne pepper.
Food Allergy Swaps
This recipe is naturally egg, nut, peanut, and sesame-free, making it suitable for most dietary needs. However, always check labels for hidden allergens.
- Dairy-Free: Instead of buttermilk, use unsweetened plant-based milk (such as soy, oat, or almond) mixed with 1 tablespoon of vinegar or lemon juice to create a dairy-free “buttermilk” substitute.
- Gluten-Free: Instead of seasoned bread crumbs or panko, use gluten-free breadcrumbs or crushed gluten-free cornflakes. Double-check that the cornflakes you use are gluten-free, as some brands may contain malt flavoring (a gluten source).
Step-by-Step Recipe Photo Tutorial
Detailed instructions are included in the printable recipe below (scroll down).
Step 1 – Prepare The Chicken
Use a sharp knife to trim the fat from the chicken breasts and cut them into tenders. Dip the chicken into buttermilk and let it soak for at least 30 minutes or up to overnight.

Step 2 – Make the Breading
Place corn flakes, seasoned breadcrumbs, garlic powder, black pepper, paprika, and cayenne pepper into a small food processor. Pulse until well combined.

Step 3 – Bread the Chicken
Place the breadcrumbs mixture in a shallow pan. Then dip each chicken piece into the breading mixture. Press down firmly so the breading sticks to the chicken.

Step 4 – Bake the Chicken
Preheat the oven to 450°F. Place the chicken on a lightly oiled pan and spray the top of the chicken well with cooking spray. Bake the chicken until done, about 30 minutes.

Why Cornflakes Make the Crispiest Crust
The secret to that shattering, deep-fried-style crunch — without the fryer — is crushed cornflakes. Blended with seasoned breadcrumbs, they give the coating a light, craggy texture that crisps up beautifully in a hot oven and stays crunchy far longer than breadcrumbs alone. It’s the little trick that makes people swear these came straight out of a fryer.
Quick Recipe Tips
- The cooking time will depend on the thickness and size of your chicken pieces. So make sure to check that the chicken is cooked through before you serve. The best way is to use a meat thermometer (165°F for breasts; 180°F for thighs and legs).
- Don’t have regular breadcrumbs? Try panko breadcrumbs.
- Leave space between the chicken breasts when placing them on the sheet pan. This way, the heat can reach all sides of the chicken to help it get extra crispy.
- This baked crispy chicken is best enjoyed right away, as it loses its crispness over time.

Variations
- Spicy: bump the cayenne, or add hot sauce to the buttermilk soak.
- Extra-crispy: use all crushed cornflakes for the coating.
- Different cuts: works with drumsticks or thighs — just add baking time and check the temp.
- Herb-crusted: add dried thyme or oregano to the crumb mix.
Storing & Freezing Instructions
If you have oven-fried chicken leftovers, here’s how to store them.
Leftovers: These crispy chicken tenderloins can be refrigerated for 3 days. Be sure to wrap them up tightly or store them in an airtight container.
Freeze: These eggless oven-fried chicken tenders can also be frozen.
- Baked Chicken Tenders: Let the chicken cool completely and then place them in a freezer plastic bag and freeze for up to 2 months.
- Unbaked Chicken Tenders: Arrange the breaded chicken tenders on a baking sheet and freeze until hard, 1 to 2 hours. Then, transfer to resealable freezer bags and freeze for up to 1 month. When ready to eat the frozen tenders, generously spray the frozen chicken tenders all over with cooking spray. Arrange on the baking rack and bake, flipping halfway through, until golden and crispy and cooked through.
Frequently Asked Questions
You can use whatever cut of chicken you prefer. Just keep in mind that dark meat has more calories than white meat.
You can make healthier fried chicken in the air fryer! Preheat the air fryer to 400°F. Place the chicken in the basket in a single layer (cook in batches if needed). Cook for 13-15 minutes, flipping the chicken halfway through so it’s crispy on both sides. Repeat with the remaining chicken.
To keep the chicken crispy, reheat the chicken tenderloins in a 350ºF oven for 10 to 15 minutes or until warmed through.
The buttermilk soak does the job. As the chicken sits in buttermilk, it turns tacky enough to grab the cornflake-and-breadcrumb coating — no egg needed. Press the coating on firmly, and it stays put through baking.
Bake at a hot 450°F (230°C) — the high heat is what crisps the crust. Cook for about 30 minutes, flipping halfway, until the chicken reaches a safe internal temperature of 165°F.
It can be. Swap the buttermilk for unsweetened plant-based milk (soy, oat, or almond) plus 1 tablespoon of vinegar or lemon juice to make a dairy-free “buttermilk.” Everything else stays the same.
Yes — dark meat works beautifully and stays extra juicy. Just add a few minutes of baking time and always check for 165°F at the thickest part.

Make It a Meal: What to Serve With Oven-Fried Chicken


Recipe Card

Crispy Eggless Oven-Fried Chicken


Equipment
Important
• For best results, I highly recommend using a kitchen scale to measure the ingredients.
Ingredients
- 1 lb (450 g) chicken breast, boneless and skinless (about 2 -3 medium-sized chicken breasts)
- 1 cup (240 ml) buttermilk
- 1 cup (80 g) cornflakes
- 1 cup (100 g) bread crumbs or panko (see notes)
- 1 tablespoon garlic powder
- 1 teaspoon kosher salt
- 1 teaspoon black pepper
- 1 teaspoon paprika
- 1/4 teaspoon ground cayenne pepper (optional)
Instructions
- Use a sharp knife to trim the fat from the chicken breasts and cut them into tenders.
- Dip the chicken into buttermilk and let it soak for at least 30 minutes or up to overnight.
- Place corn flakes, seasoned breadcrumbs, garlic powder, salt, black pepper, paprika, and cayenne pepper into a small food processor. Pulse until well combined.
OVEN:
- Preheat oven to 450º F (230º C).
- Place the breadcrumb mixture in a shallow pan. Then dip each chicken piece into the breading mixture. Press down firmly so the breading sticks to the chicken.
- Place the chicken on a lightly oiled sheet pan; spray the top of the chicken well with olive oil spray.
- Bake the chicken until done, about 30 minutes, flipping it halfway through so it's crispy on both sides. NOTE: The cooking time will depend on the thickness and size of your chicken pieces. The best way to check for doneness is to use a meat thermometer. The chicken will be done when it reaches 165°F. So, make sure to check that the chicken is cooked through before you serve.
AIR FRYER:
- Preheat the air fryer to 400°F (200º C).
- Place the chicken in the basket; DO NOT crowd or overlap. You might need to do this in batches depending on the air fryer's capacity.
- Cook for 13-15 minutes, flipping the chicken halfway through so it's crispy on both sides. Repeat with the remaining chicken.
- Baked Chicken Tenders: Let the chicken cool completely, then place it in a freezer-safe plastic bag and freeze for up to 2 months.
- Unbaked Chicken Tenders: Arrange the breaded chicken tenders on a baking sheet and freeze until hard, 1 to 2 hours. Then, transfer to resealable freezer bags and freeze for up to 1 month. When ready to eat the frozen tenders, generously spray them all over with cooking spray. Arrange on the baking rack and bake, flipping halfway through, until golden, crispy, and cooked through.
- Dairy-Free: Instead of buttermilk, use unsweetened plant-based milk (such as soy, oat, or almond) mixed with 1 tablespoon of vinegar or lemon juice to create a dairy-free “buttermilk” substitute.
- Gluten-Free: Instead of seasoned bread crumbs or panko, use gluten-free breadcrumbs or crushed gluten-free cornflakes. Double-check that the cornflakes you use are gluten-free, as some brands may contain malt flavoring (a gluten source).
- The cooking time will depend on the thickness and size of your chicken pieces. Make sure to check that the chicken is cooked through before serving. The best way is to use a meat thermometer (170°F for breasts; 180°F for thighs and legs).
- Don’t have regular breadcrumbs? Try panko breadcrumbs.
- Leave space between the chicken breasts when placing them on the sheet pan. This way, the heat can reach all sides of the chicken to help it get extra crispy.
- This baked crispy chicken is best enjoyed right away, as it loses its crispness over time.
Nutrition
Nutrition information provided is an estimate and will vary based on cooking methods and brands of ingredients used.
Eggless Baking Frequently Asked Questions
You’ve asked, and I’ve answered! Read on for a handful of answers to the most frequently asked questions about eggless baking.
More Recipes You’ll Love
- Instant Pot Teriyaki Turkey Meatballs
- Eggless Homemade Fish Sticks
- Easy Carnitas Taquitos
- Easy Eggless Meatloaf
- Easy Instant Pot Chicken Marsala
- Eggless Ricotta Stuffed Shells
- Browse more recipes…
Recipe Changelog
- Originally posted in April 2016.
- Update: The post was edited in December 2019 to add more helpful information, with no changes to the recipe.
- Update: The post was updated again in August 2026 to add more helpful information, with no changes to the recipe.




Something I was sad to give up were chicken tenders, but this recipe helped to satisfy that craving. Even my picky son enjoyed them – he tells me he loves them more than the ones we can get at a restaurant. Thanks! 🙂
Hello Markus! Great to hear that it was a hit =) Thanks a lot for the review and good feedback.
These were very very tasty and my kids ate them!! Will definitely make them again. X
Hello Sam! I’m so glad you loved this recipe. Thank you for sharing your wonderful feedback and review!
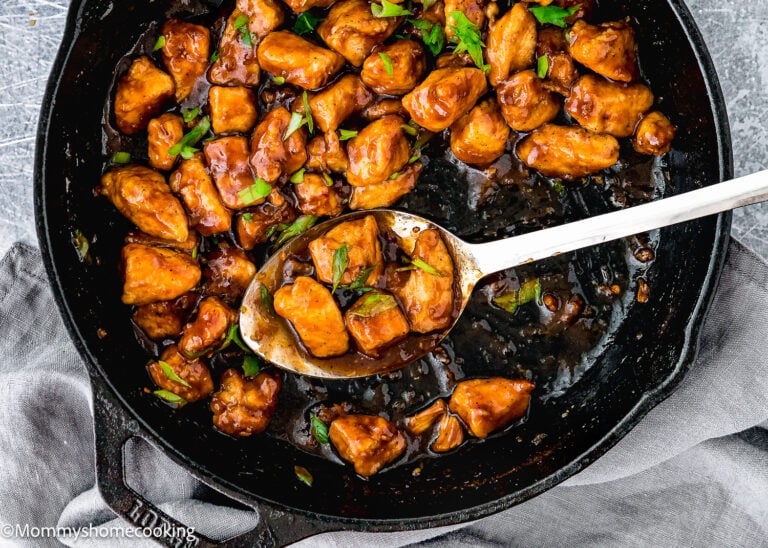
What is that that you garnished with?
Hello Tiffany! That is chopped cilantro. Thanks for your interest in my recipe. Please come back and let me know how you like it =)
I just tried your recipe in the air fryer, it turned out perfectly! I think that it tastes better than fried chicken. This is definitely gonna be a regular for me.
Hello Leona! It sounds like you nailed it! Thanks so much for trying my recipe and taking the time to come back and let me know.
Hello~
I was wondering if you can use bone in chicken? I just honestly enjoy traditional wings!
Hello Marly! Yes, you can, just make sure to adjust the baking time accordingly. Thanks for your interest in my recipe. Please come back and let me know how you like it =)
These are very good. would love to cook in air fryer
Hello Mary! To cook in the air fryer: reheat the air fryer to 400°F. Place the chicken in the basket, adding in batches to not crowd or overlap. Cook for 13-15 flipping the chicken halfway through so they’re crispy on both sides.
How do you cook in the air fryer?
Hello Mary! Yes…reheat the air fryer to 400°F. Place the chicken in the basket, adding in batches to not crowd or overlap. Cook for 13-15 flipping the chicken halfway through so they’re crispy on both sides. Hope this helps!