
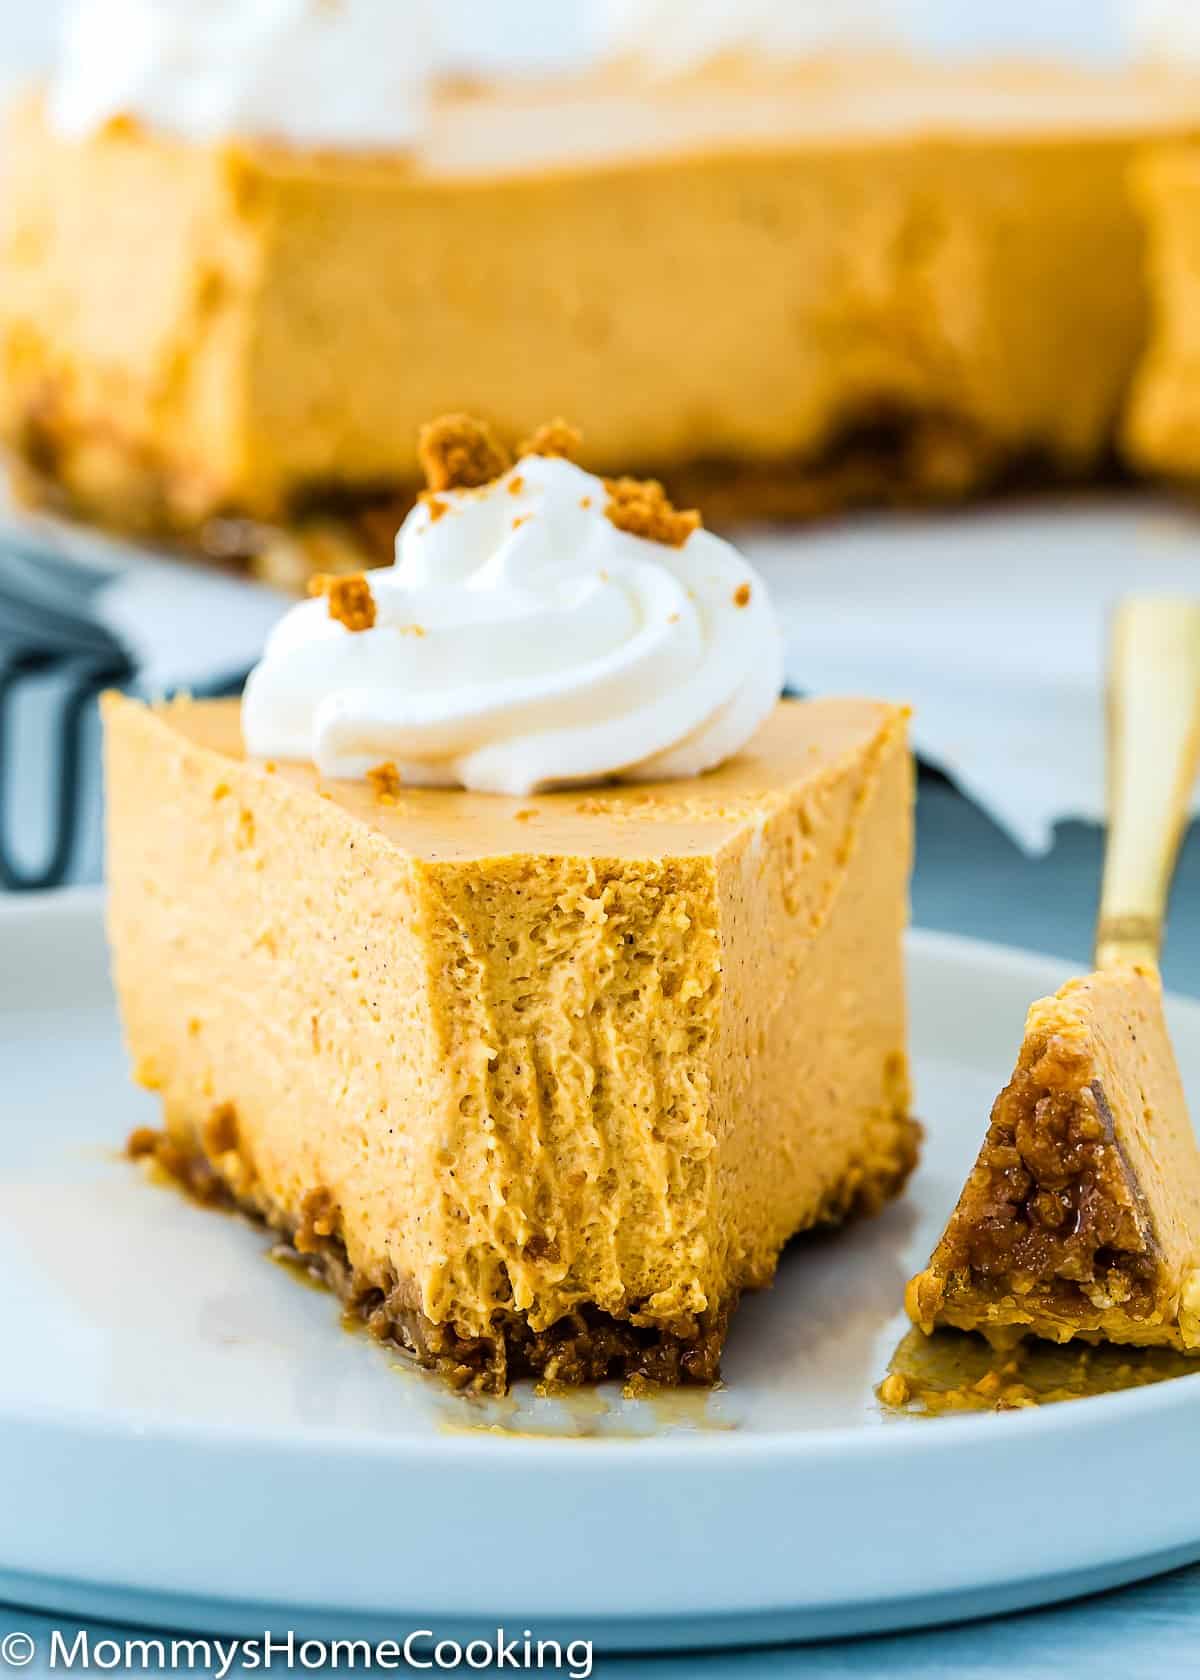
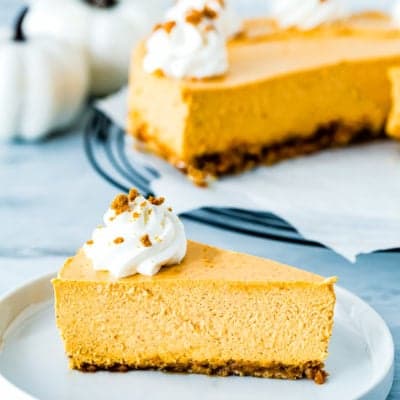
Eggless Pumpkin Cheesecake is creamy, silky, and smooth! Made with simple ingredients, this delicious dessert will be the perfect centerpiece on your fall table. The recipe includes step-by-step photos and lots of tips.
If you prefer the classic version, check out my Best Eggless Cheesecake recipe!

Egg-Free Pumpkin Cheesecake Highlights
Look no further for the BEST Eggless Pumpkin Cheesecake recipe! This Eggless Pumpkin Cheesecake is creamy, silky, and smooth. It combines all the flavors of fall together like no other—the perfect dessert for fall parties or for your Thanksgiving table.
Preparing cheesecake is pretty simple. However, baking it could be a little tricky. Many things can go wrong, like the springform pan leaking, the surface of the cheesecake cracking, under-baking, over-baking, etc. I have added a few tips in this post that will help to create cheesecake perfection.
You’ve got to try it to believe how good it is.

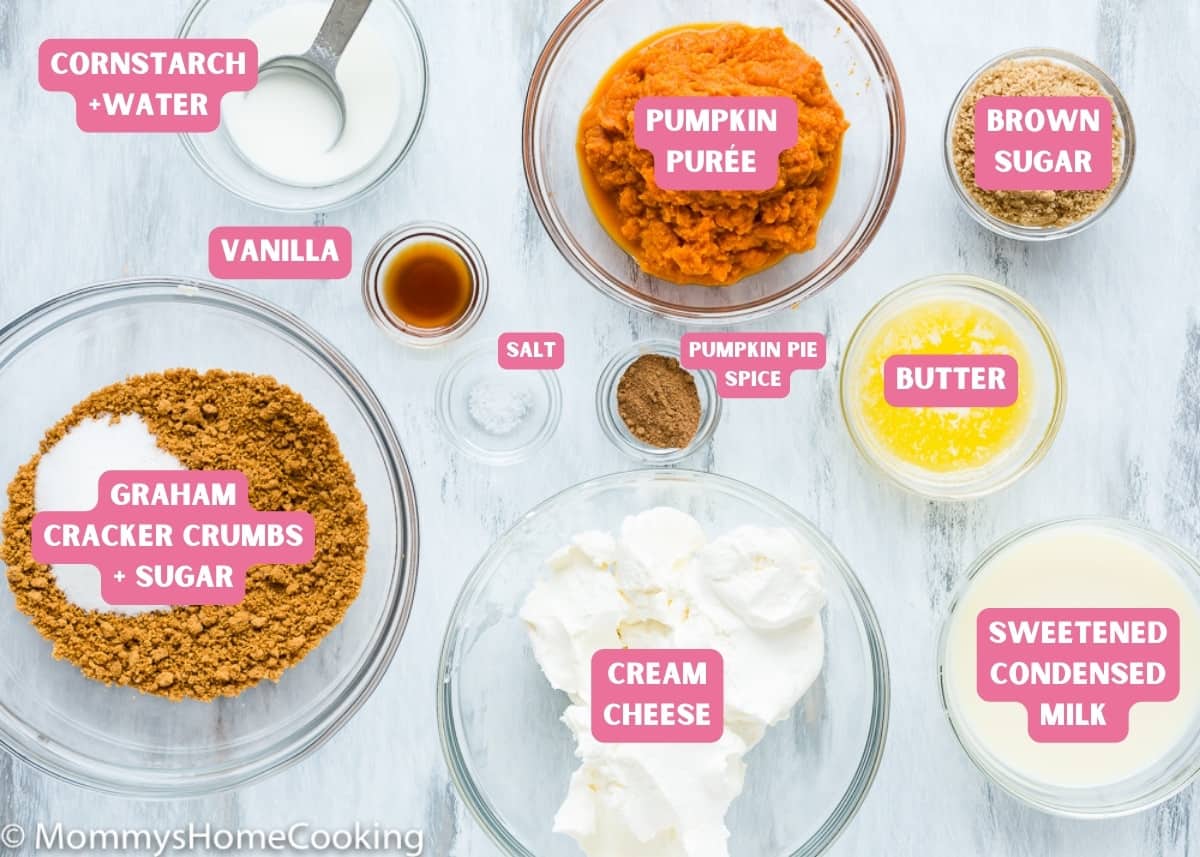
Ingredients You’ll Need
You only need a few basic staple ingredients for cheesecake.
Ingredients Notes & Substitutions
For the crust, you will need:
- Graham cracker crumbs, melted butter, and sugar. You can also use digestive biscuits, gingersnaps, or Biscoff instead of Graham crackers. I like to use my food processor to make cracker crumbs. For a gluten-free crust, use your favorite gluten-free crackers/biscuits.
For the filling, you will need:
- Cornstarch: This ingredient will help the cheesecake to set. If you’re allergic to corn, you can use potato starch 1:1.
- Cream cheese: Use the full-fat version that comes in blocks. Dairy-free alternative: Violife VIOlife Just Like Cream Cheese Original.
- Brown sugar: I prefer light brown sugar, so the cheesecake is not too dark in color.
- Sour cream: I recommend using the full-fat versions. If sour cream is difficult to find in your country, learn How to Make Sour Cream at Home. Dairy-free alternative: Tofutti Better than Sour Cream.
- Pumpkin puree: It must be pure pumpkin puree, not pumpkin pie filling. I use and recommend Libby’s 100% Pure Pumpkin.
- Sweetened condensed milk: Use the full-fat version for better results. Dairy-free alternative: NATURES CHARM Sweetened Condensed Oatmilk.
- Pumping pie spice: This is a blend of ground cinnamon, nutmeg, cloves, and allspice and is easily found in most American grocery stores. If this blend is not available in your country, you can use 2 tsp cinnamon, ¼ tsp nutmeg, ¼ tsp cloves, and ¼ tsp allspice.
- Salt: Just a pinch to balance out all the flavors. I prefer kosher or sea salt. If you only have table salt handy, I recommend reducing the amount to half.
- Vanilla extract: For optimal flavor, reach for pure vanilla instead of imitation. Even better, try homemade vanilla extract!
Step By Step Recipe Photo Tutorial
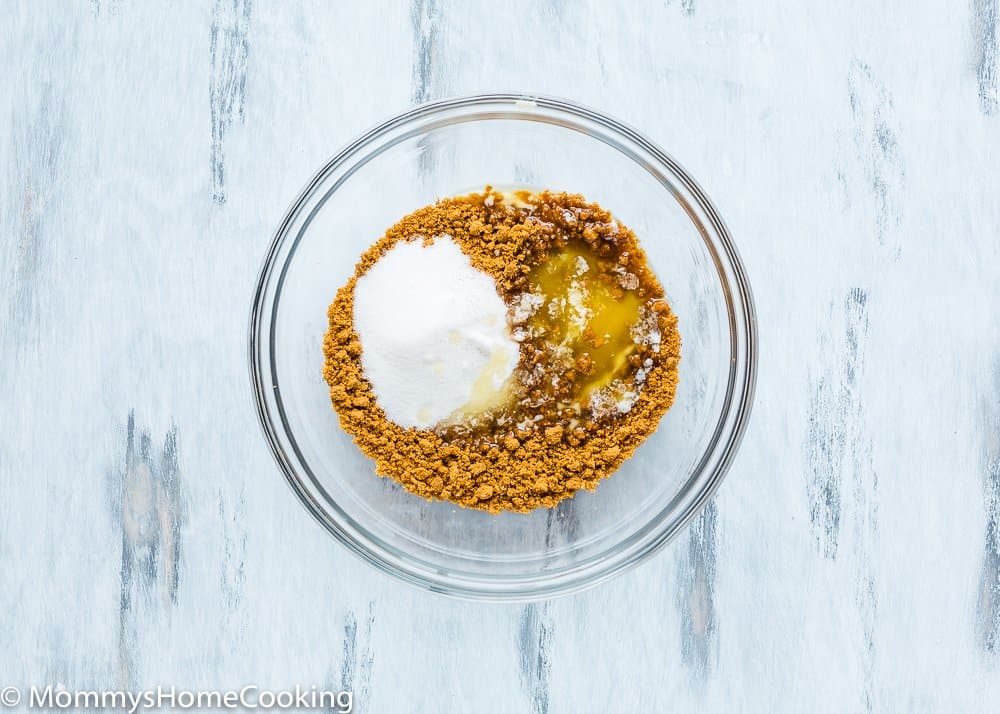
Step 1 – Make the Graham Cracker Crust
- Line and wrap with foil the springform pan very well to avoid the water coming in.
- Mix the crust ingredients.
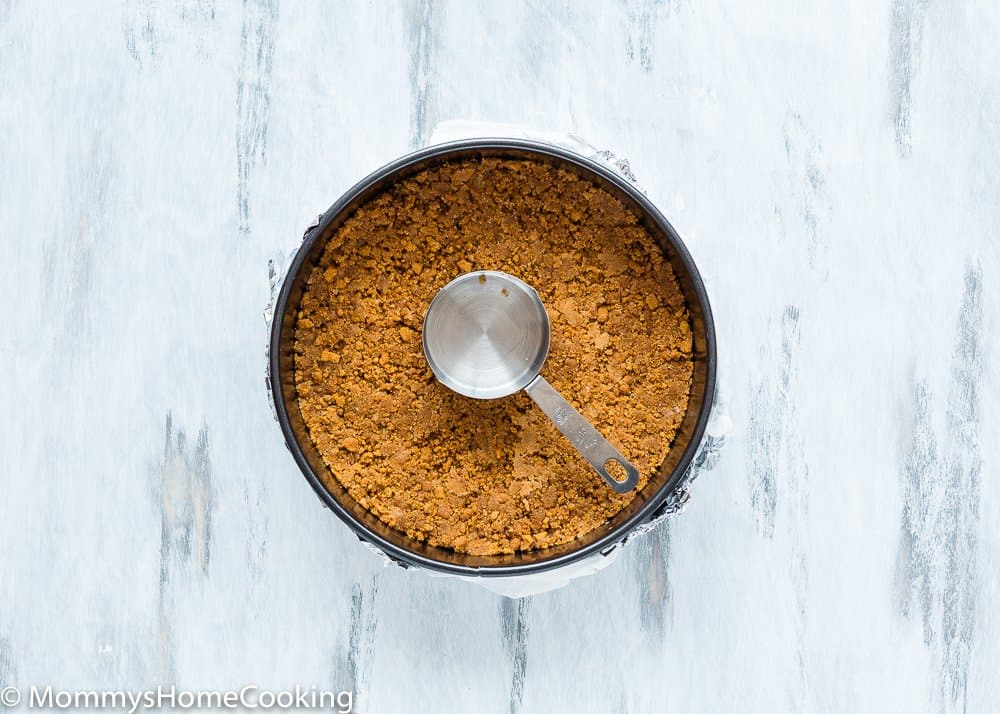
- Press the crumbs down into the base and up the sides.
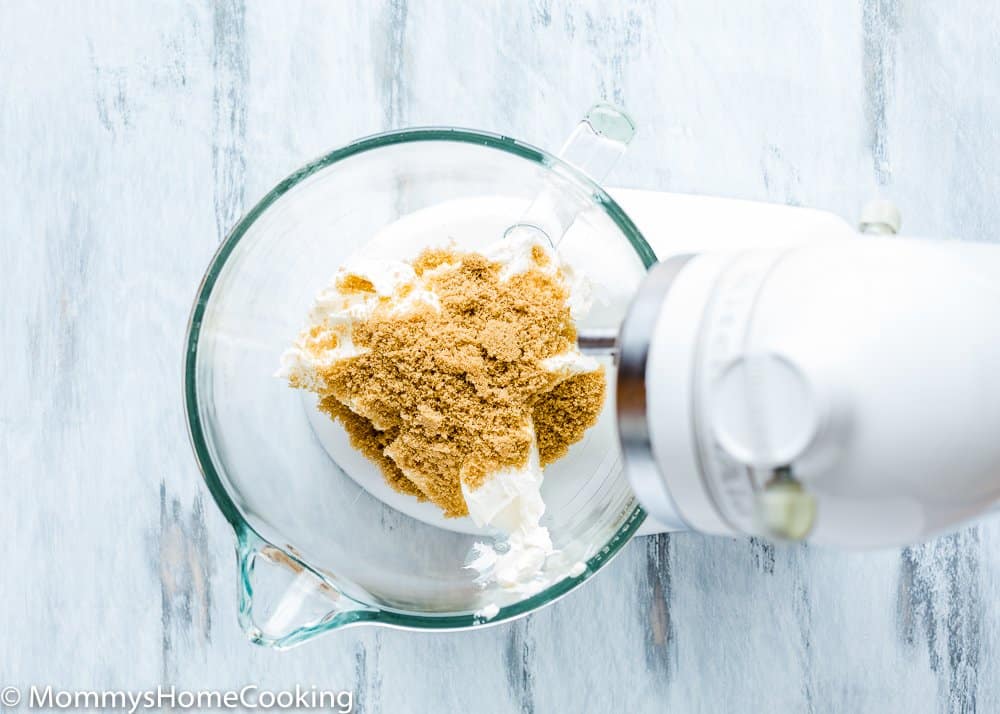
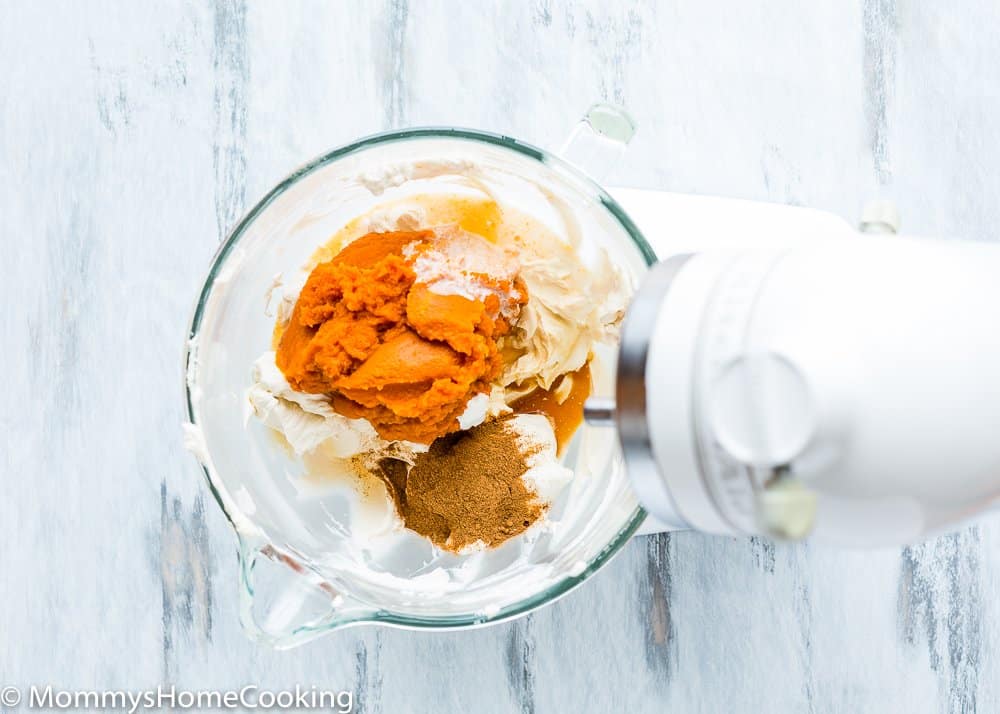
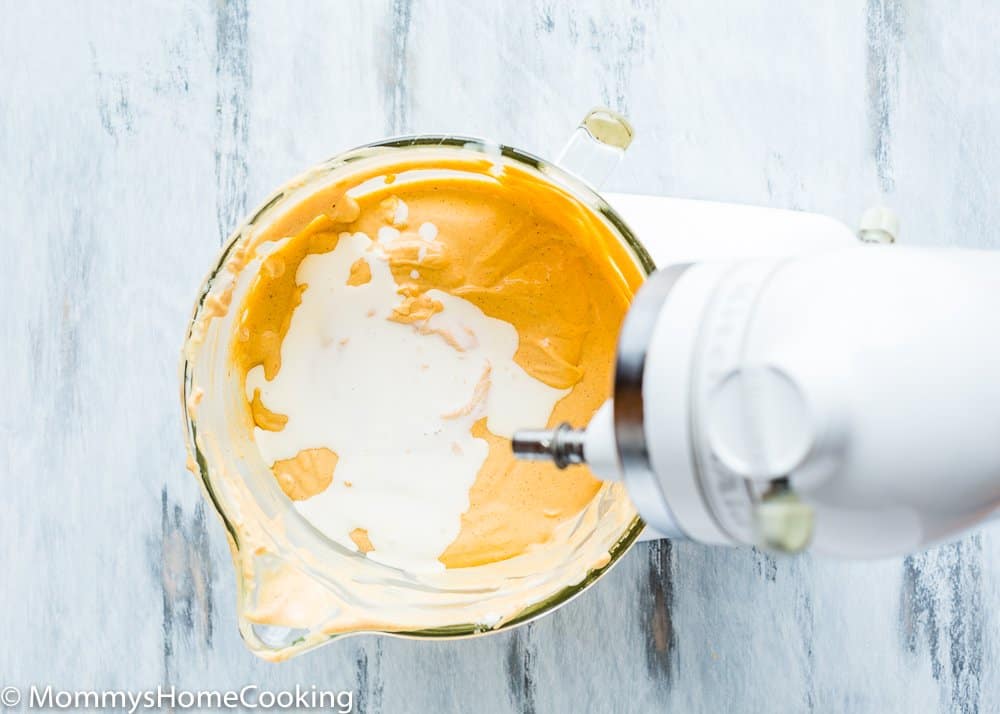
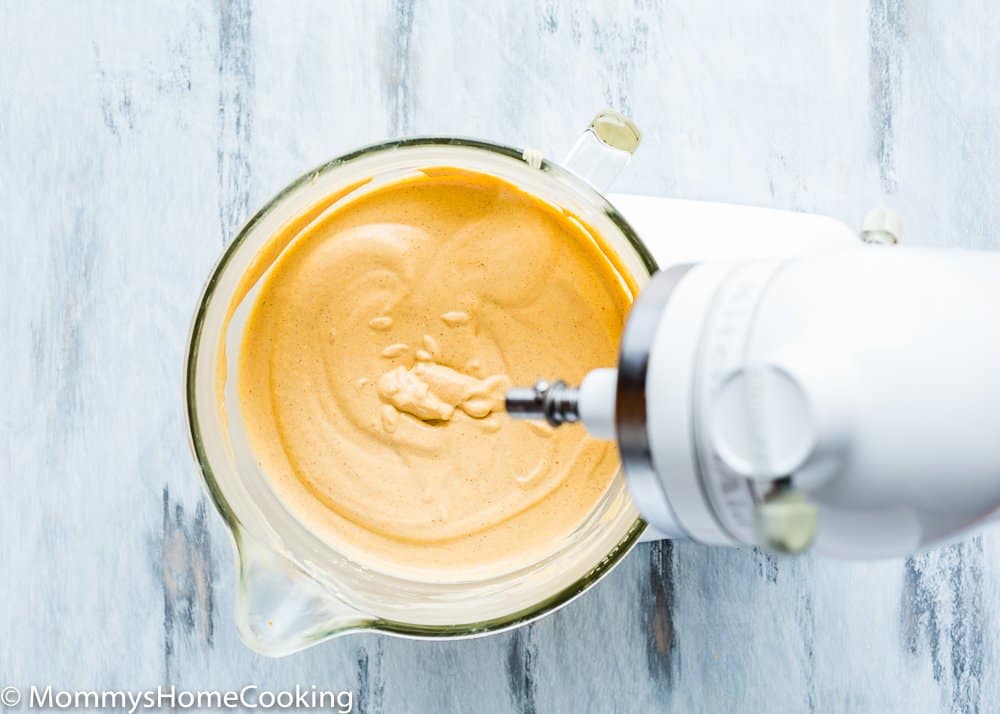
Step 2 – Make the Pumpkin Cheesecake Filling
Place the cream cheese and brown sugar in the bowl of an electric mixer and beat on low speed for 2-3 minutes until smooth and free of any lumps. Add sour cream and pumpkin puree and continue mixing until incorporated. Gradually add sweetened condensed milk and beat until creamy, for about 1-2 minutes. Add the pumpkin spice, vanilla extract, and cornstarch mixture; beat until well incorporated.
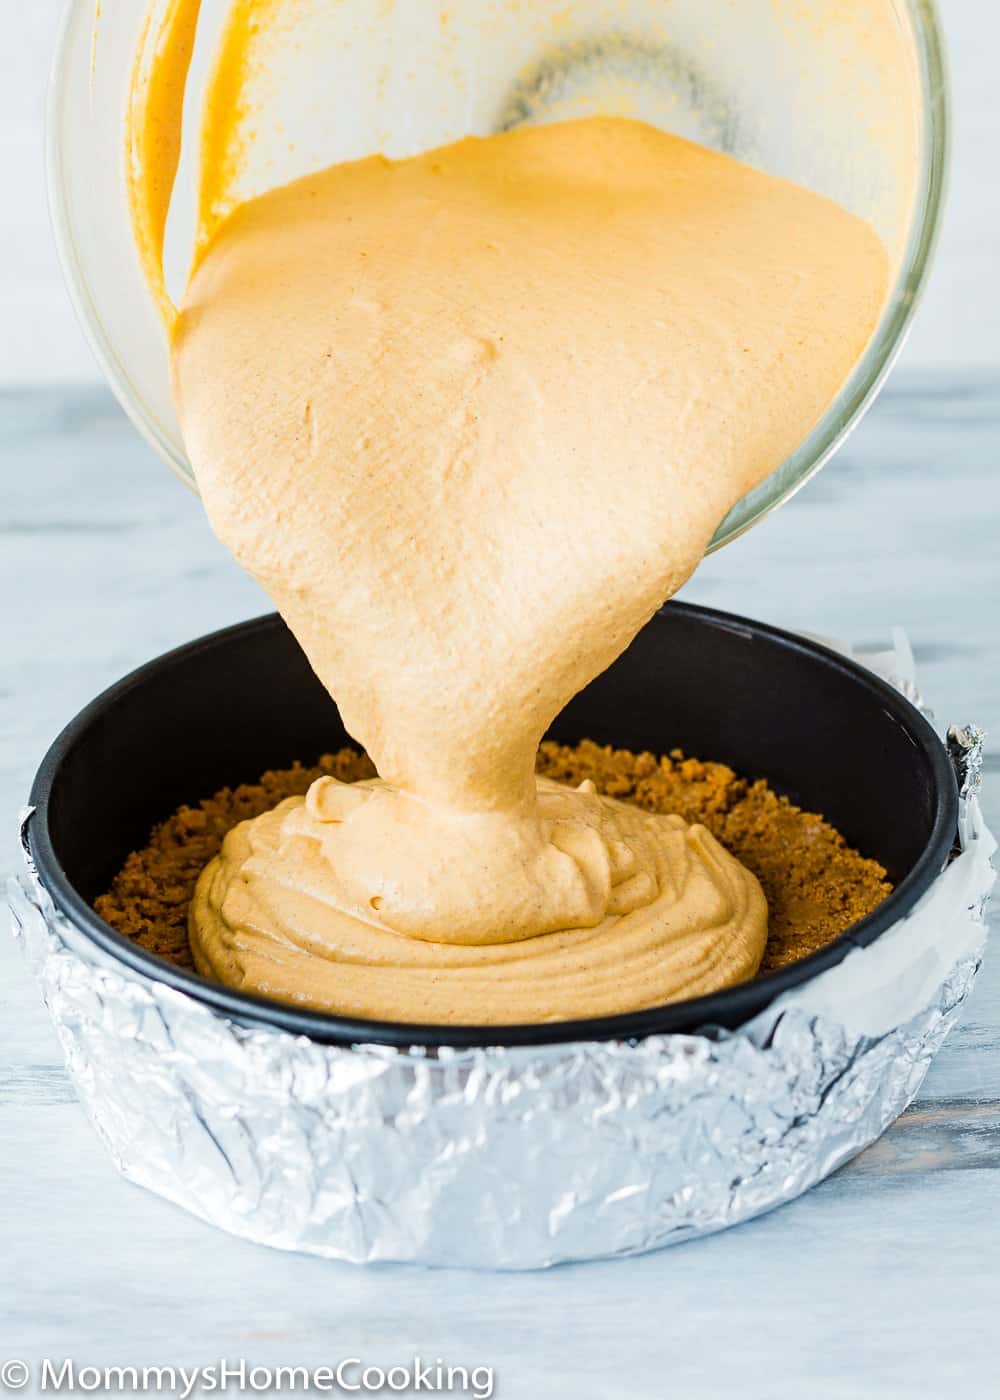
Step 3 – Pour the Mixture Over the Crust
Tap gently to remove any air bubbles.
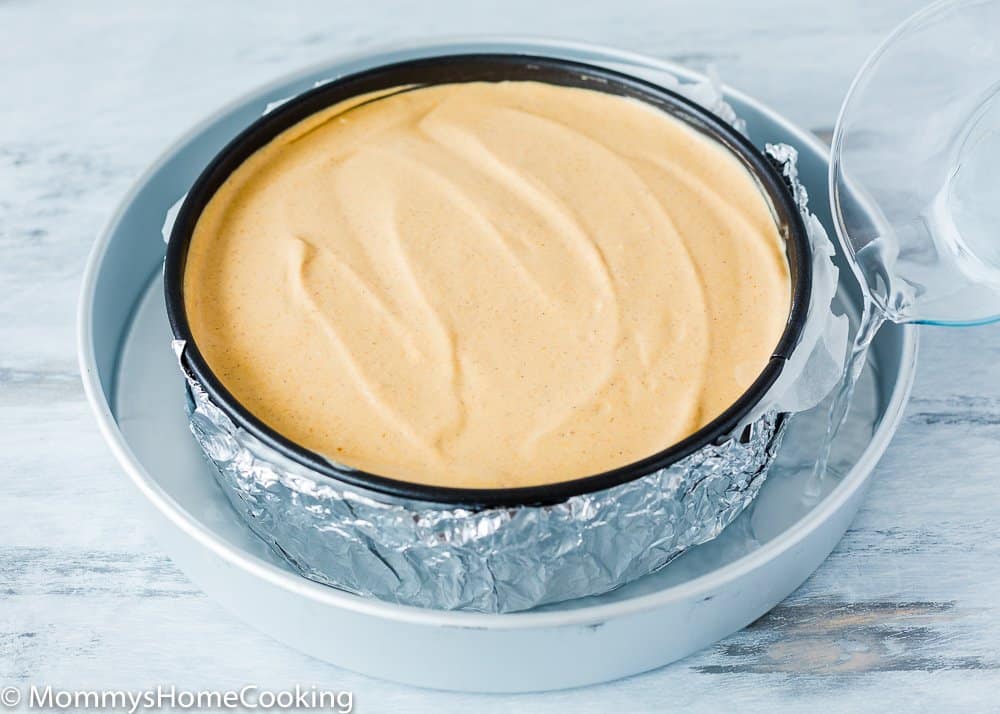
Step 4 – Prepare the Water Bath
Place the springform pan into a larger pan and pour boiling water into the pan, careful to make sure the water level doesn’t come up higher than the foil.
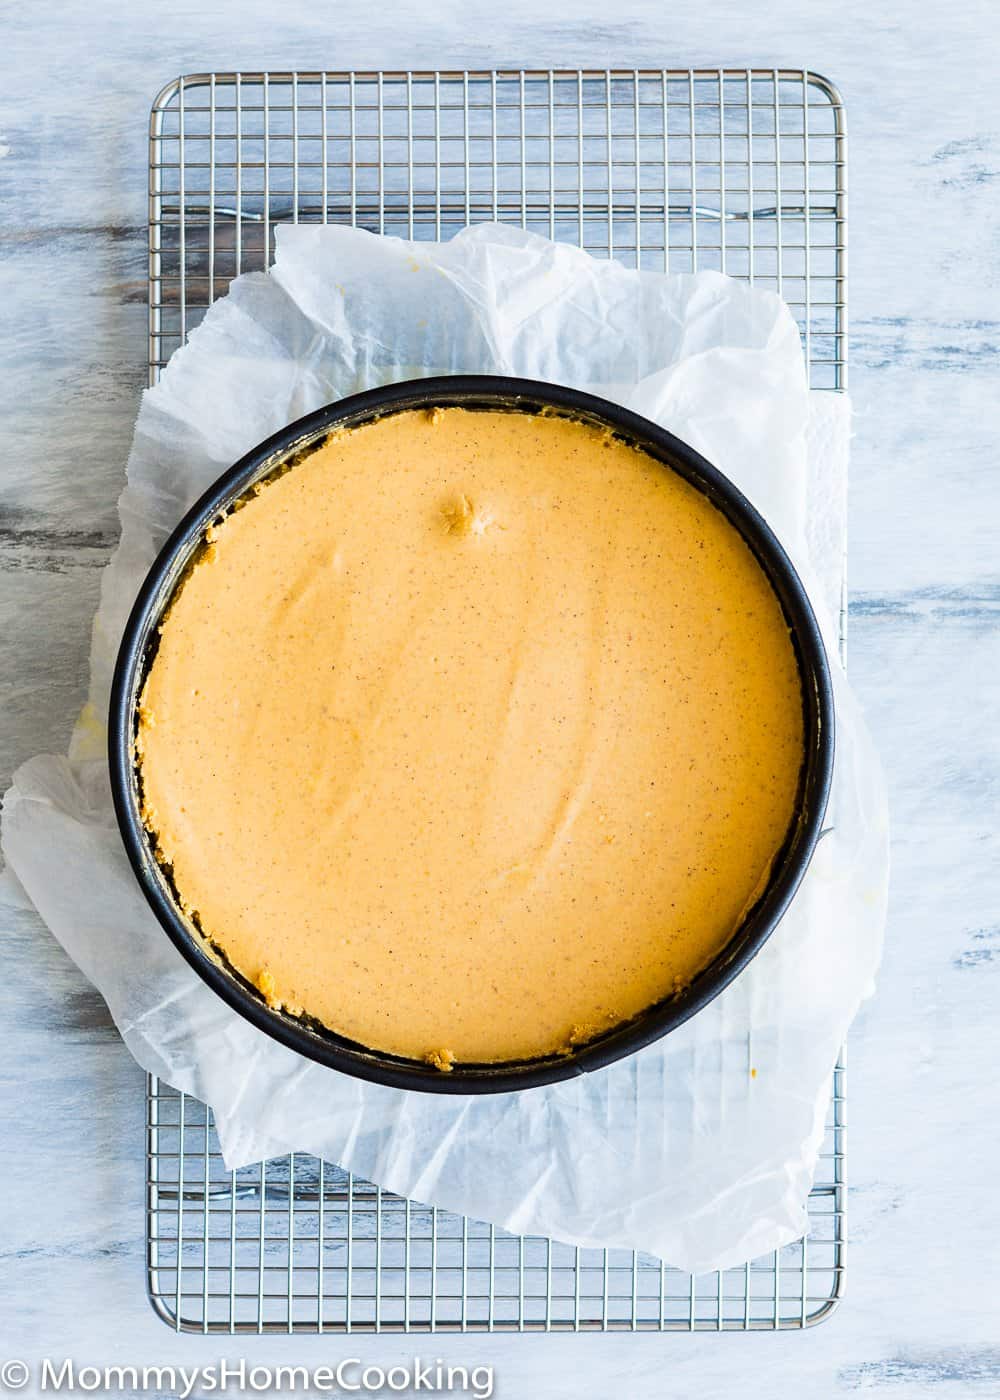
Step 5 – Bake and let it cool until well set
Bake and let it cool until well set.
Recipe Tips
Plan ahead! Cheesecake is one of those desserts you have to plan in advance. It takes a long time to chill and set.
Make sure all your ingredients are at room temperature.
The Leaky pans are a cheesecake’s arch nemesis so make sure the cheesecake pan is well wrapped in foil. I like to line the base of my pan with a large layer of non-stick aluminum foil and then Wrap the outside of the pan in a double layer of heavy-duty foil, covering the underside and coming all the way to the top.
Avoid overcooking the cheesecake, or it will crack. The center of your cheesecake should still wobble when you remove it from the oven; it will continue to set as it cools on the counter.
To prevent cracks during cooling, it’s important to loosen the cheesecake from the sides of the pan after baking. First, cool the cheesecake on a wire rack for 15 minutes. Then, carefully run a knife between the cheesecake and the inside of the pan. Don’t remove the sides of the pan yet.
How To Unmold Cheesecake
- Loosen the cheesecake from the sides of the pan by running a thin metal spatula around the inside rim again.
- Remove the band from the pan.
- Take a large knife or metal spatula and carefully run it under the bottom of the cheesecake to loosen it.
- Then, use two large spatulas to carefully lift the cheesecake over to the serving plate. Be sure the cheesecake is well balanced/supported so it won’t crack or break. Then, carefully transfer it to a cake plate.
- Serve whipped cream, if desired.
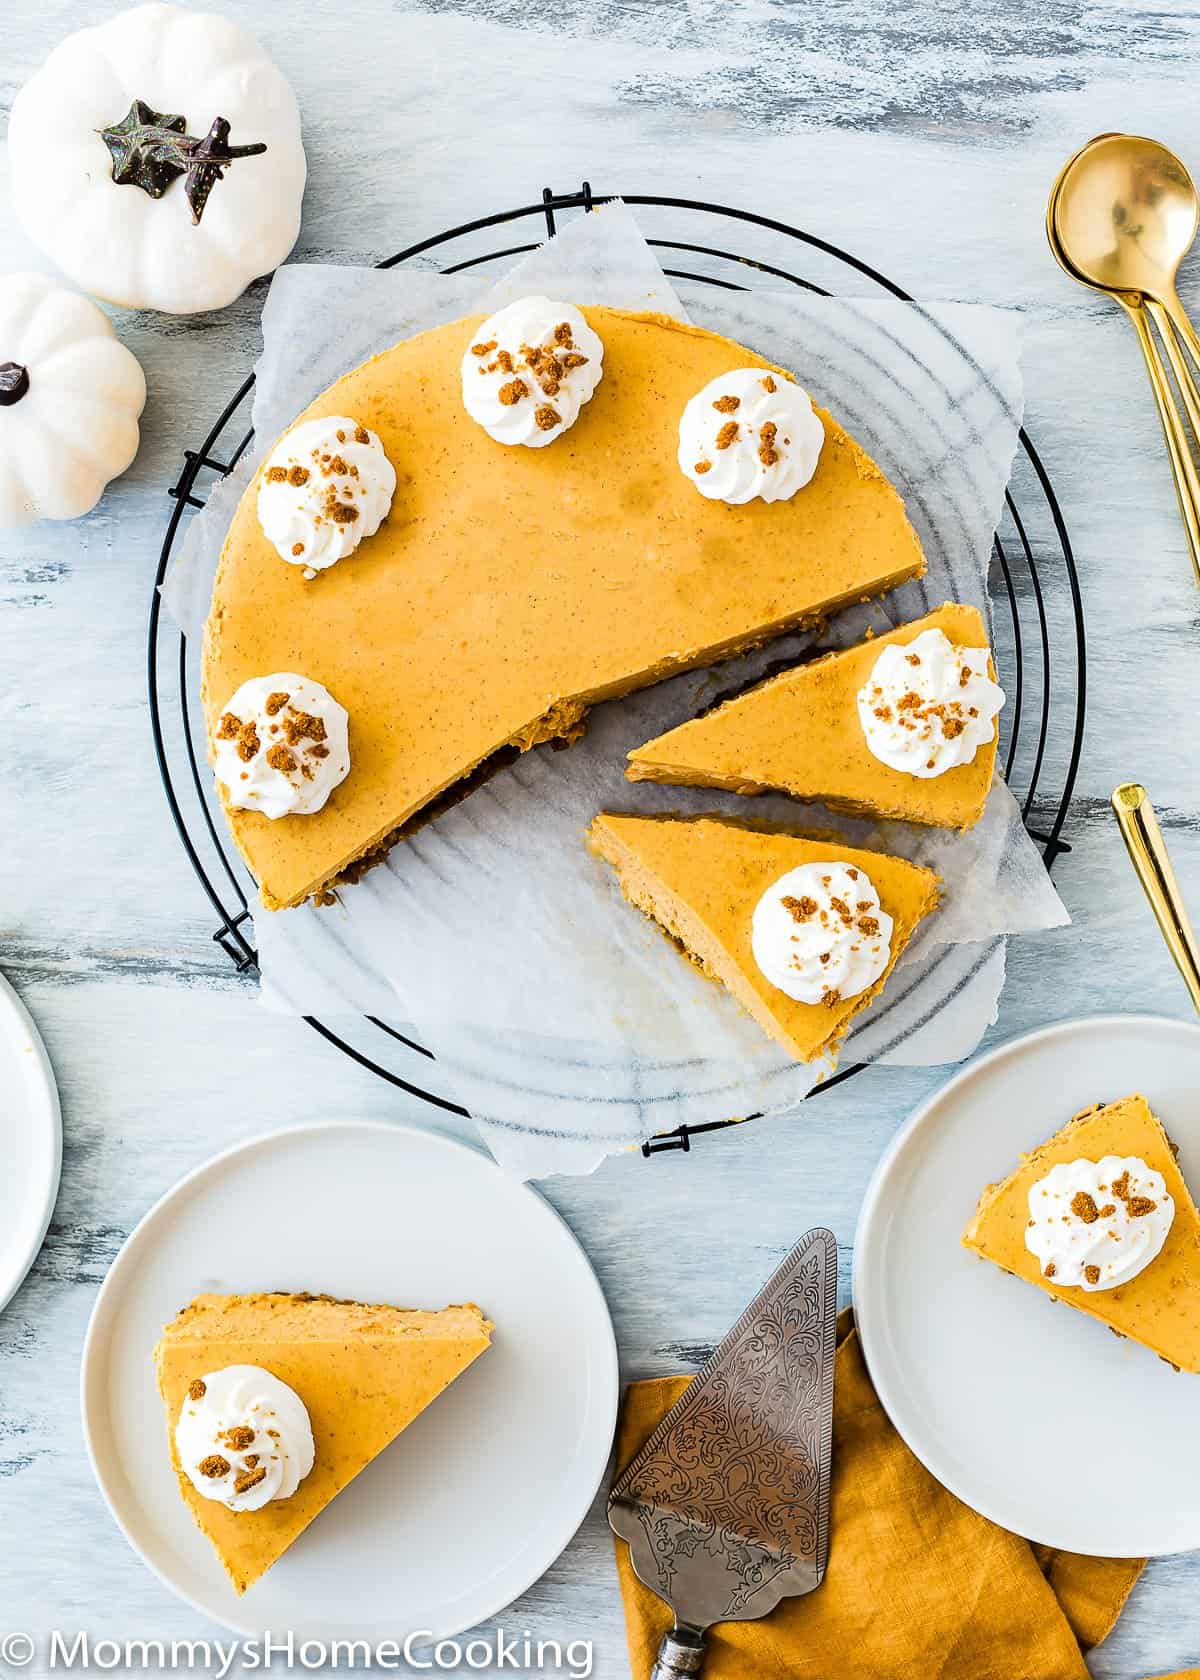
How To Cut Cheesecake
First, place the cheesecake in the freezer for 20-30 minutes before slicing to ease the cutting process. Then, use a thin knife that has been dipped in hot water and then wipe dry. Repeat this step before every single cut.
Please don’t forget the stabilized whipped cream that guarantees your whipped cream won’t get watery and lose shape while waiting to be devoured.
How To Make Stabilized Whipped Cream
Making stabilized whipped cream is pretty simple! Just add a tablespoon of cornstarch per cup of heavy cream along with the sugar.
Storing & Freezing Instructions
Store: Refrigerate leftovers in the fridge uncovered to avoid condensation building up for 5 days.
Freeze. Cheesecakes are freezer-friendly! Just follow these simple steps:
- Let it cool to room temperature.
- Put the cheesecake in the freezer, uncovered, for 45-60 minutes. This will allow the cheesecake to firm up enough to be safely removed from the springform.
- Loosen the cheesecake from the sides of the pan by running a thin metal spatula around the inside rim again.
- Remove the band from the pan. Take a large knife or metal spatula and carefully run it under the bottom of the cheesecake to loosen it.
- Then, use two large spatulas to lift the cheesecake over to the plate carefully. Be sure the cheesecake is well balanced/supported so it won’t crack or break.
- Wrap it tightly with plastic wrap, then put it back in the freezer. Freeze for up to 2 months.
- When ready to use, thaw overnight in the refrigerator.
Frequently Asked Questions
Yes, absolutely! You can make this cheesecake 2 – 3 days before and keep it in the refrigerator until ready to serve.
You can use digestive biscuits, gingersnaps, or Biscoff.
Your egg-free pumpkin cheesecake will last up to five days in the refrigerator. You can wrap well and freeze for up to two months.
You can leave the cheesecake in the springform pan until ready to serve.
Eggs play several essential roles in cheesecake, affecting its texture, structure, and flavor. Eggs act as a binding agent, helping to hold the cheesecake together. They provide structure, preventing it from collapsing or falling apart during and after baking. Eggs help create a smooth and creamy consistency in the cheesecake and add a subtle richness and depth of flavor to the cheesecake.
Yes, you can make cheesecake without eggs by using egg substitutes or alternative ingredients. Try my TRIED and TRUE Eggless Cheesecake recipe, which has the best ingredient combinations.
More Eggless Fall Recipes You’ll Love!
- Eggless Pumpkin Cake
- Eggless Pumpkin Snickerdoodles
- Easy Eggless Pumpkin Pie
- Easy Eggless Pecan Pie
- Cakey Eggless Pumpkin Cookies
- Eggless Salted Caramel Apple Cheese Danish
- Eggless Apple Maple Spice Cake
- Easy Eggless Coffee Cake
❤️ Love what you see? JOIN my Private Baking Club. Also, SUBSCRIBE to Mommy’s Home Cooking, so you’ll never miss a recipe! And FOLLOW along on Instagram, Pinterest, and Facebook for more fun!
Recipe Card 📖
Eggless Pumpkin Cheesecake
Equipment
Ingredients
Crust:
- 1 ¾ cups (175 g) graham cracker crumbs (about 27 square sheets graham cracker)
- 1/3 cup (80 g) unsalted butter, melted
- ¼ cup (50 g) granulated sugar
Filling:
- 3 tablespoons (30 g) cornstarch
- 3 tablespoons (45 ml) water
- 32 oz (907 g) cream cheese, softened (4 pkg 8oz. each)
- 1/2 cup (100 g) brown sugar (I use light brown sugar)
- 1/2 cup (120 g) sour cream
- 15 oz (425 g) pure pumpkin puree
- 14 oz (397 g) sweetened condensed milk
- 1 tablespoon pumpkin pie spice
- 1 teaspoon ( 5 ml) pure vanilla extract
- Pinch of kosher salt
Instructions
Make the Crust:
- Lightly grease a 9-inch round springform pan and line it with parchment paper. Next, double wrap the cheesecake pan with aluminum foil and fold up the sides around it (this is to keep the water from seeping into the cheesecake).
- Preheat oven to 350º F (180º C).
- In a medium mixing bowl, combine graham crumbs, butter, and sugar with a fork until evenly moistened.
- Put the crumbs mixture into the pan and press the crumbs down into the base and up the sides. Tip: Use the bottom of a measuring cup or glass to press down the crumbs evenly.
- Bake for about 10-15 minutes, or until fragrant and a darker golden color. Let it cool unitl you prepera the filling.
Make the Filling:
- Mix cornstarch and water in a small bowl until smooth. Set aside.
- Place the cream cheese and brown sugar in the bowl of an electric mixer, beat on low speed for 2-3 minutes until smooth and free of any lumps. Add sour cream and pumpkin puree and continue mixing until incorporated. Gradually add sweetened condensed milk and beat until creamy, for 1-2 about minutes. Add the pumpkin spice, vanilla extract, pinch of salt and cornstarch mixture; beat until well incorporated. Turn off the mixer.
- Pour the mixture over the cooled crust; tap gently to remove any air bubbles.
Prepare the Water Bath:
- Place the springform pan into a larger pan and pour boiling water into the pan until the water is about halfway up the sides of the cheesecake pan. Do it carefully to make sure the water level doesn’t come up higher than the foil. Be careful do not to split water into the cheesecake batter.
Bake:
- Bake for 40 minutes or until the edges are barely puffed, but the filling is slightly set. Next, turn the oven off and leave the cheesecake in the oven with the door closed for 40 minutes. After that time passed, take the cheesecake out of the oven. The center of the cheesecake should still wobble when you remove it from the oven.
- Cool the cheesecake on a wire rack for 15 minutes. Then carefully run a knife between the cheesecake and the inside of the pan. Don’t remove the sides of the pan yet. Then allow the cheesecake to cool at room temperature for at least an hour, then cover with foil and transfer into the refrigerator for 6 hours or overnight.
- Loosen the cheesecake from the sides of the pan by running a thin metal spatula around the inside rim. Unmold and transfer to a cake plate.
- PRO TIP: Place the cheesecake in the freezer 20-30 minutes before slicing to ease the cutting process. Then use a thin knife that has been dipped in hot water and then wipe dry. Repeat this step before every single cut.
- I decorated the pumpkin cheesecake with whipped cream and graham cracker crumbs, if desire.
- Let it cool to room temperature.
- Put the cheesecake in the freezer, uncovered, for 45-60 minutes. This will allow the cheesecake to firm up enough to be safely removed from the springform.
- Loosen the cheesecake from the sides of the pan by running a thin metal spatula around the inside rim again.
- Remove the band from the pan.
- Take a large knife or metal spatula and carefully run it under the bottom of the cheesecake to loosen it.
- Then use two large spatulas to carefully lift the cheesecake over to the plate. Be sure the cheesecake is well balanced/supported so it won’t crack or break.
- Wrap it tightly with plastic wrap, then put it back in the freezer. Freeze for up to 2 months. When ready to use, thaw overnight in the refrigerator.
- Plan ahead! Cheesecake is one of those desserts you have to plan in advance. It takes a long time to chill and set.
- Make sure all your ingredients are at room temperature.
- The Leaky pans are a cheesecake’s arch-nemesis so make sure the cheesecake pan is well wrapped in foil. I like to line the base of my pan with a large layer of non-stick aluminum foil and then Wrap the outside of the pan in a double layer of heavy-duty foil, covering the underside and coming all the way to the top. This is my fave springform.
- Avoid overcooking the cheesecake, or it will crack. The center of your cheesecake should still wobble when you remove it from the oven; it will continue to set as it cools on the counter.
- To prevent cracks during cooling, it’s important to loosen the cheesecake from the sides of the pan after baking. First, cool the cheesecake on a wire rack for 15 minutes. Then carefully run a knife between the cheesecake and the inside of the pan. Don’t remove the sides of the pan yet.
Nutrition
Eggless Baking Frequently Asked Questions
You’ve asked, and I’ve answered! Read on for a handful of answers to the most frequently asked questions about eggless baking.
Originally posted in November 2019, the post content was edited to add more helpful information, no change to the recipe in September 2023.
